Membership Payment Campaigns allow administrators to send an invoice email to members who need to renew their membership, which includes a link that directs users straight to a payment link without requiring them to complete another registration form each season.
Using the data from the organisation's GameDay database, the Membership Payment Campaigns feature allows administrators to target specific members based on their previously purchased products.
To create a Membership Payment Campaign:
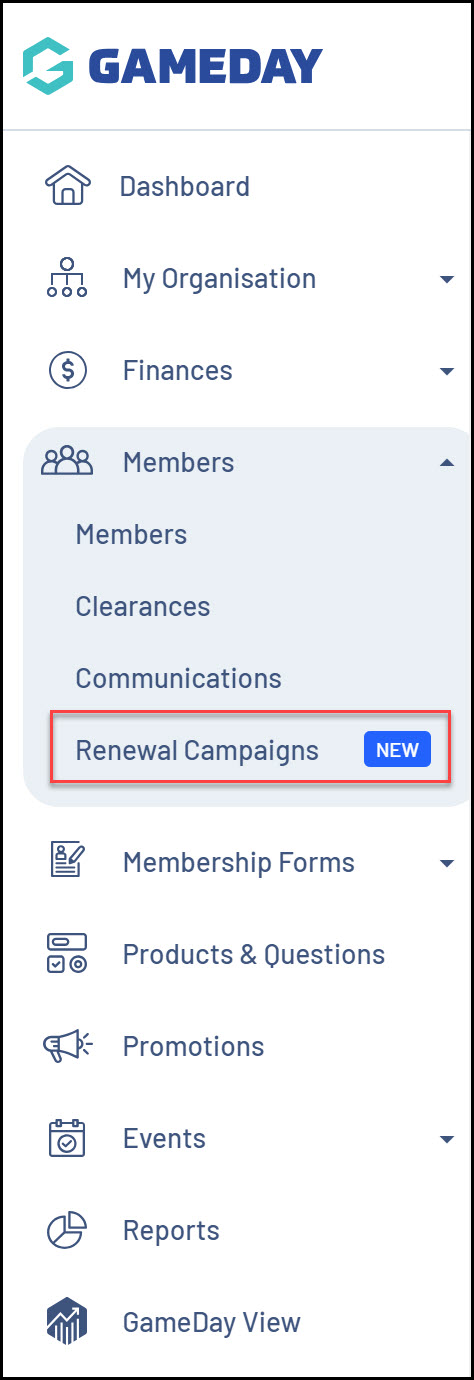
1. In the left-hand menu, open the Members section and click RENEWAL CAMPAIGNS
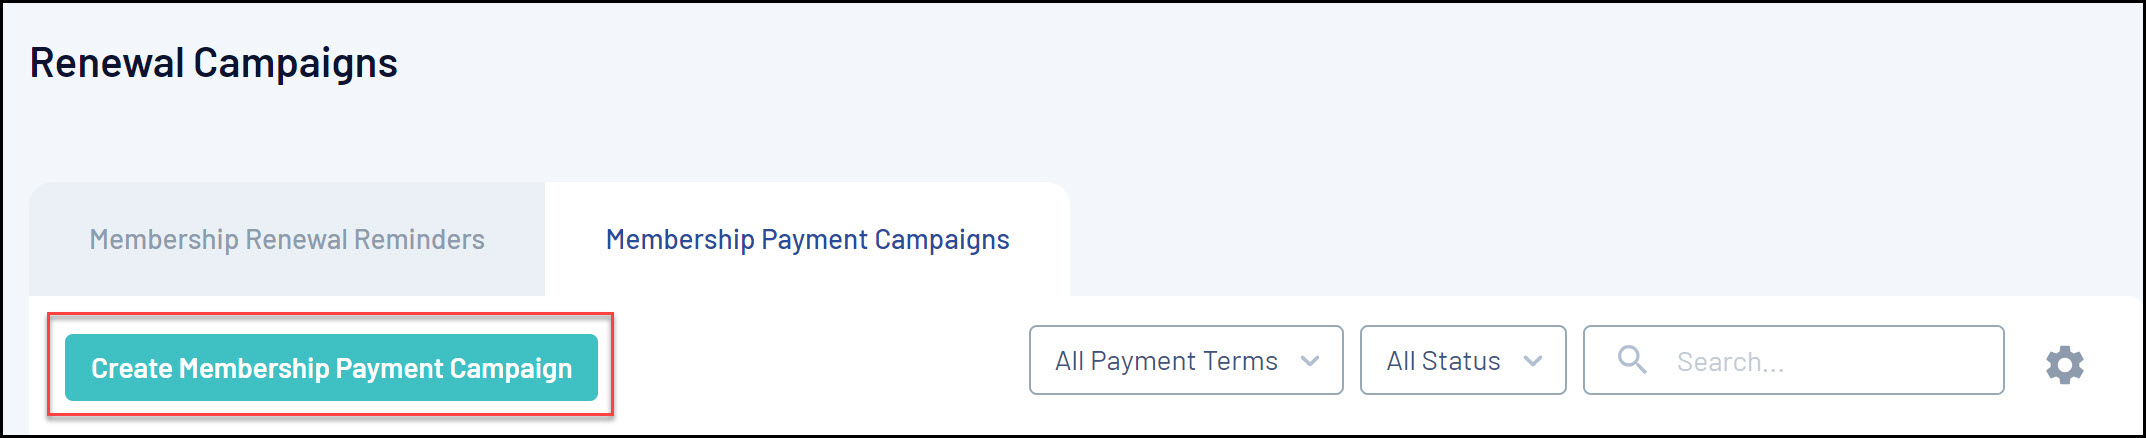
2. Toggle over to the Membership Payment Campaigns tab, then click the CREATE MEMBERSHIP RENEWAL CAMPAIGN button
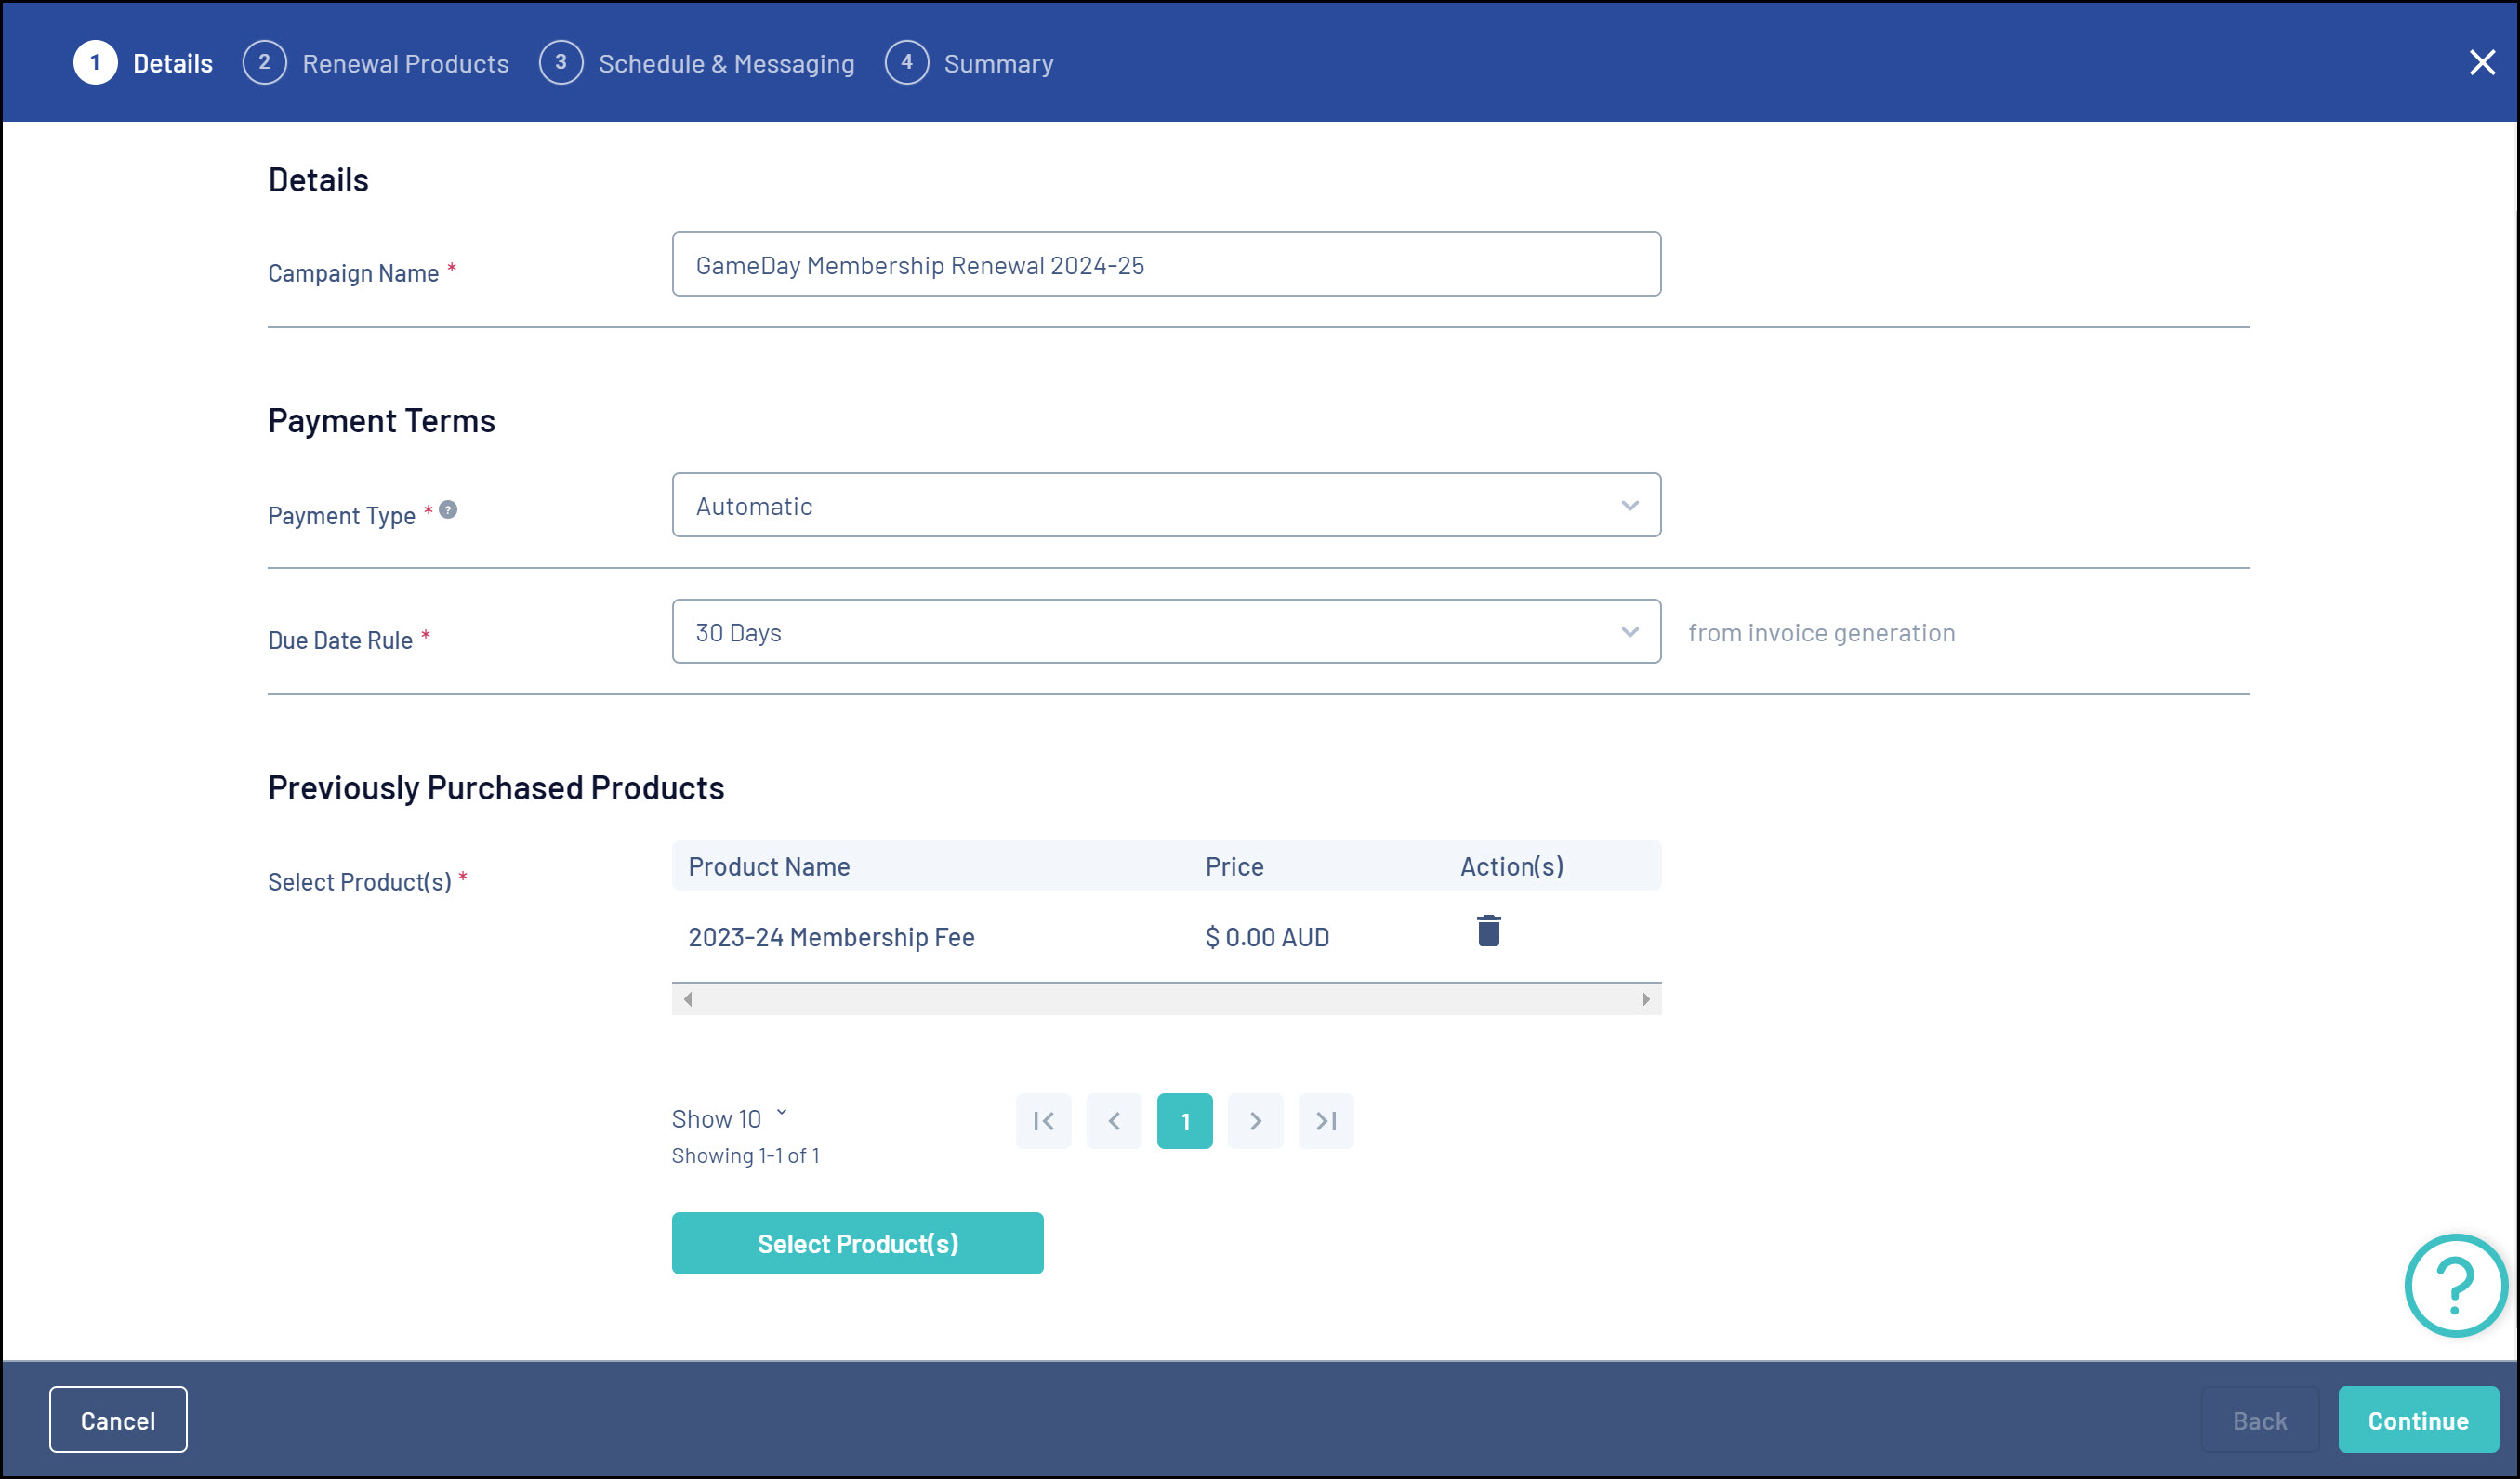
3. In the Details tab, enter the following information:
- Campaign Name: The name of the campaign in your GameDay database
- Payment Type:
- Automatic reminders are sent based on the expiry date of the selected product(s). Product Expiry Dates can be found by editing a product and finding the Product End Date field.
- Manual
- Due Date Rule: Determines how long the member has to pay the invoice
- Select Product(s): Select any previously purchased products that you want to use to form the basis of your recipient list. Any members who have previously purchased these products will be available to add to your campaign recipients
Click CONTINUE
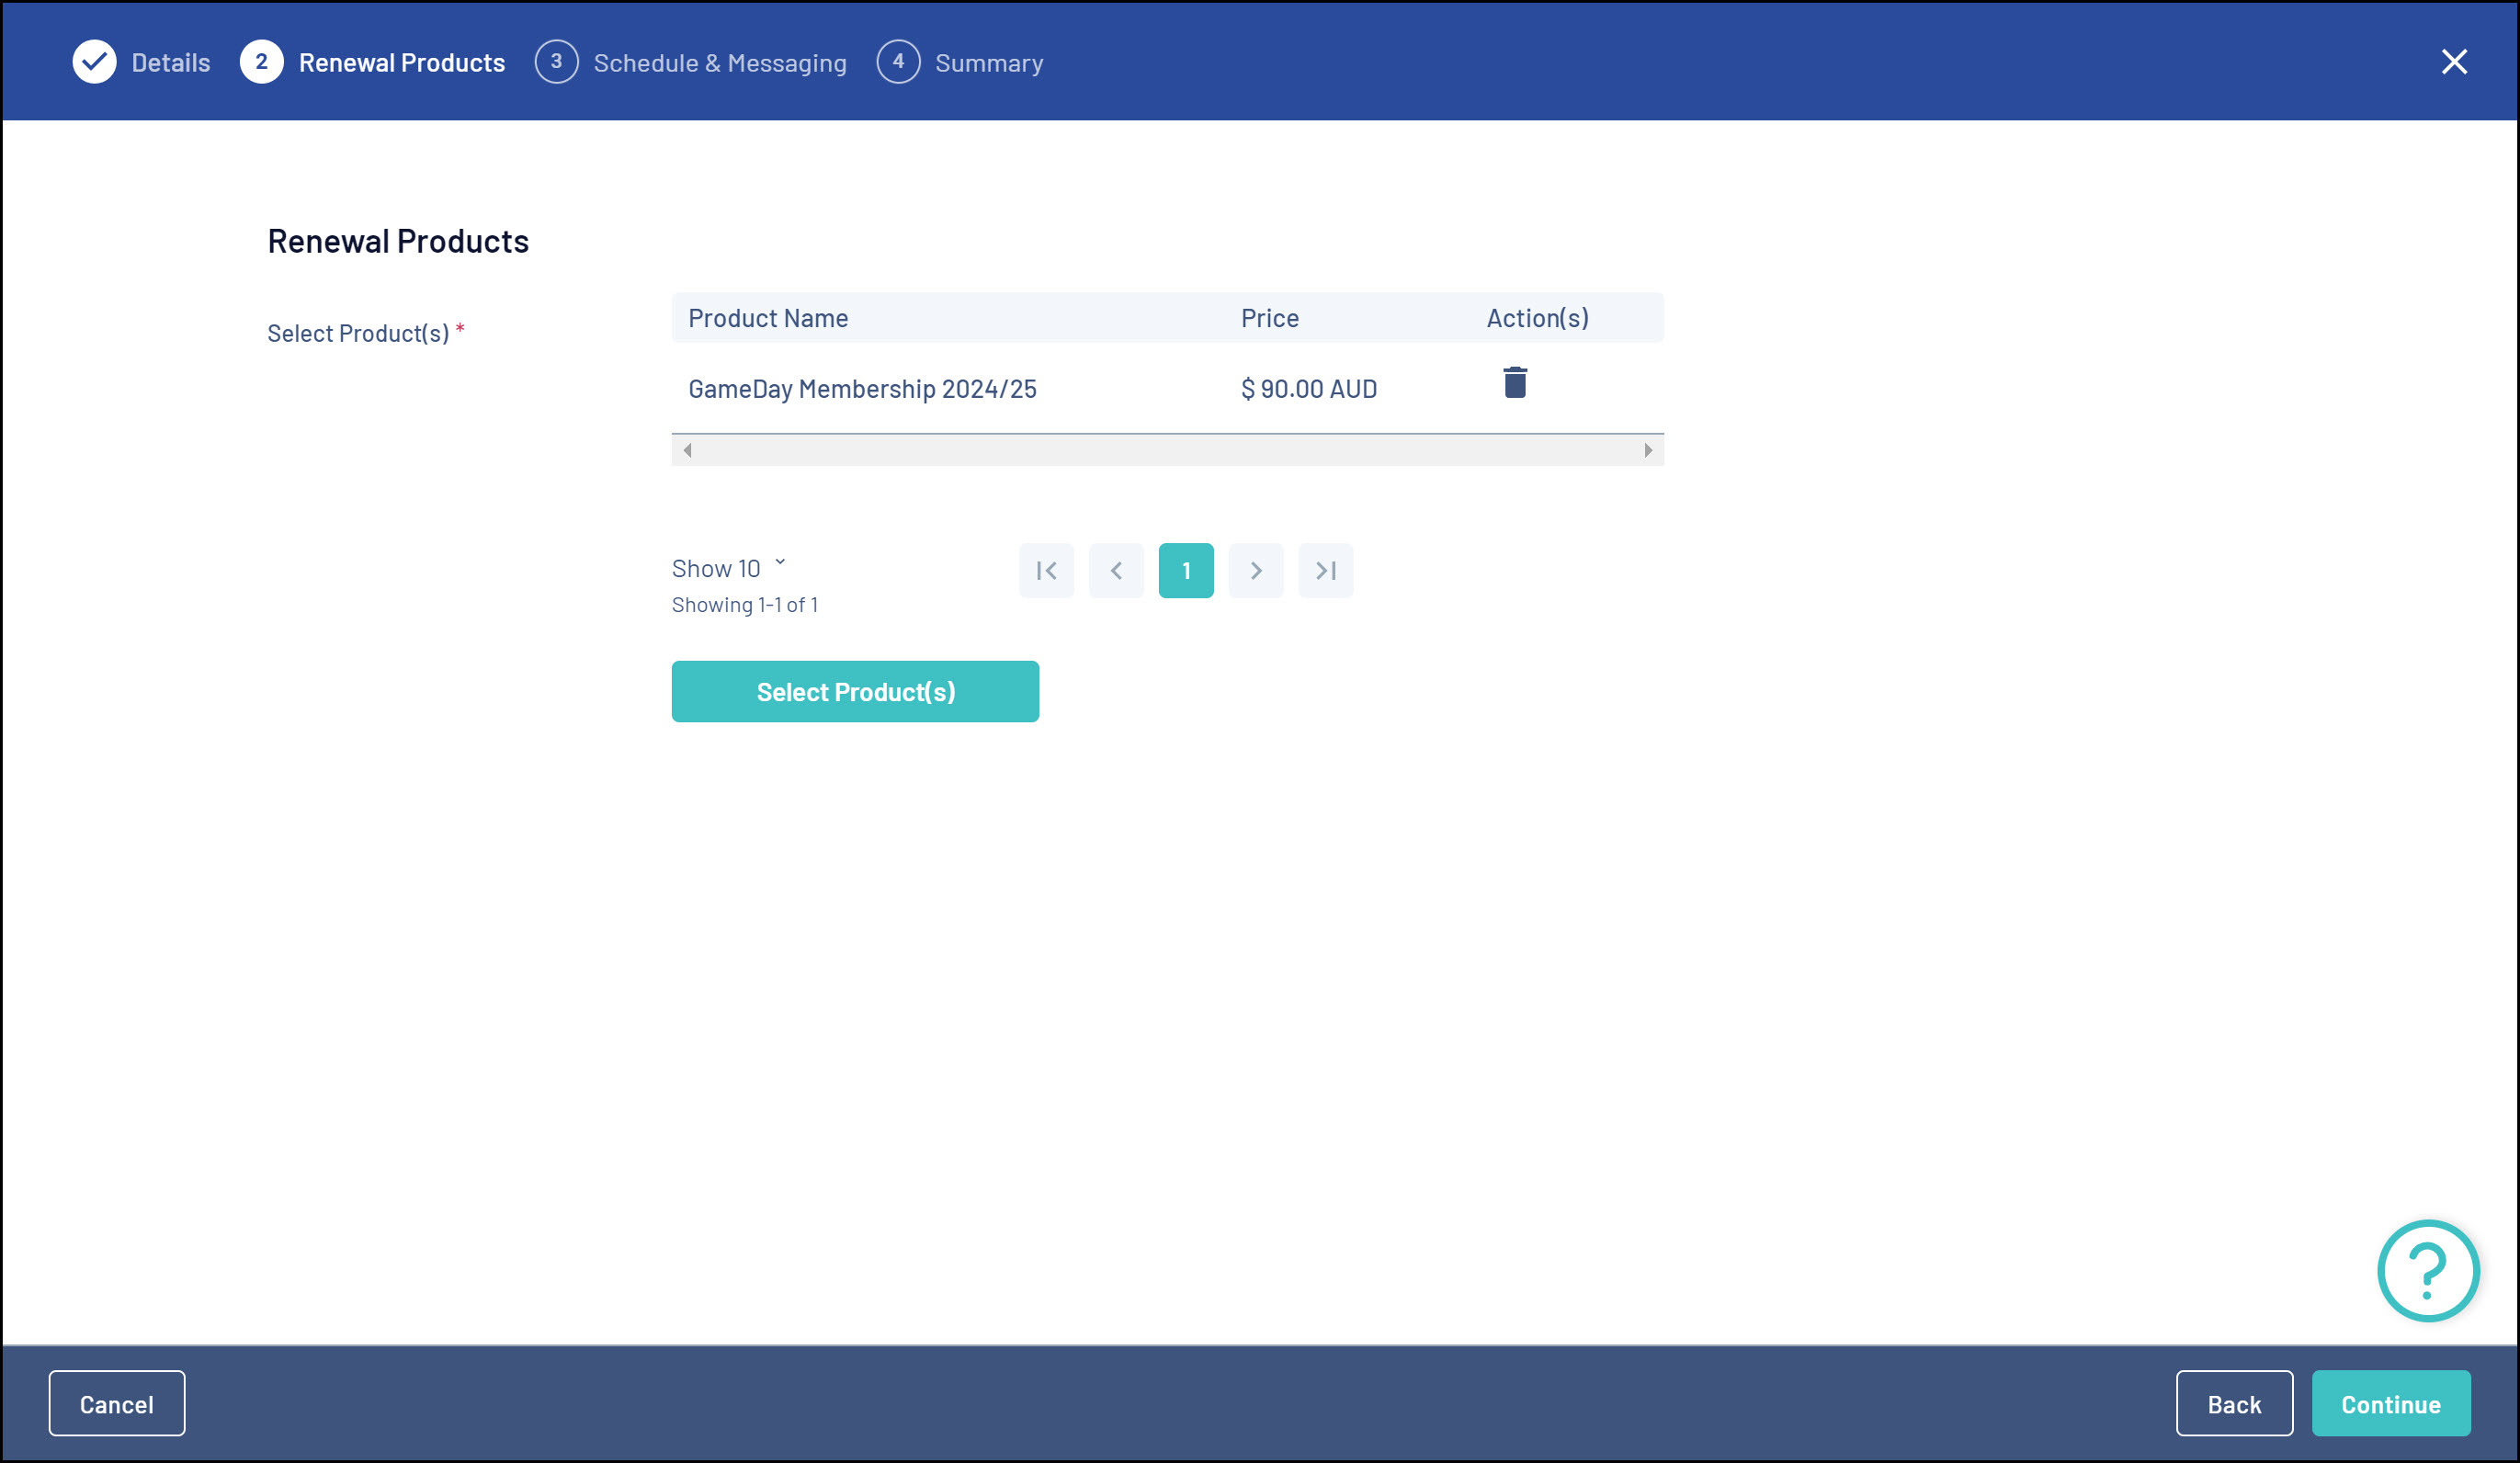
4. In the Renewal Products tab, click the SELECT PRODUCT(S) button to add a product that you want the members to purchase as part of their renewal for the upcoming season.
Note: You will need to make sure your products for the upcoming season have been created before you can complete this step. Click here to learn more about creating products
Click CONTINUE
5. In the Schedule & Messaging tab, enter the following information:
- I would like to generate and send this invoice...:
- Before Product Expiry Date
- After Expiry Date
- Specific Date
Note: If you selected a Manual payment type in the previous step, you will only have the Specific Date option available
- Day/Week: Choose how long before or after the product expiry date (based on the selection above) you want the invoice to be sent
- Custom Message: Enter any custom messaging you want to appear on the invoice
Use the ADD SCHEDULED MESSAGE button if you want to add multiple emails as part of the campaign
Click CONTINUE

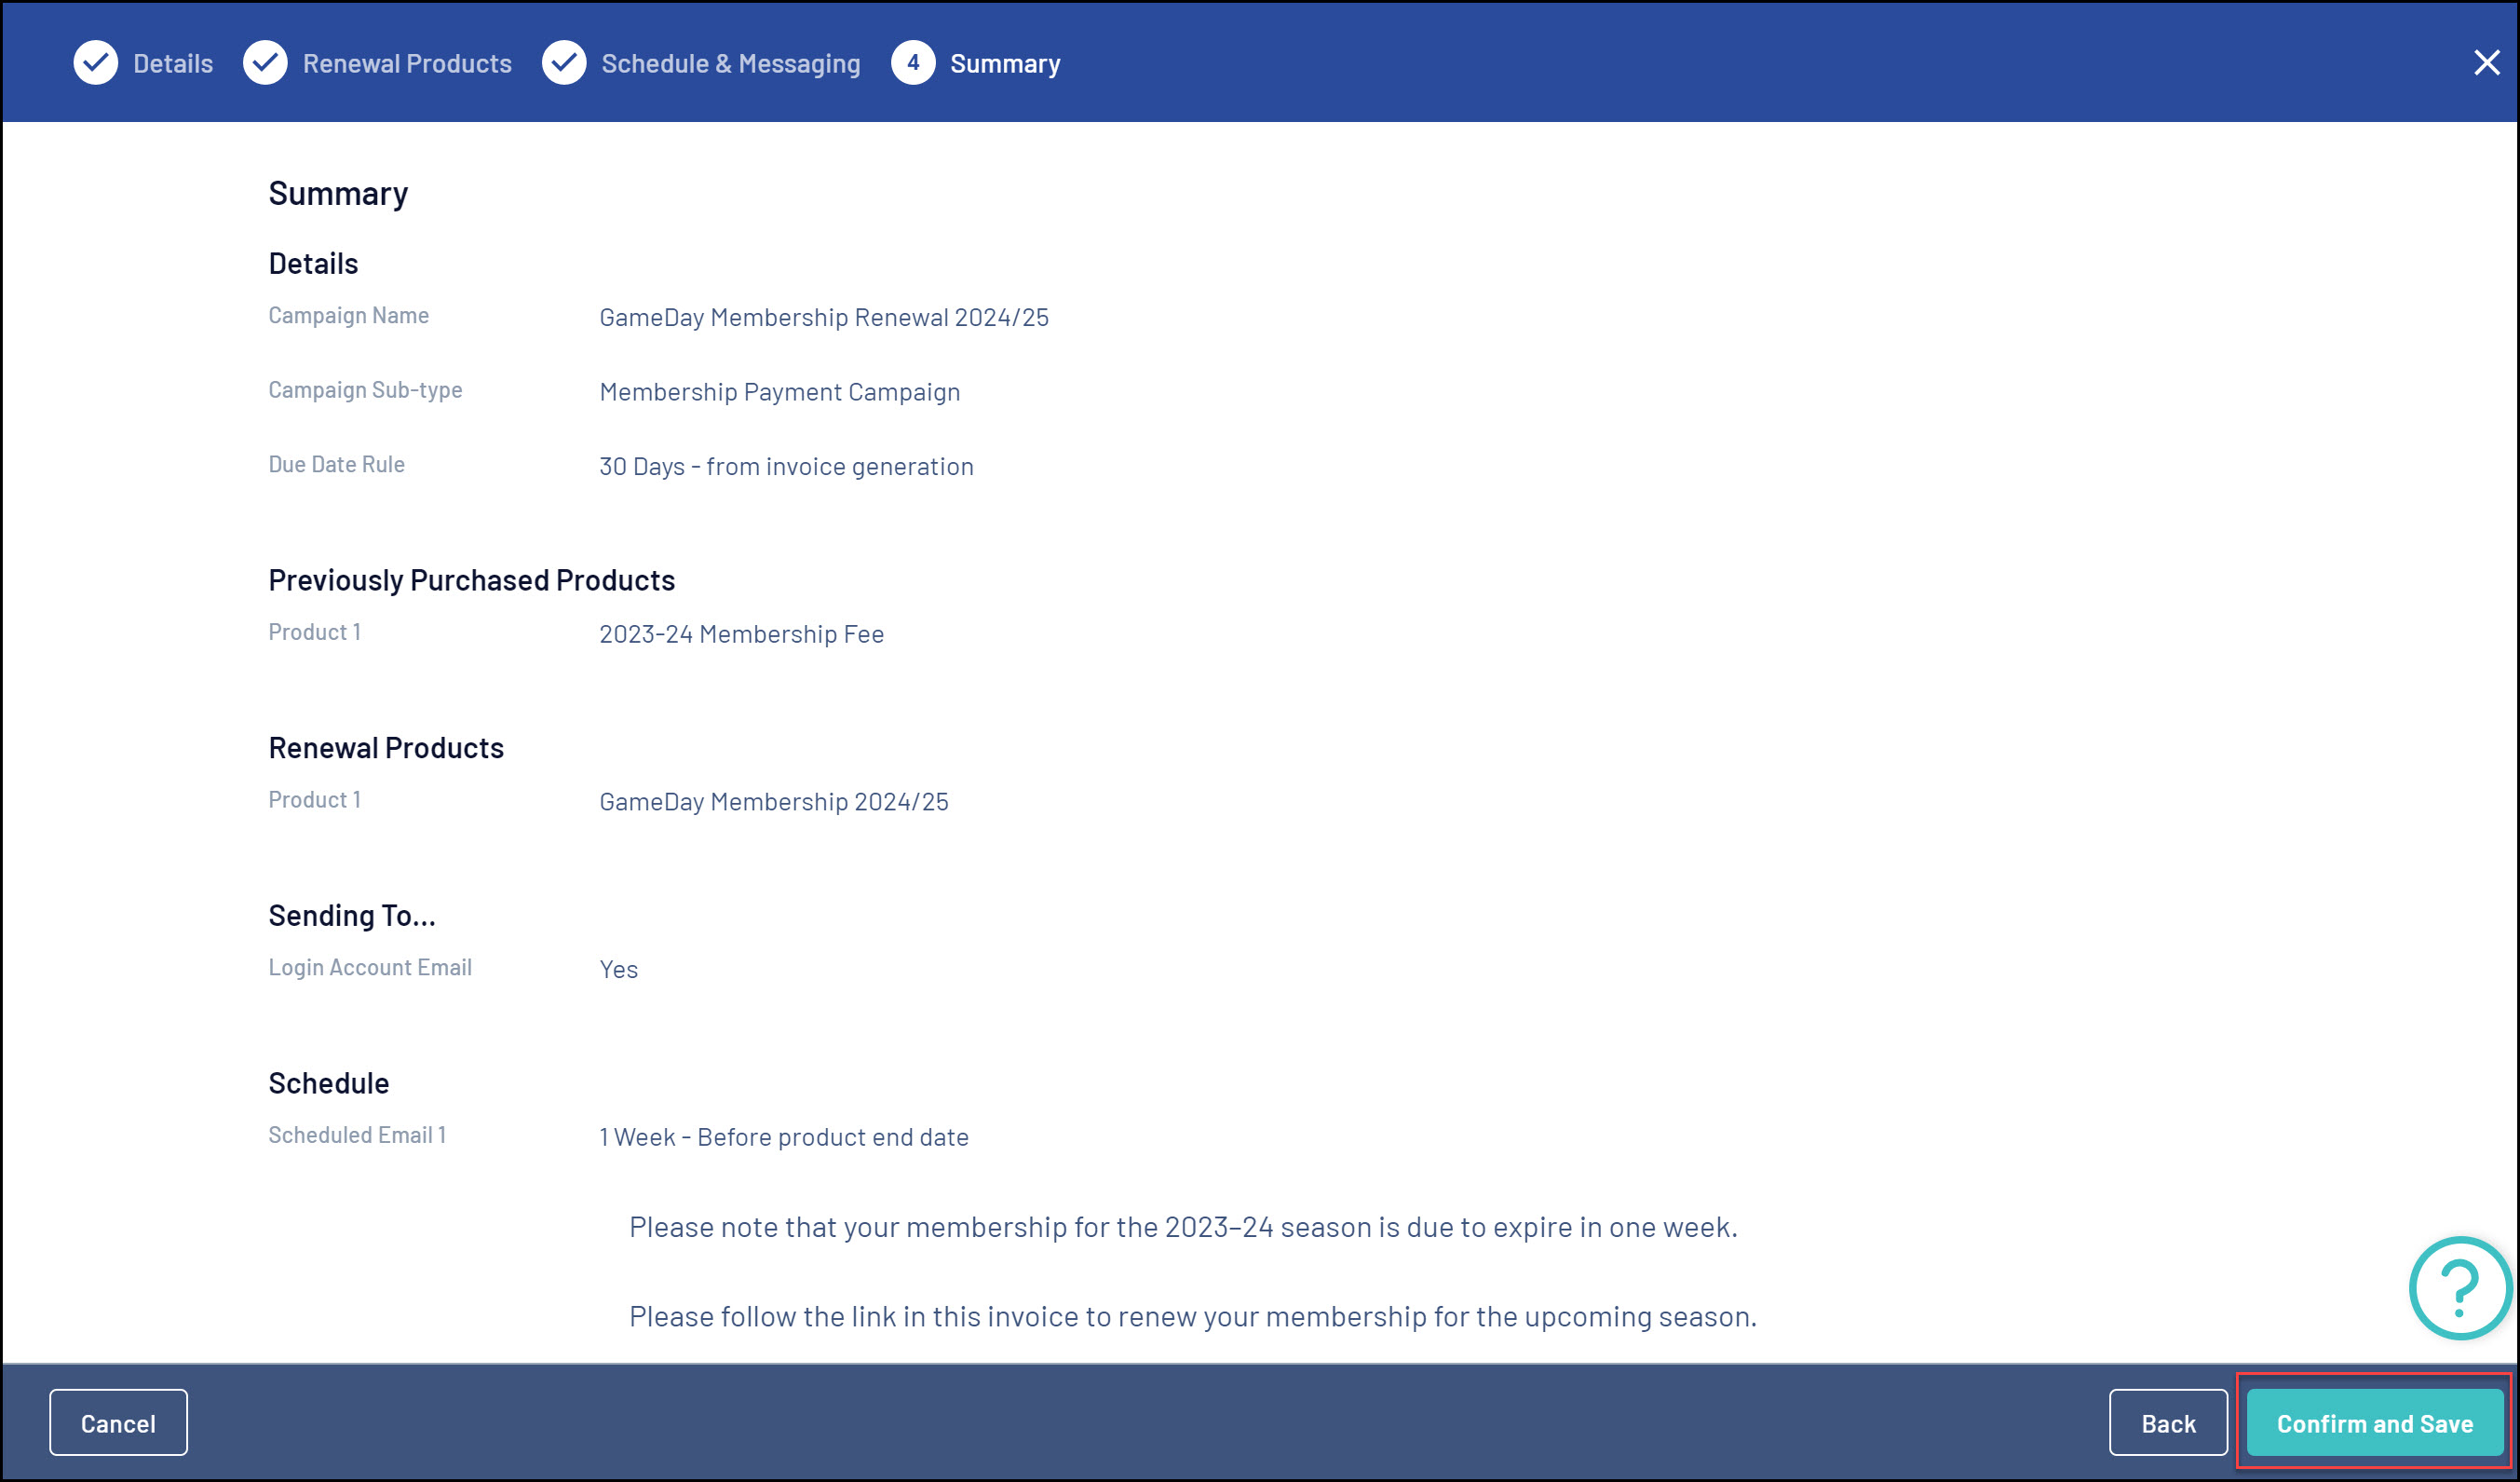
6. Confirm that your campaign details are correct, then click CONFIRM AND SAVE
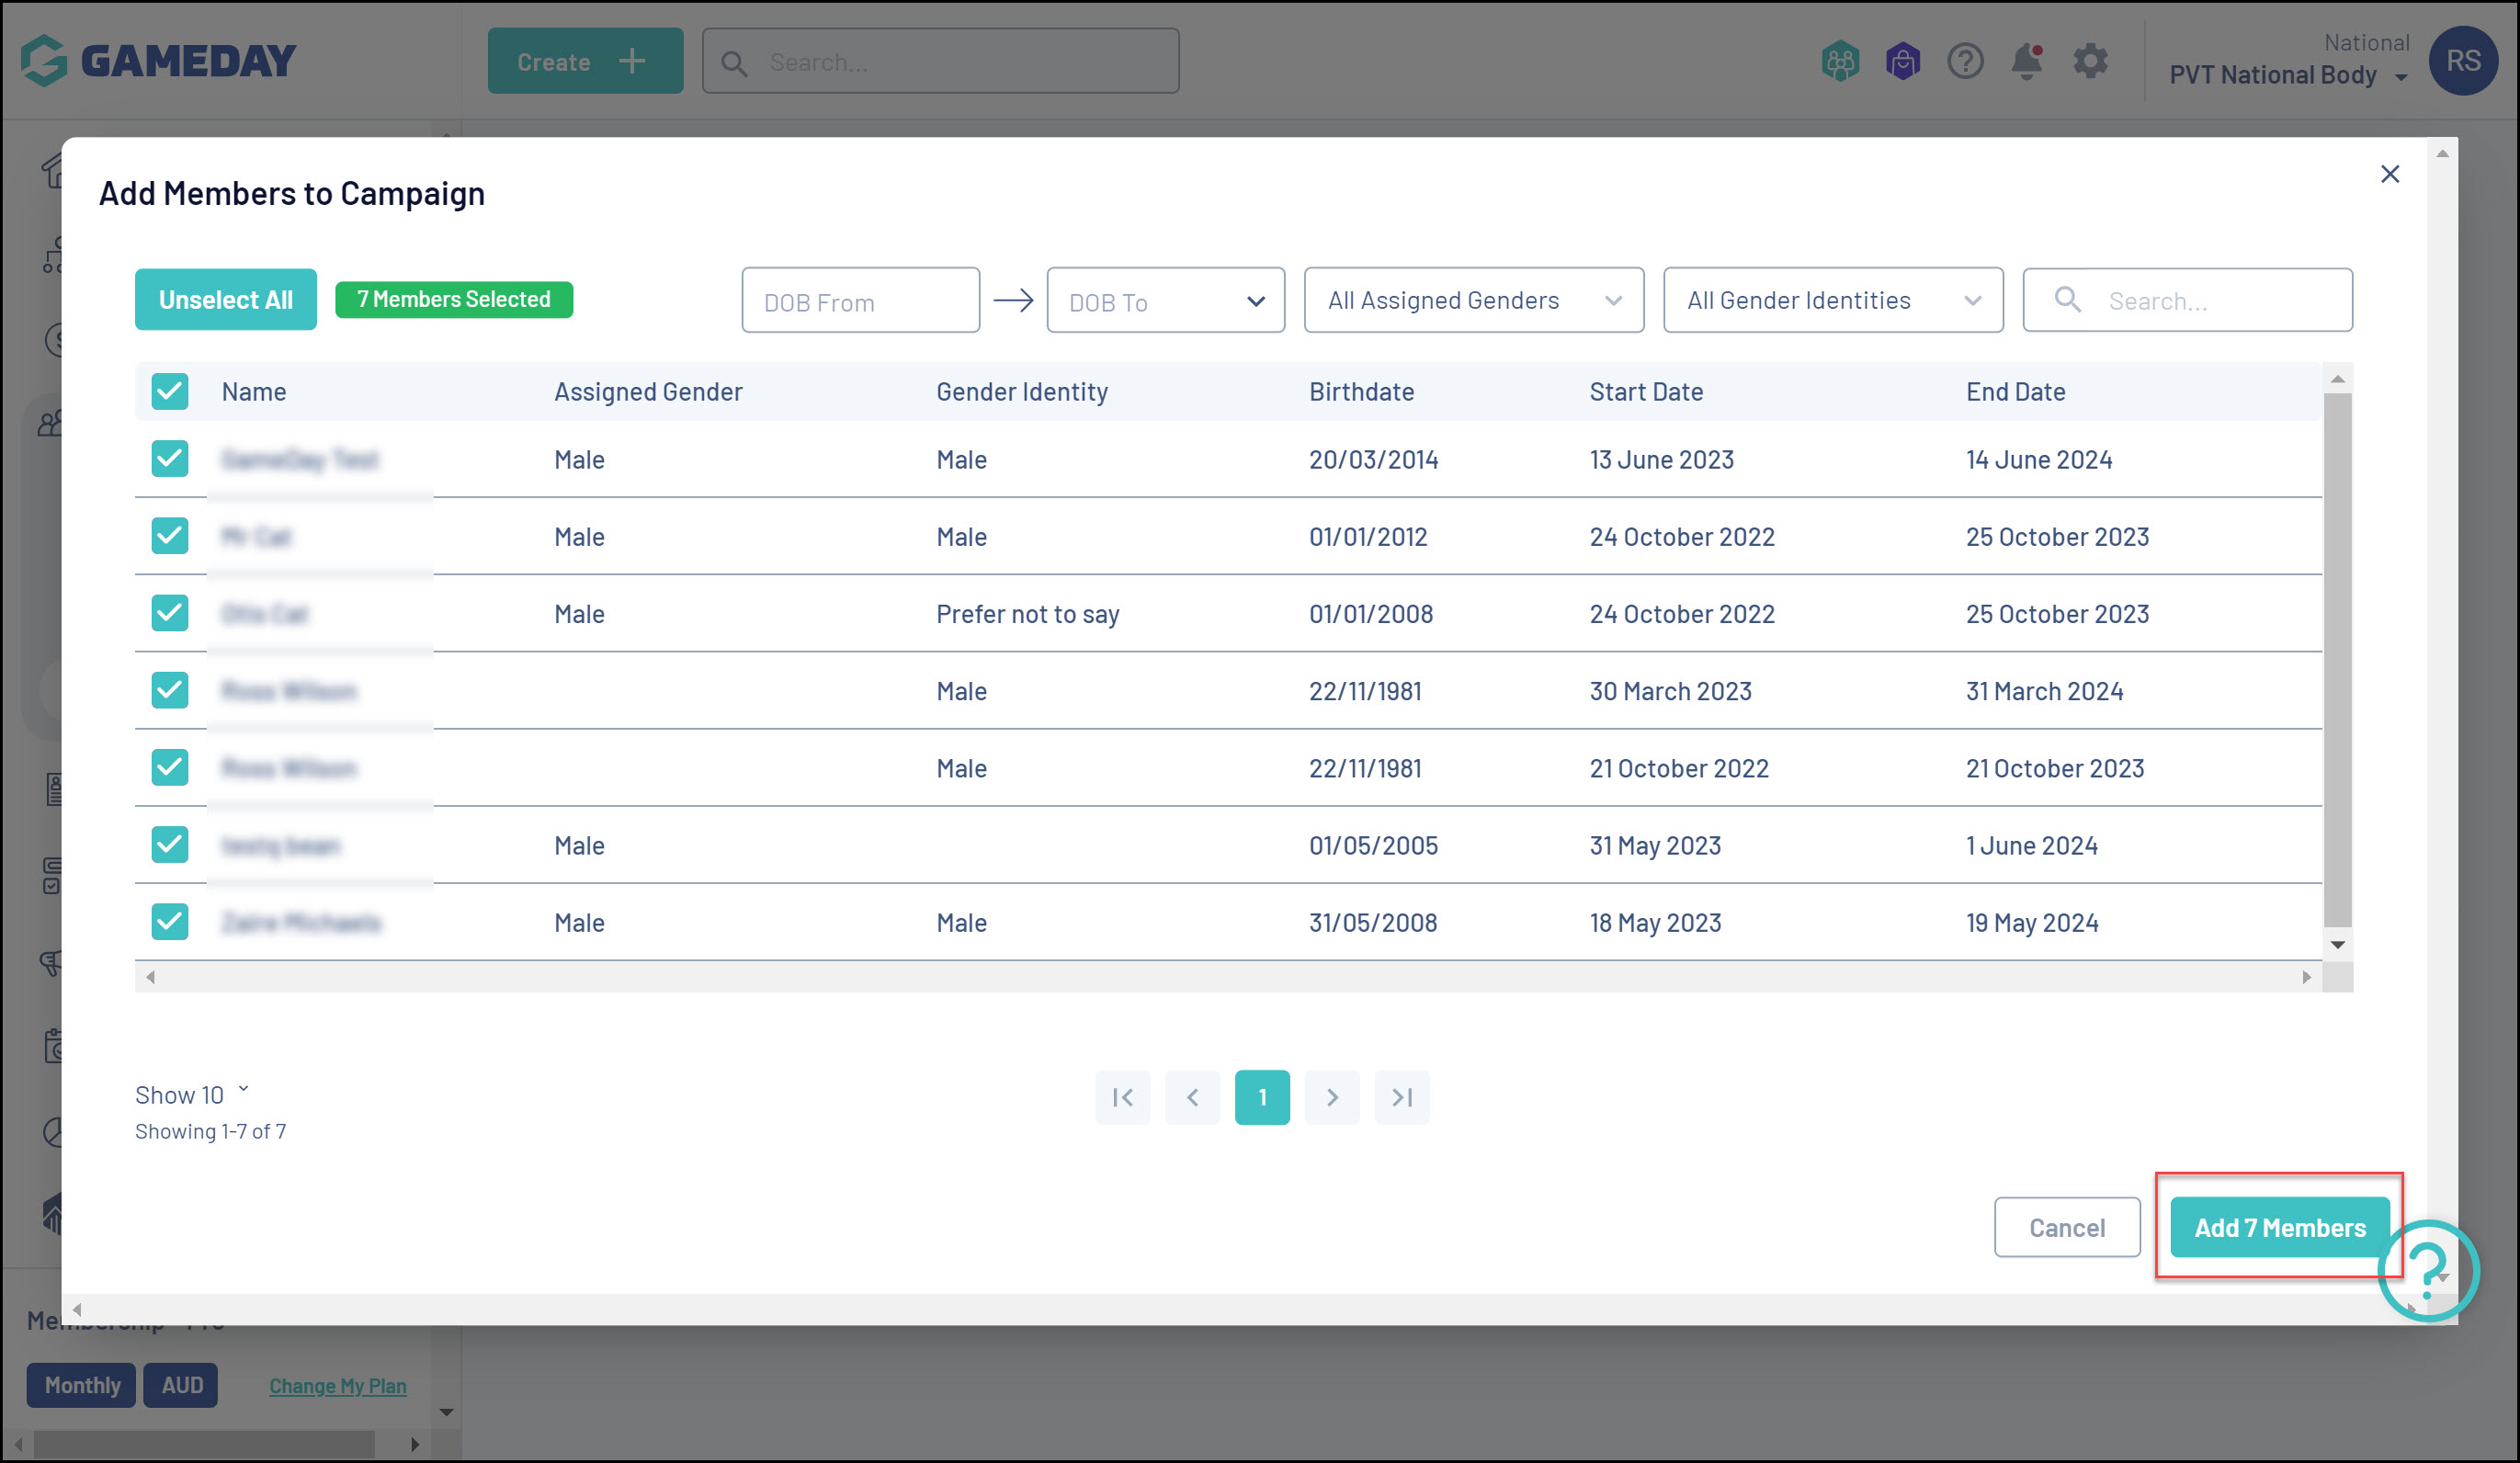
7. You will now see a list of members who have previously purchased the products you added to your campaign in Step 3. Use the checkboxes on the left-hand side to choose which members to whom you want the payment reminders to be sent, then click ADD X MEMBERS
Your campaign is now scheduled to be sent on the appropriate dates

Once the member receives the invoice email, it will appear as below:
