GameDay's Admins & Contacts section allows you to control who has access to your organisation's database. It can also be a helpful way of storing any other organisation contacts that may not need to have administrator access to your database.
To access the Admins & Contacts section, click the My Organisation option, then select ADMINS & CONTACTS in the left-hand menu

Admins & Contacts List
Your Admins & Contacts list shows you anyone that has been added as a contact previously. An important distinction to point out is that a Contact refers to anyone that you have added to this list, regardless of whether they have administrator access to your database, whereas an Admin refers to a contact who has been granted access to log in to your organisation's GameDay database.
The Admins & Contacts List displays a list of your organisation's contacts with a range of information including:
- First Name
- Last Name
- Email Address: This will be used by the contact as their GameDay username if you have provided them with access to the database
- Mobile Phone
- Roles: Pre-defined roles that allow you to label each type of administrator. Admins that have been allocated a Treasurer role will be able to add bank account details to the organisation's database
- Is Primary: By checking this box, the user will become the primary contact for this organisation, allowing them to receive automatic notifications from the platform
- Admin Status: Indicates whether a contact is Active or Inactive
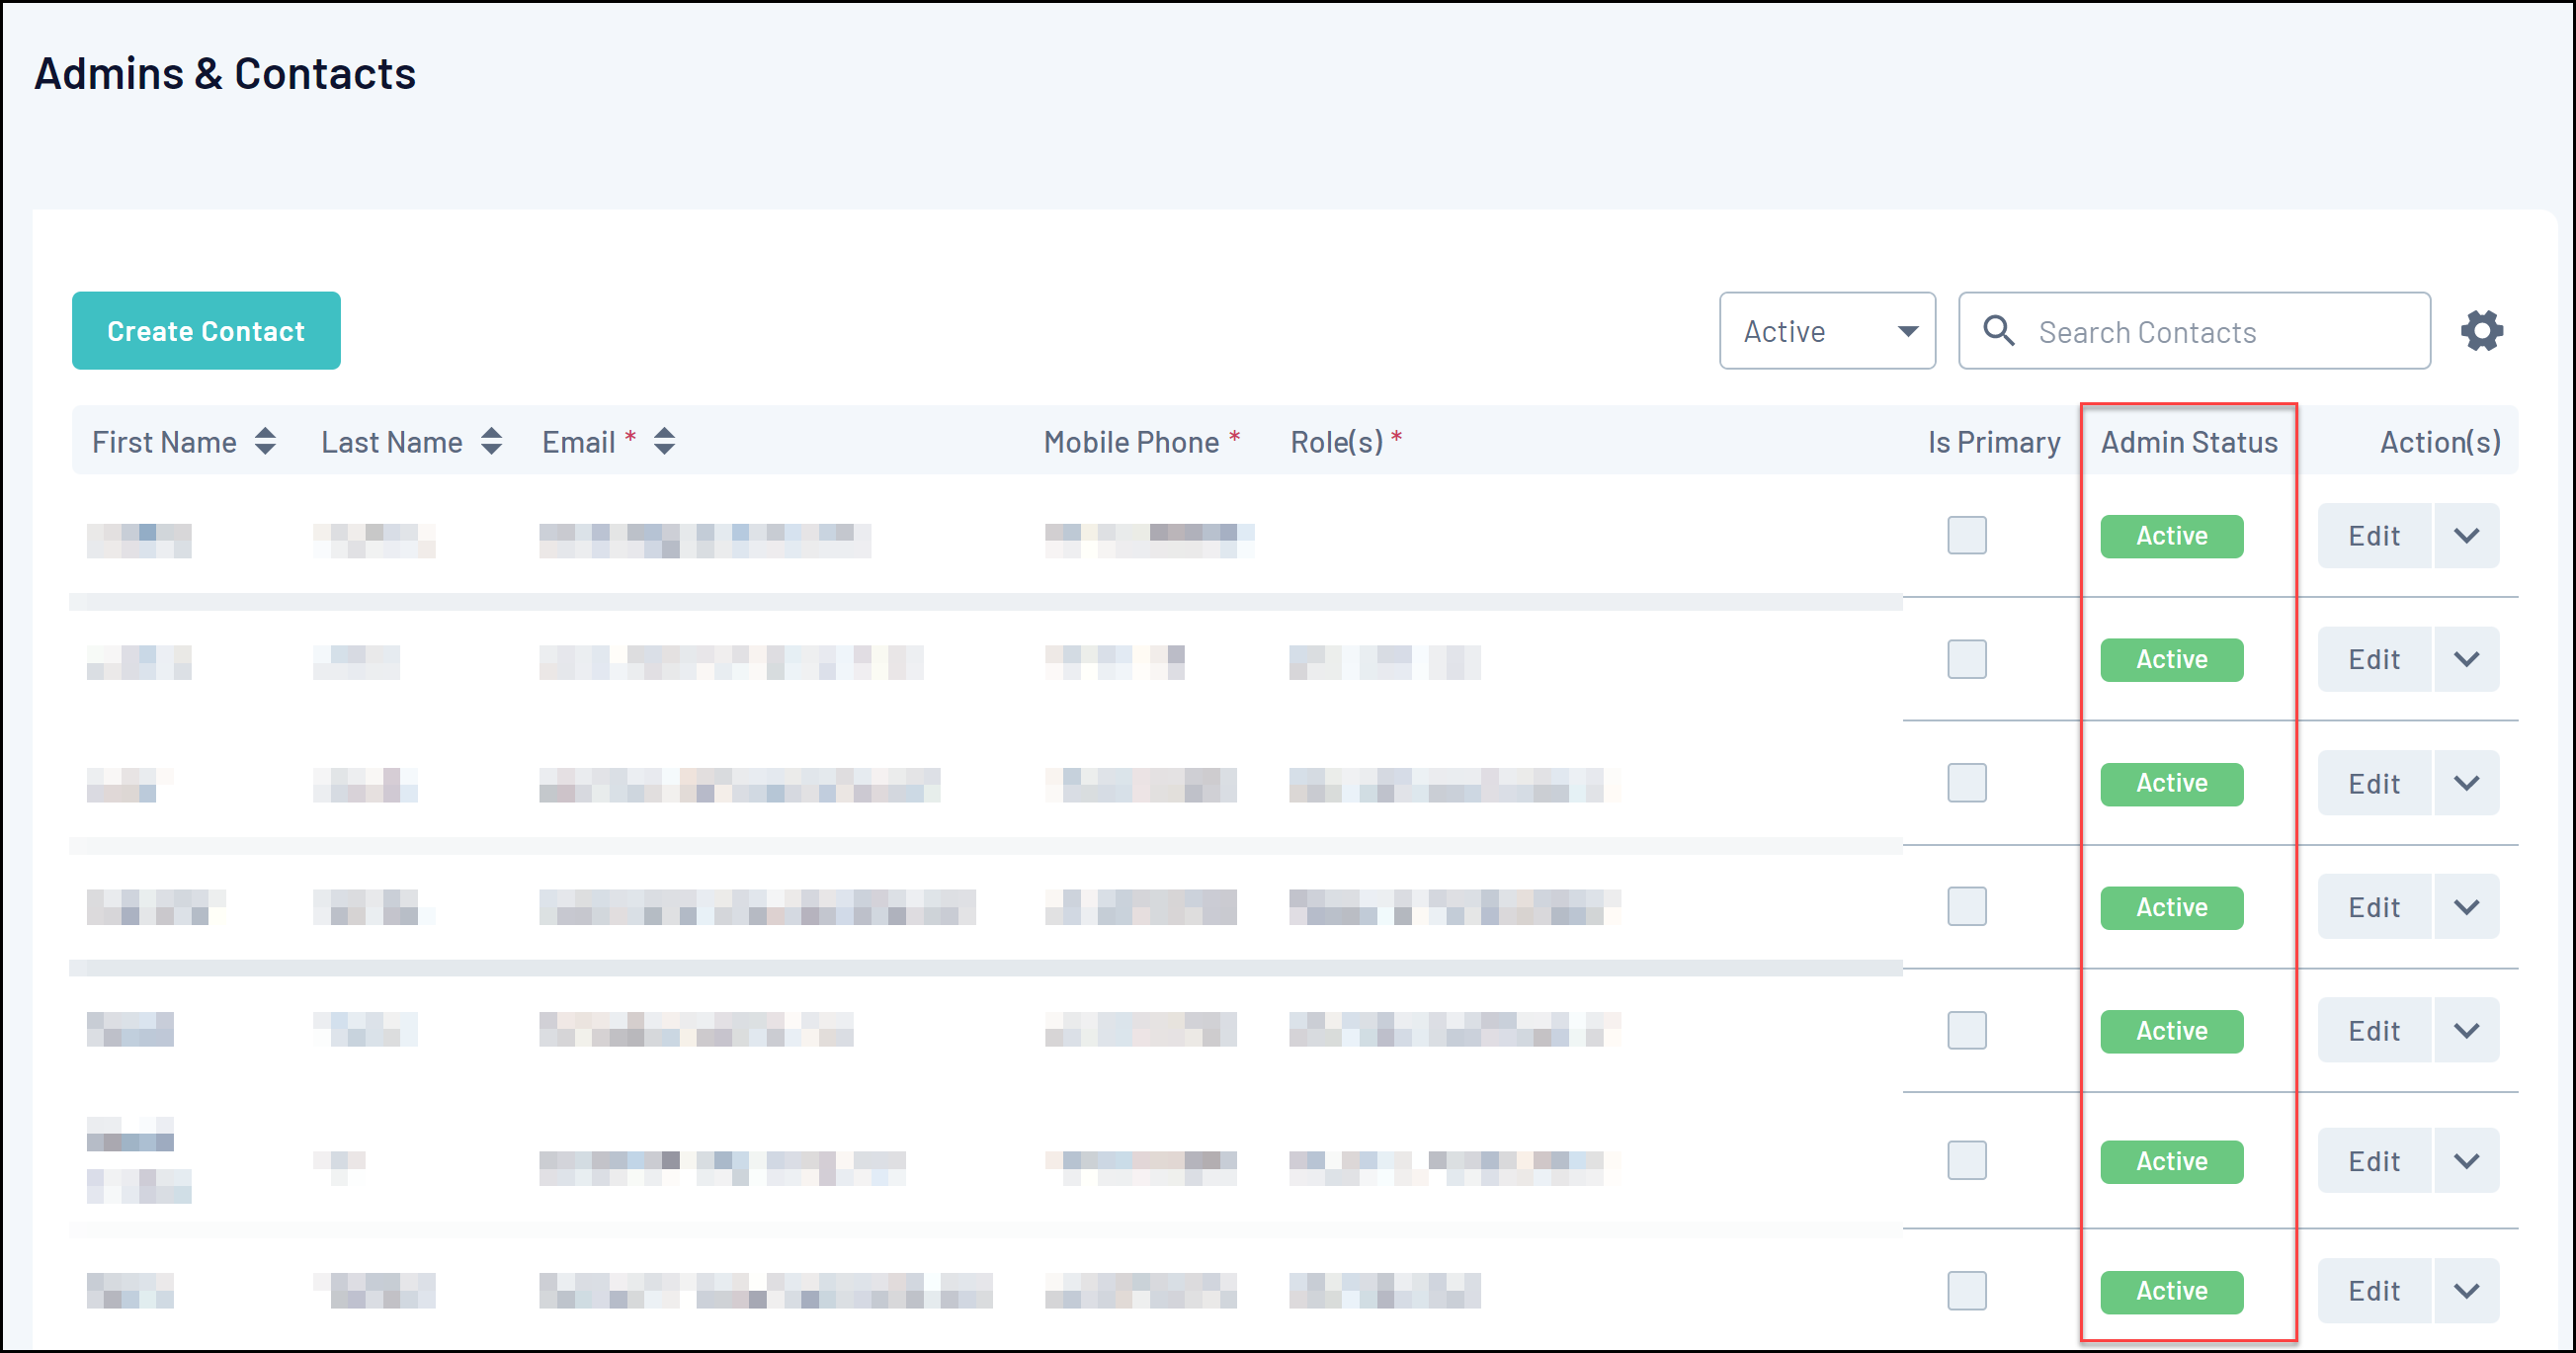
Anyone that appears in this list with an Active icon in the Admin Status column has access to login to your database:
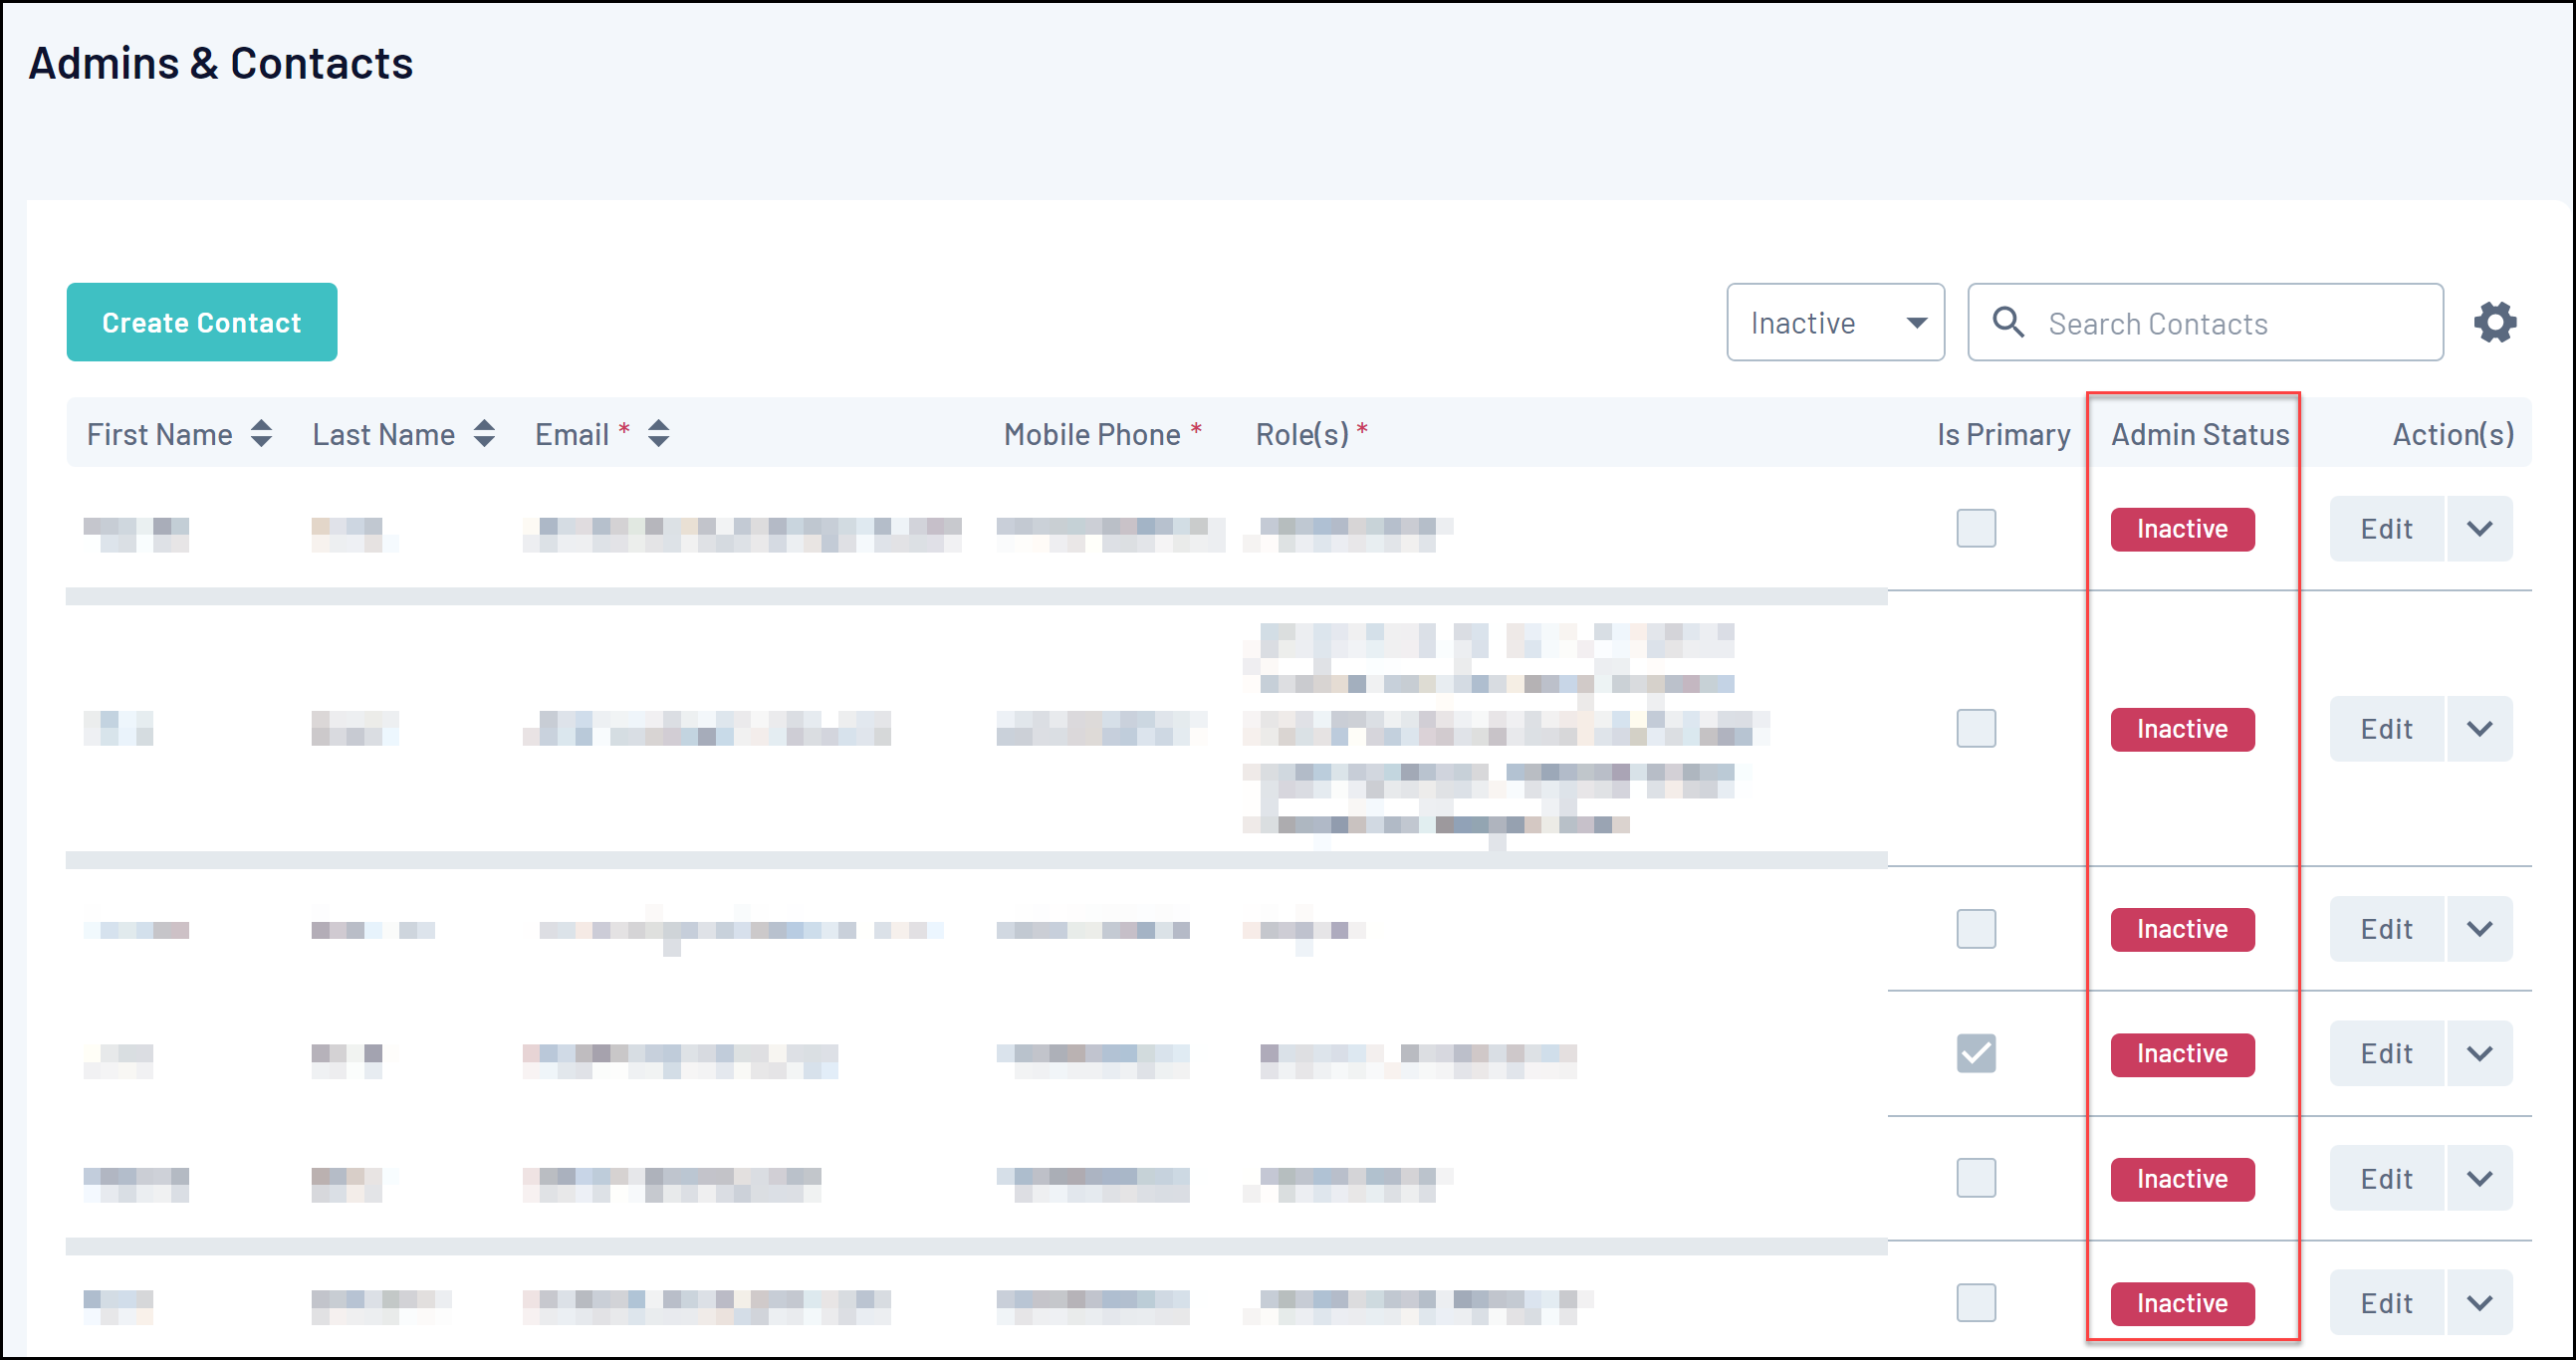
Anyone that appears as Inactive does not have access to login to your database:
Page Actions
On the Admins & Contacts List, you can apply various other actions and display settings, including:
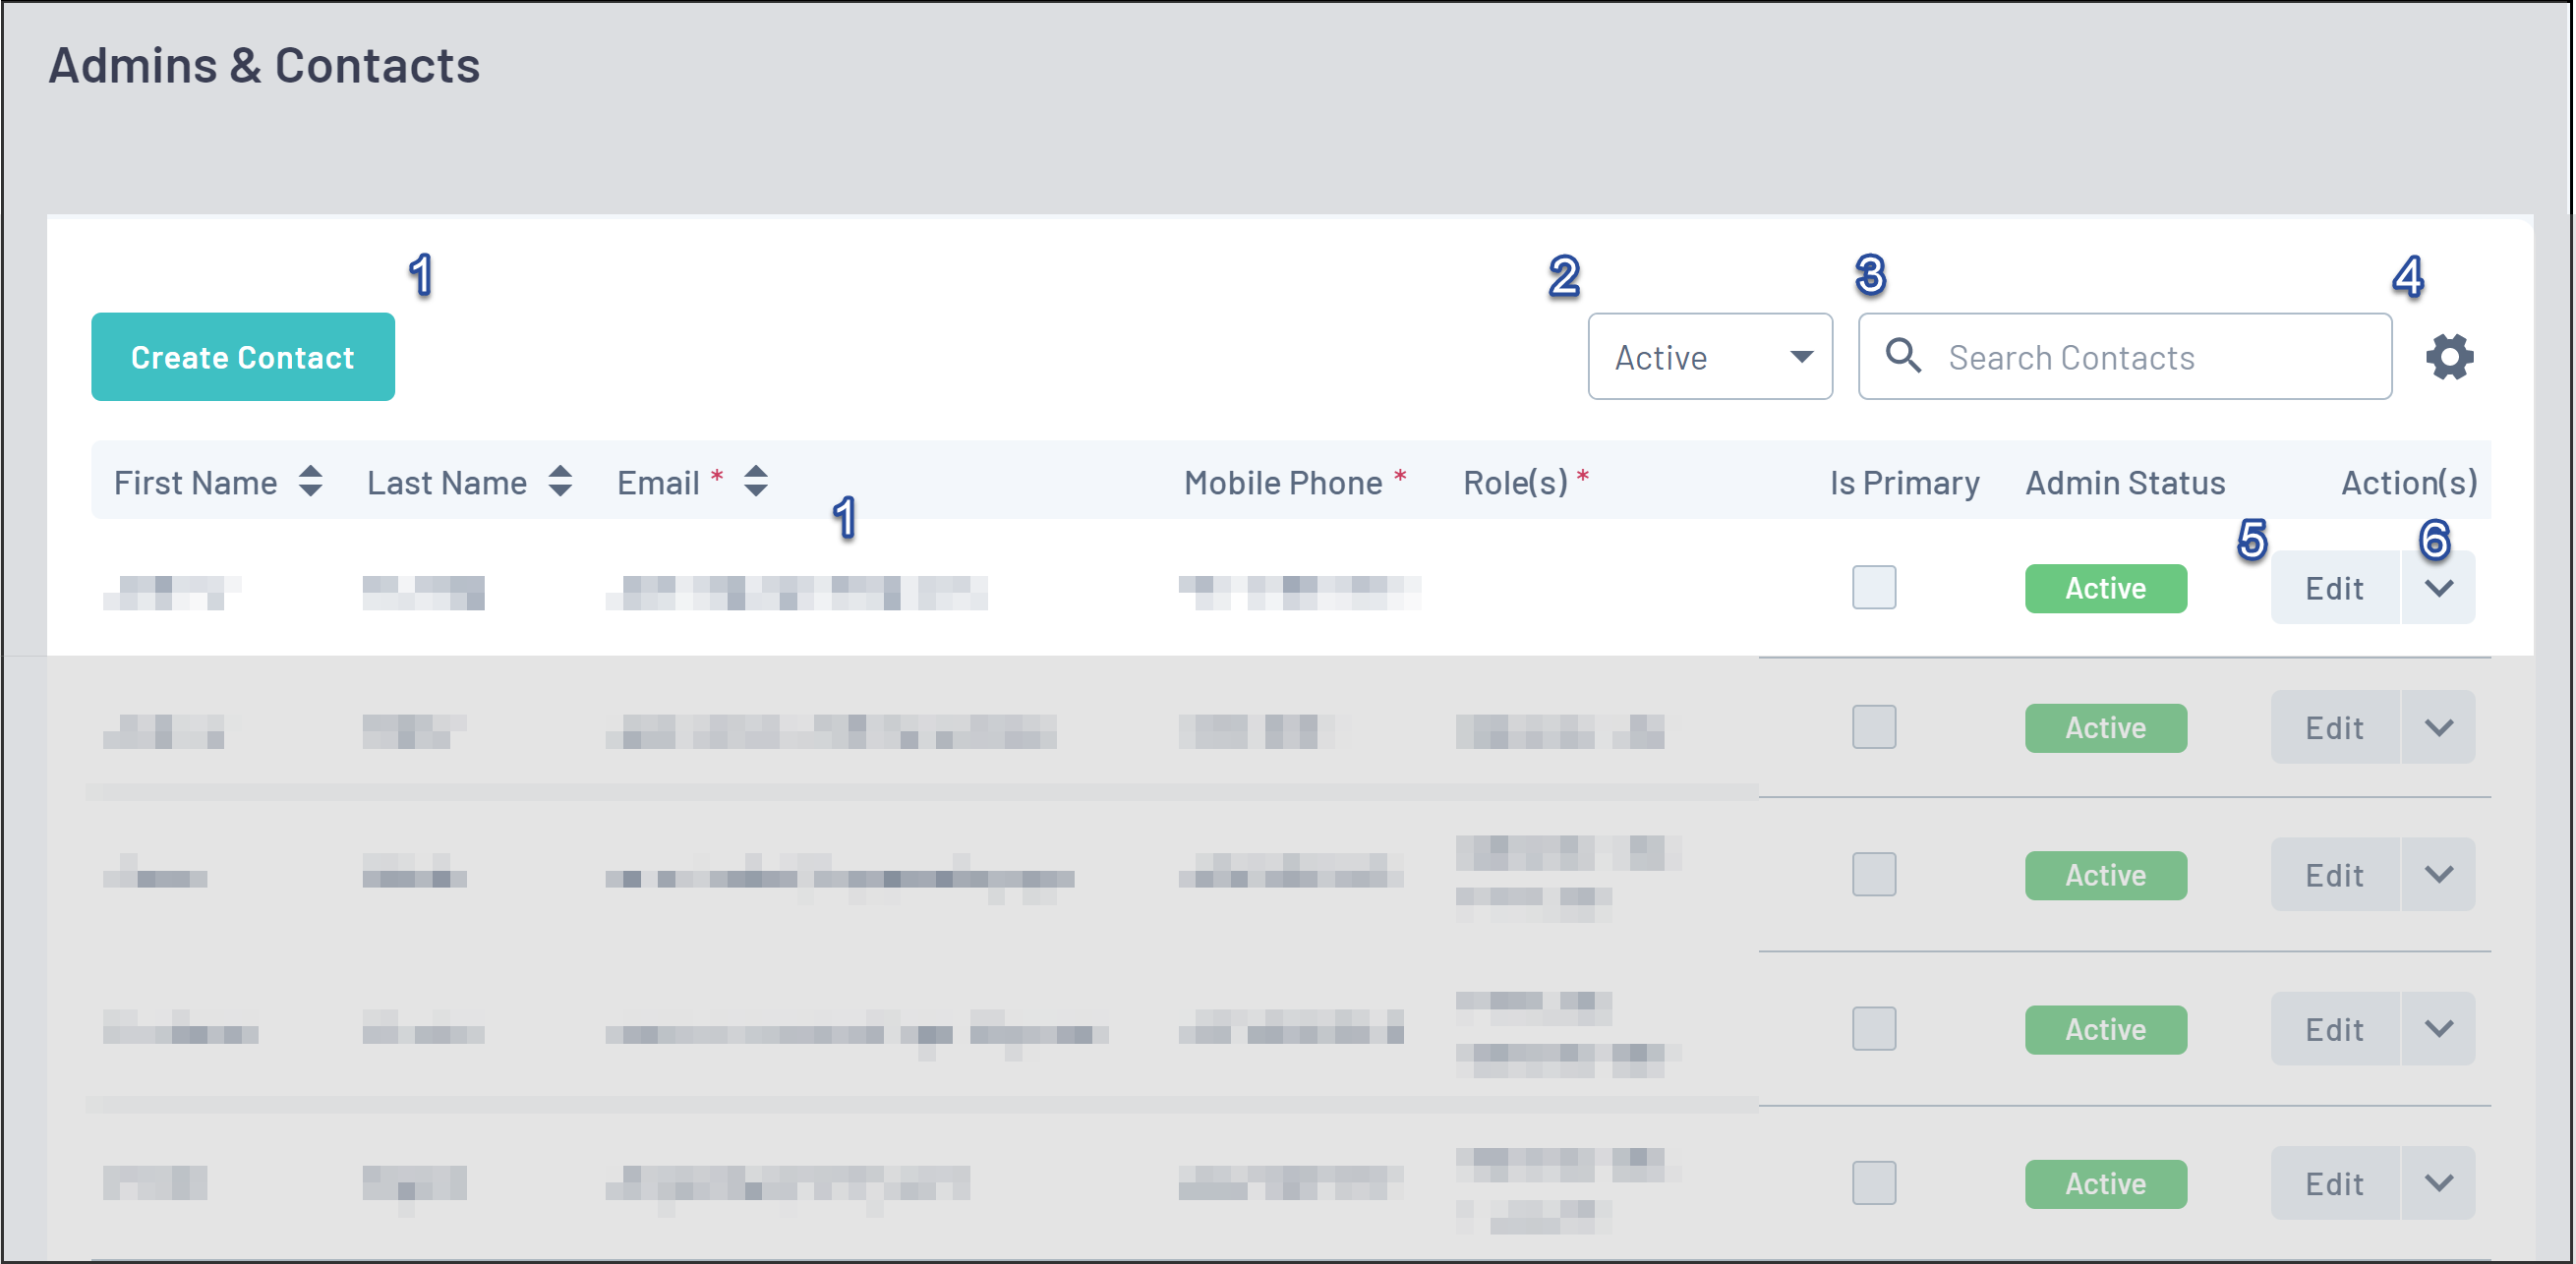
1. Create Contact: Create a new contact for your organisation
2. Status Filter: Filter the Contacts List by Active or Inactive status
3. Search Function: Search for contacts by name
4. List Table Settings: Define which fields display in the columns of the list table
5. Edit Contact: Edit an existing contact to change any basic details
Note: Once a contact has been created, you will not be able to edit their email address, as this is used as their login username if you have granted them admin access. To change a contact's email address, you will need to create a new contact and deactivate the old one.
6. Actions: Expand the actions arrow to access the below features:
- Enable/Disable Admin: For Active records, this option allows you to disable access to the organisation for the selected contact. For Inactive records it allows you to enable admin access to the organisation
Note: Please refer to the articles below to learn how to enable or disable admin access to your organisation's database.
For more information on processes relevant to the Admins & Contacts page, please refer to the Related Articles section of this article.