Ticketing Events are events that allow you to generate and send a PDF ticket to entrants to gain entry into your event.
Creating an Event
To create a new Ticketing Event:
1. Open the Events menu, then click MANAGE EVENTS.
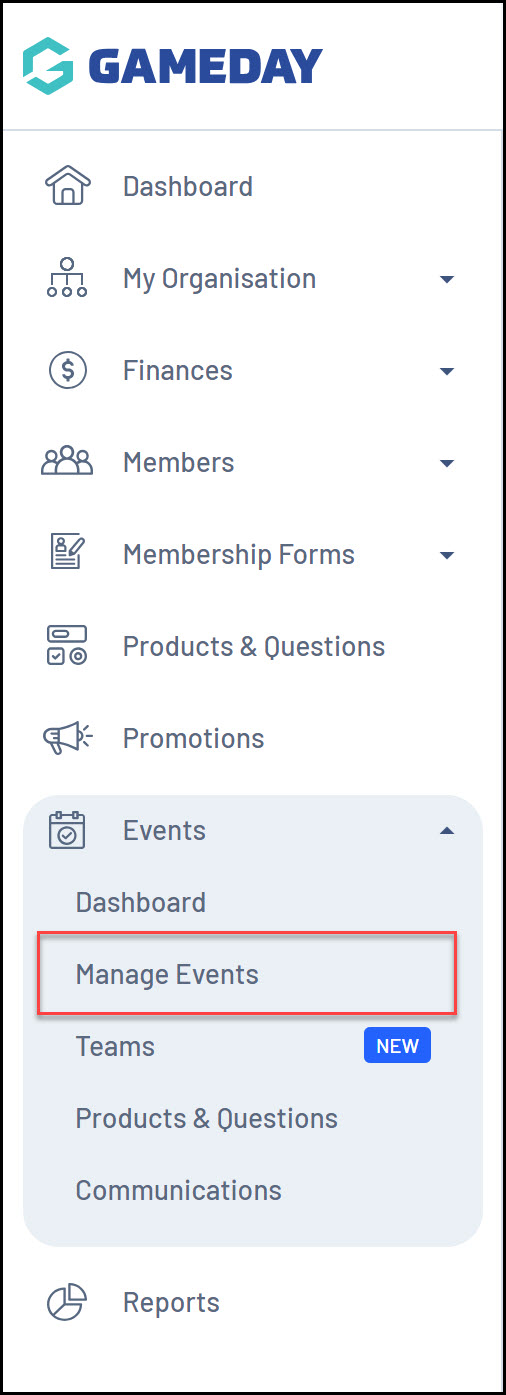
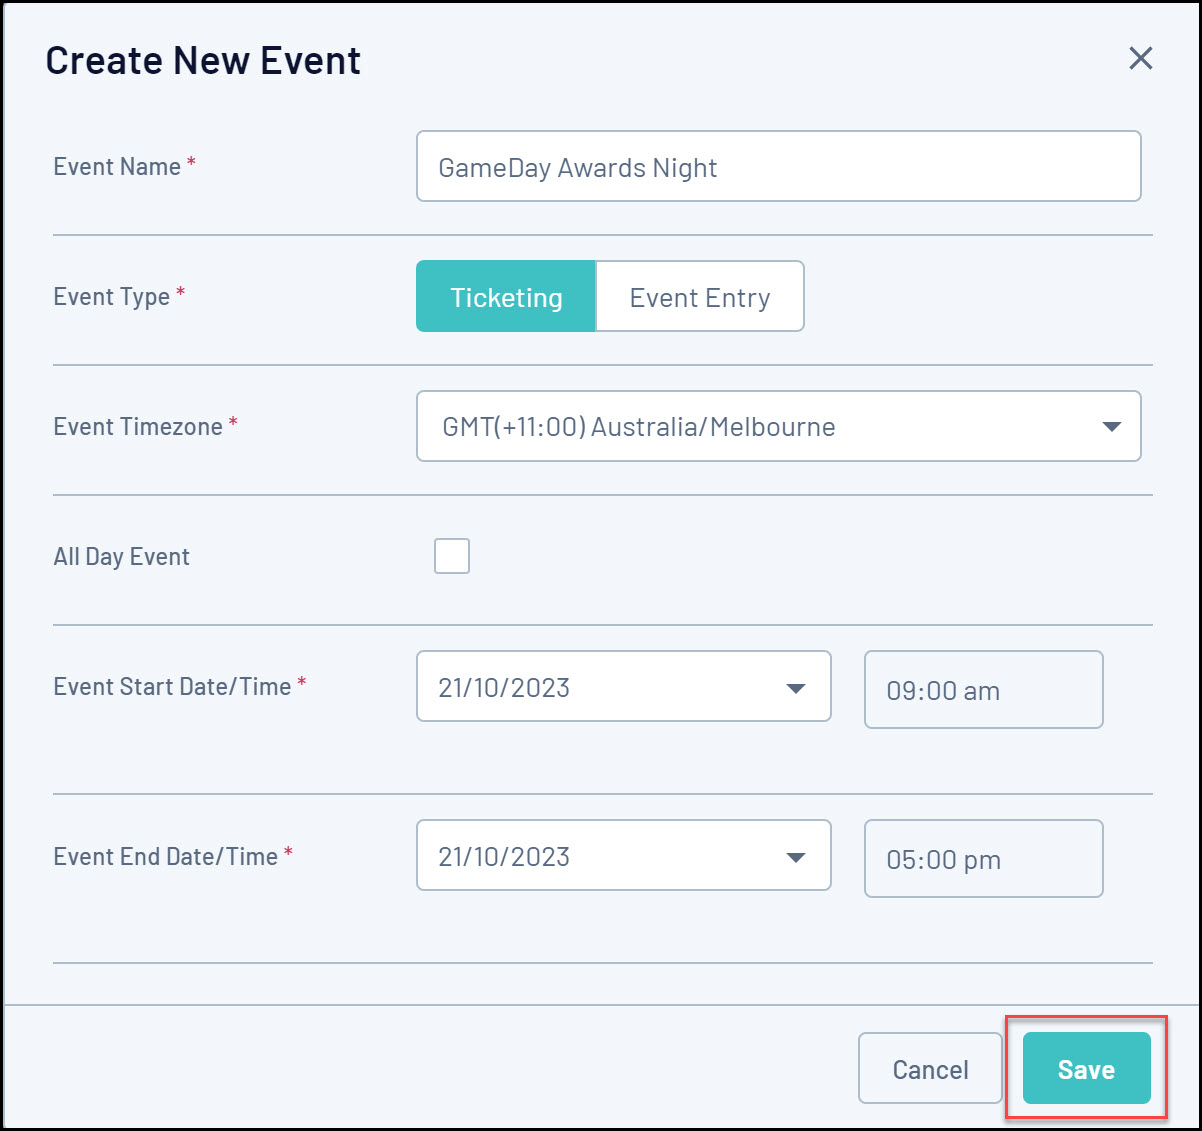
2. Click CREATE NEW EVENT.

Event Details
4. Enter the initial event details including:
- Event Name
- Event Type: To ensure your event enables ticketing features, keep the TICKETING option selected.
- Event Timezone
- Event Start Date/Time
- Event End Date/Time
Note: Selecting the All Day Event option does not require Event Start/End Times
Click SAVE once you're ready to proceed.
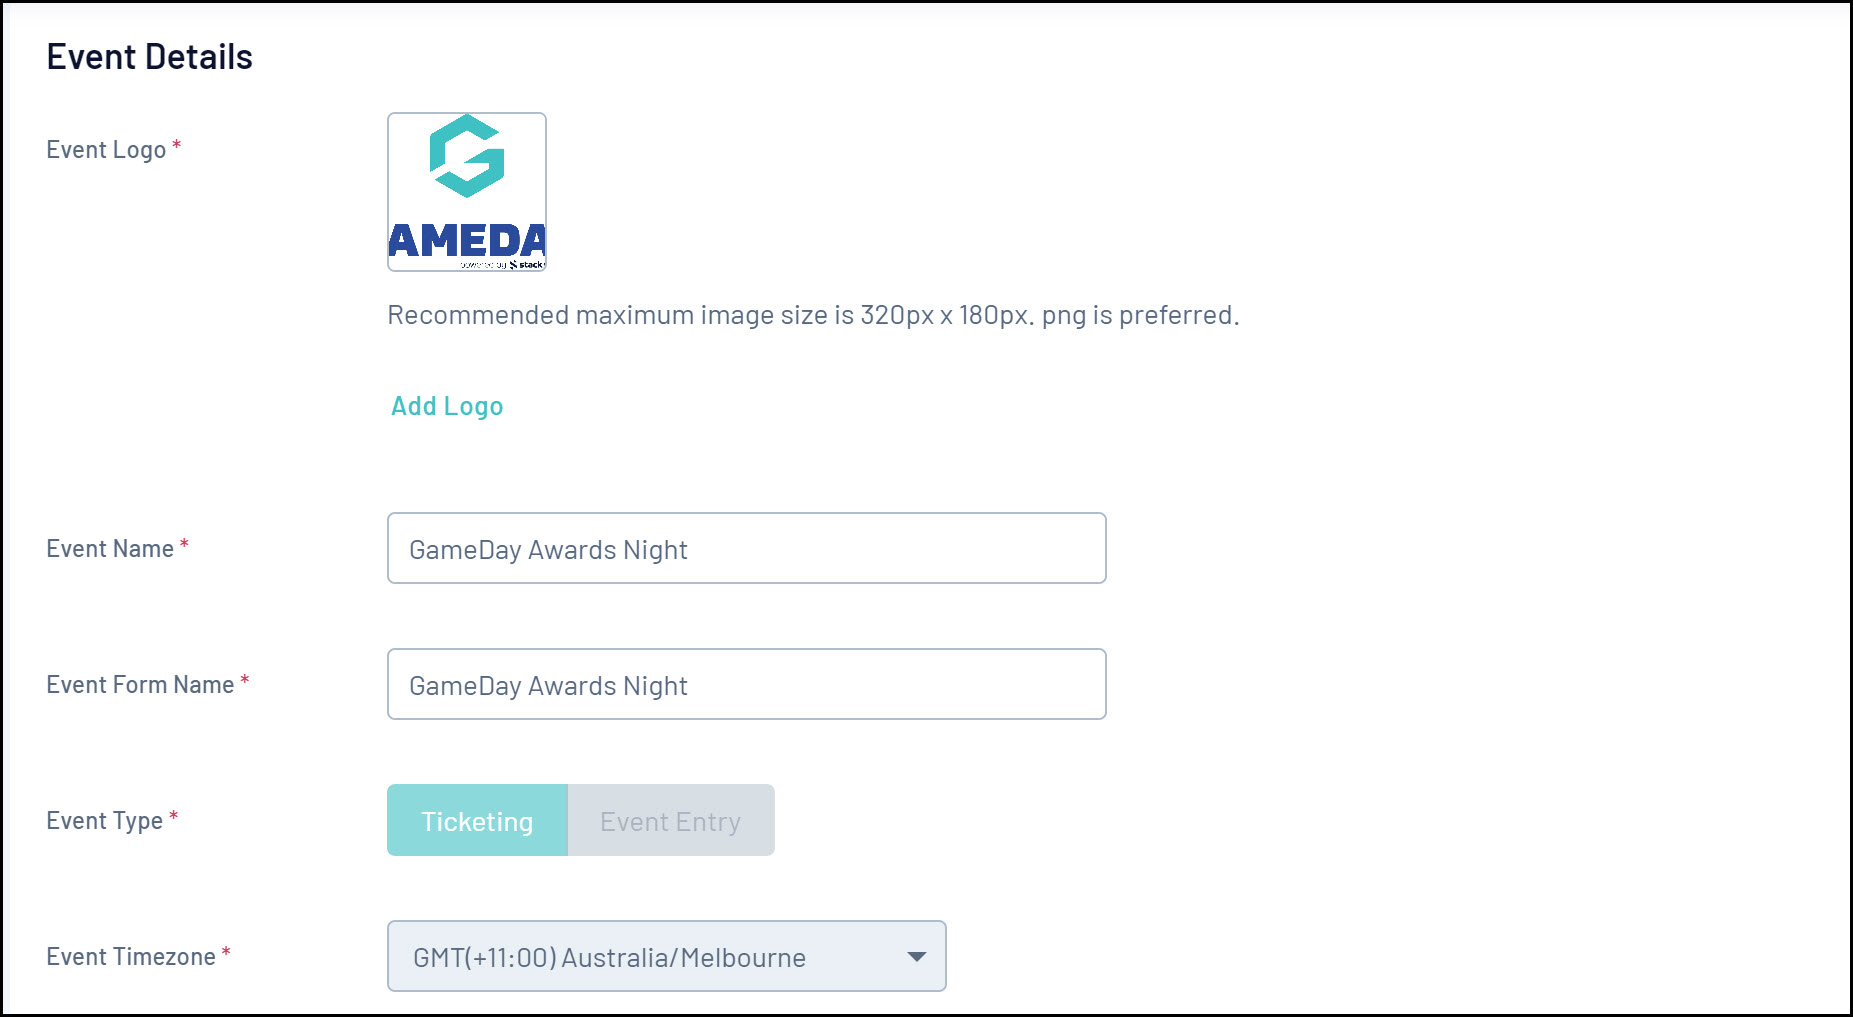
5. Add your remaining Event Details, including:
- The Event Logo
- Confirm your Event Name and Event Form Name
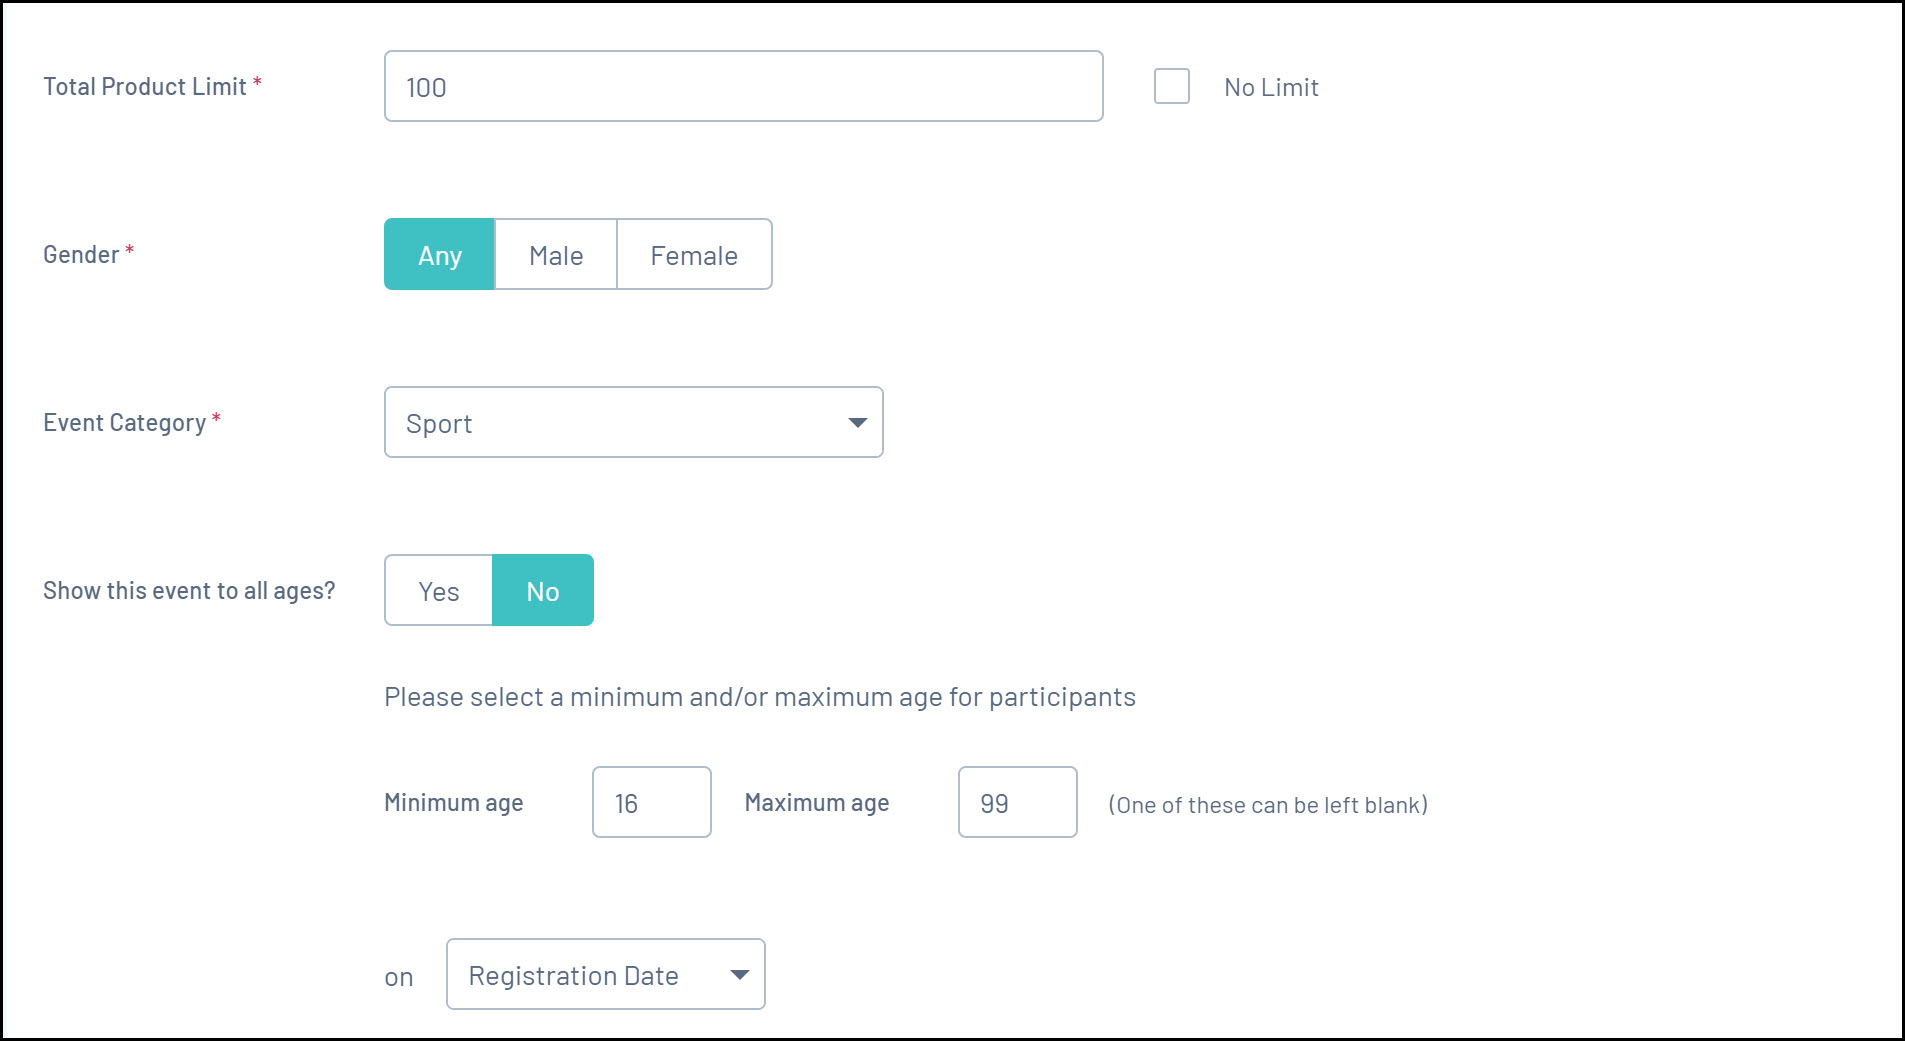
- Total Product Limit: Enter the maximum number of products/orders that you have available to be sold as part of this event. This represents the total number of orders that you want to be able to process through this event. If you don't want to apply a cap on the number of products sold, tick the No Limit box.
- Gender: Allows you to open the event to any gender, or restrict registrations to either Male or Female participants
- Event Category: Add a general categorisation for the event which can be used in reports
Note: If your event does not have a fixed address, you can select one of the following options as the Event Category:
- Multi-Location
- Online/Virtual
Both of these options will bypass the need to enter an address and map location for your event
- Show this event to all ages: By selecting No, you can apply a minimum and maximum age for incoming registrations to the event
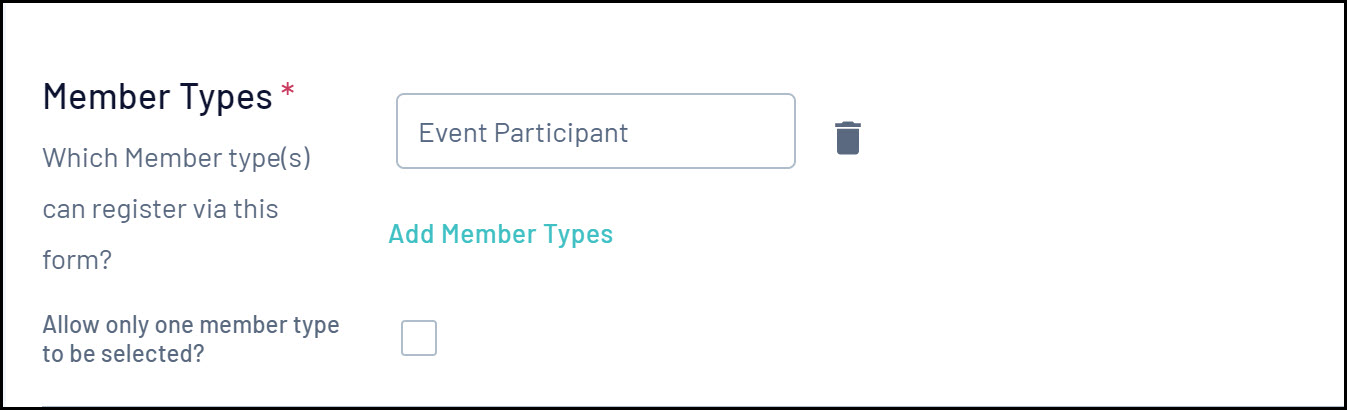
- Member Types: Select at least one Member Type that event entrants can select to register. Click here for more information on creating Member Types.
Event Content
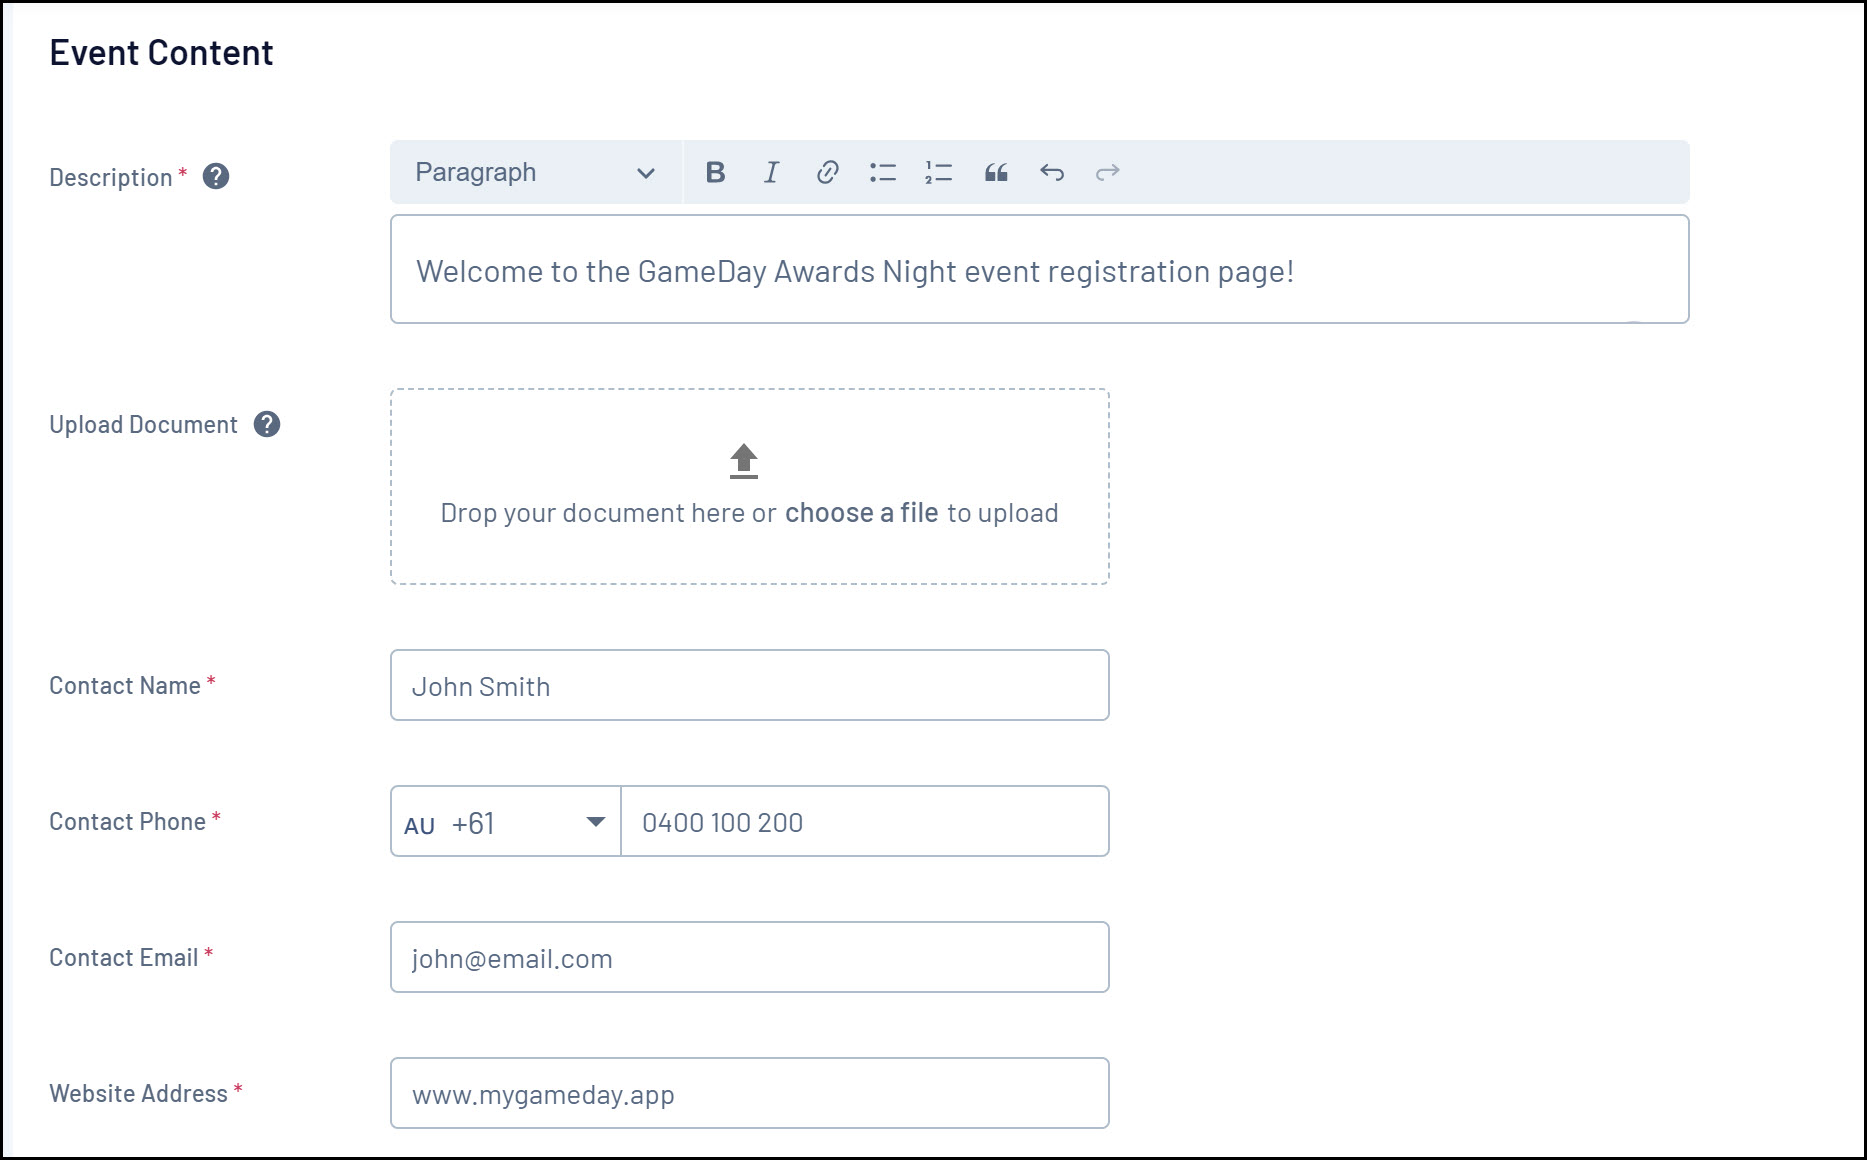
- Description: Enter a description that you want event entrants to see on your event landing page
- Upload Document: Allows you to upload a document which can be accessed by event entrants on your event landing page
- Contact Name
- Contact Phone
- Contact Email
- Website Address
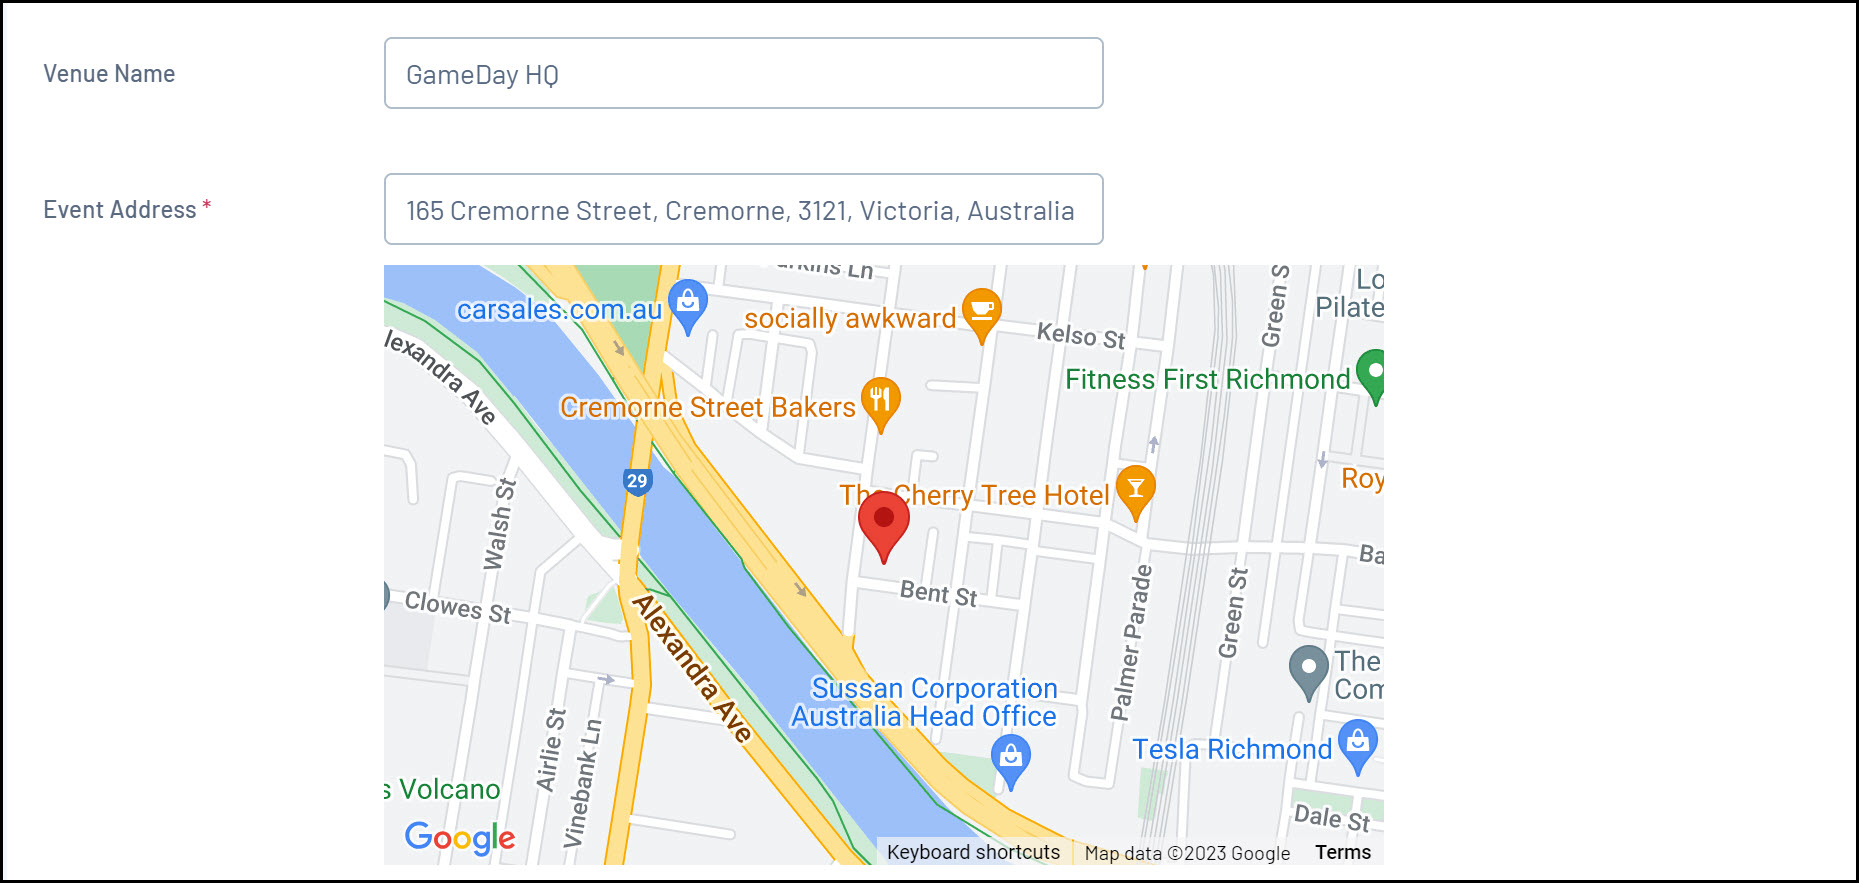
- Venue Name
- Event Address: Adding an Event Address generates a map pin which then shows on your event landing page to ensure participants know where the event is being held
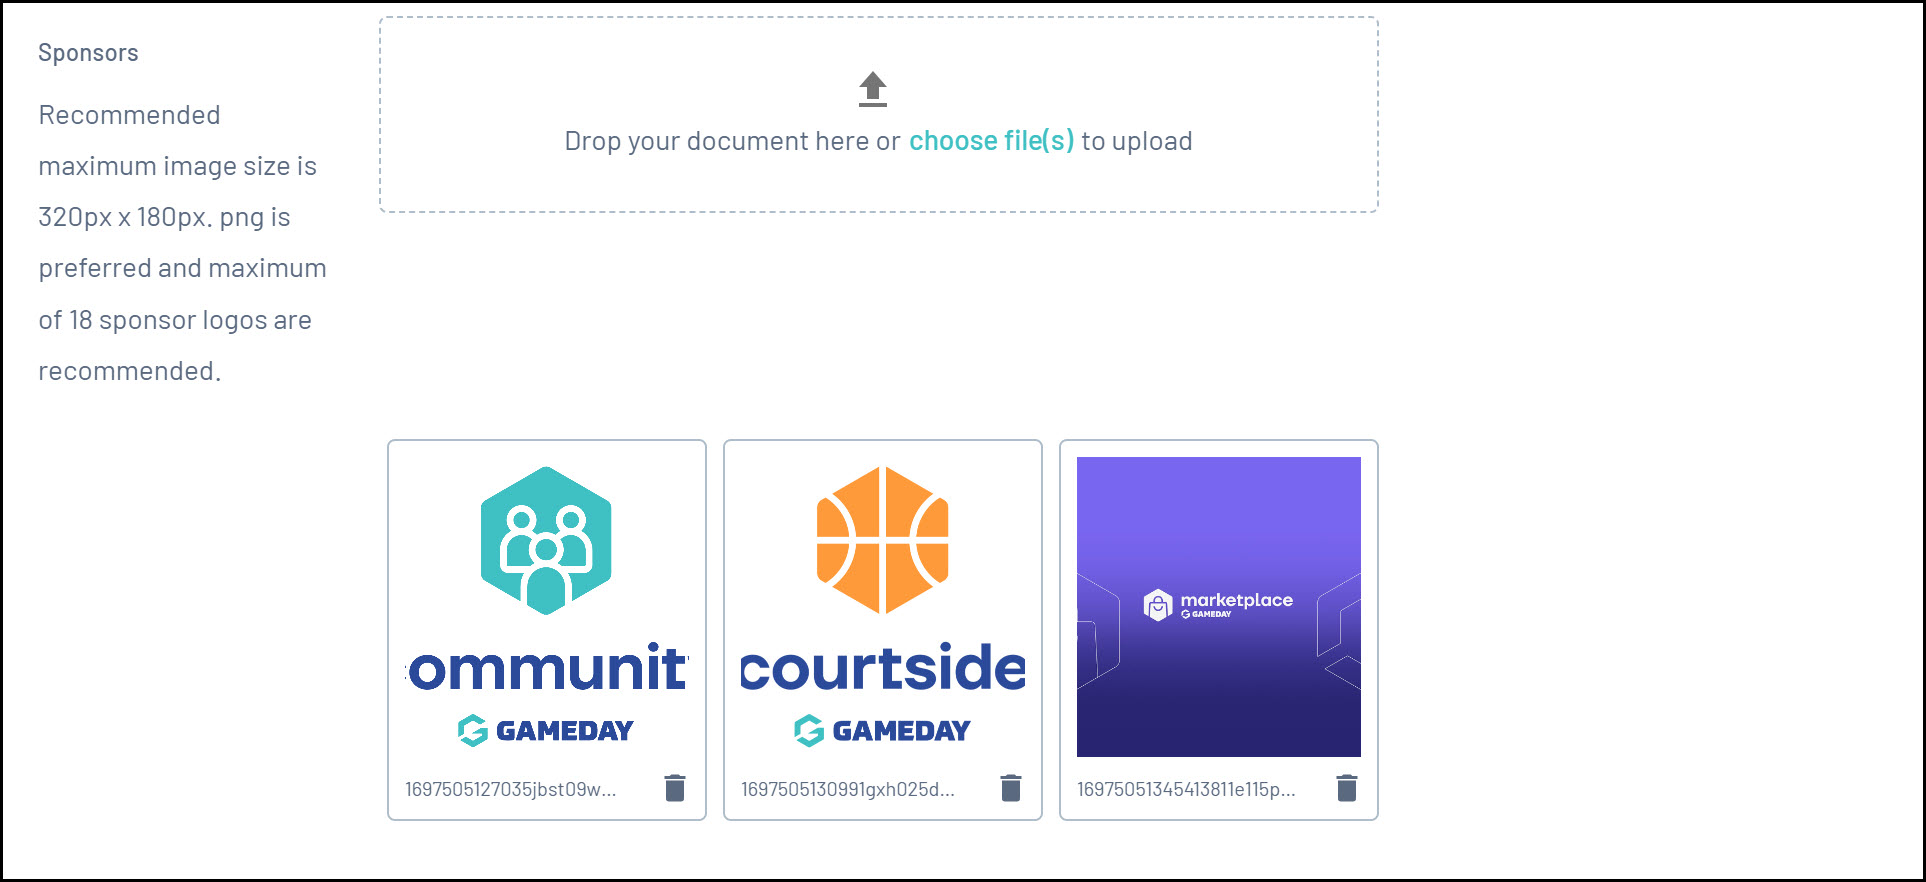
- Sponsors: Upload Sponsor Logos that will appear on your event landing page
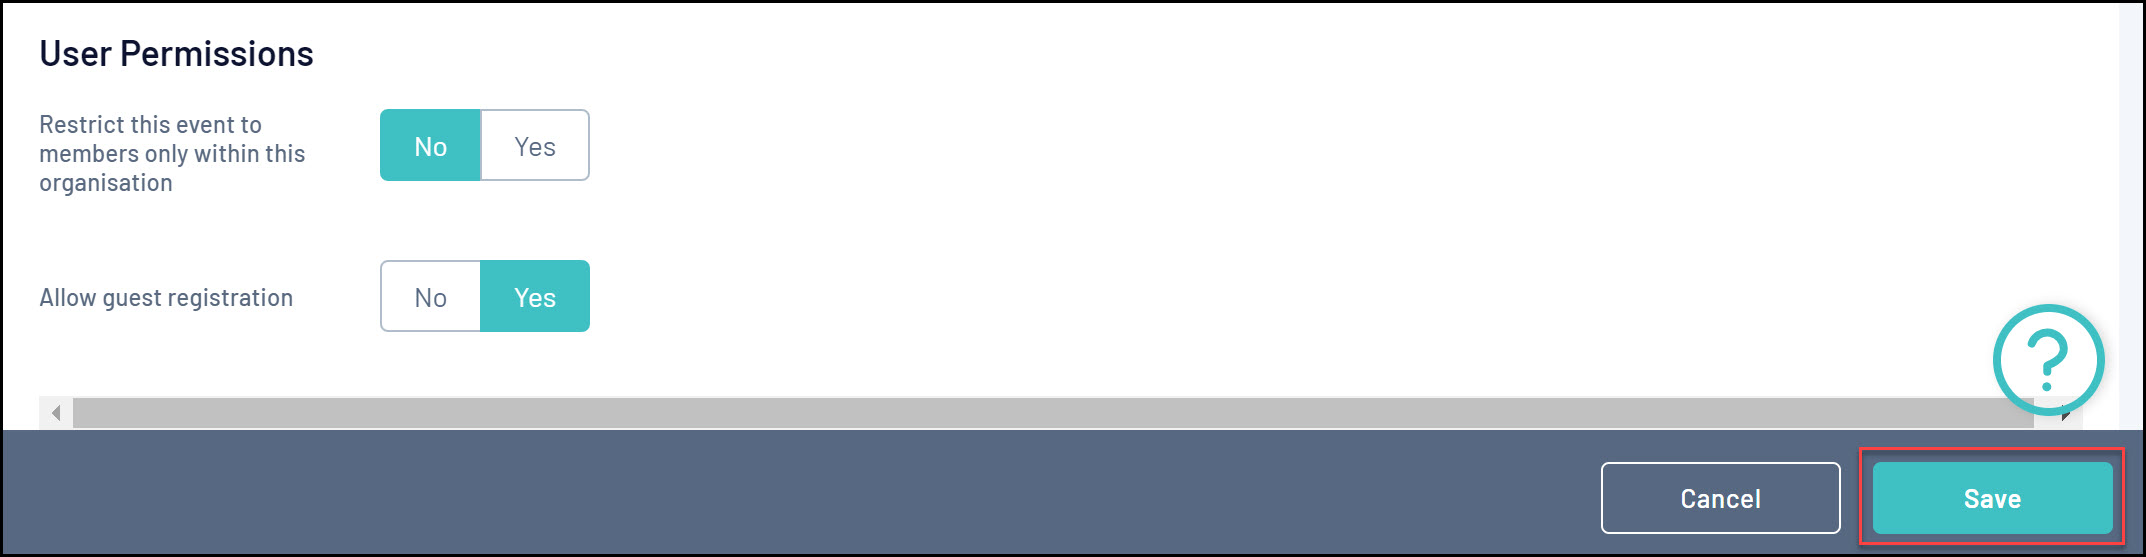
- Restrict this event to members only within this organisation: If Yes is chosen, this event will only be available to participants who already have a member record in your GameDay database, and will prompt them to use their GameDay account credentials to login to the event form
- Allow guest registration: Allows you to open the event to guest registrations, which allows participants to register without creating a GameDay account
Once you've completed all the mandatory information, click SAVE.
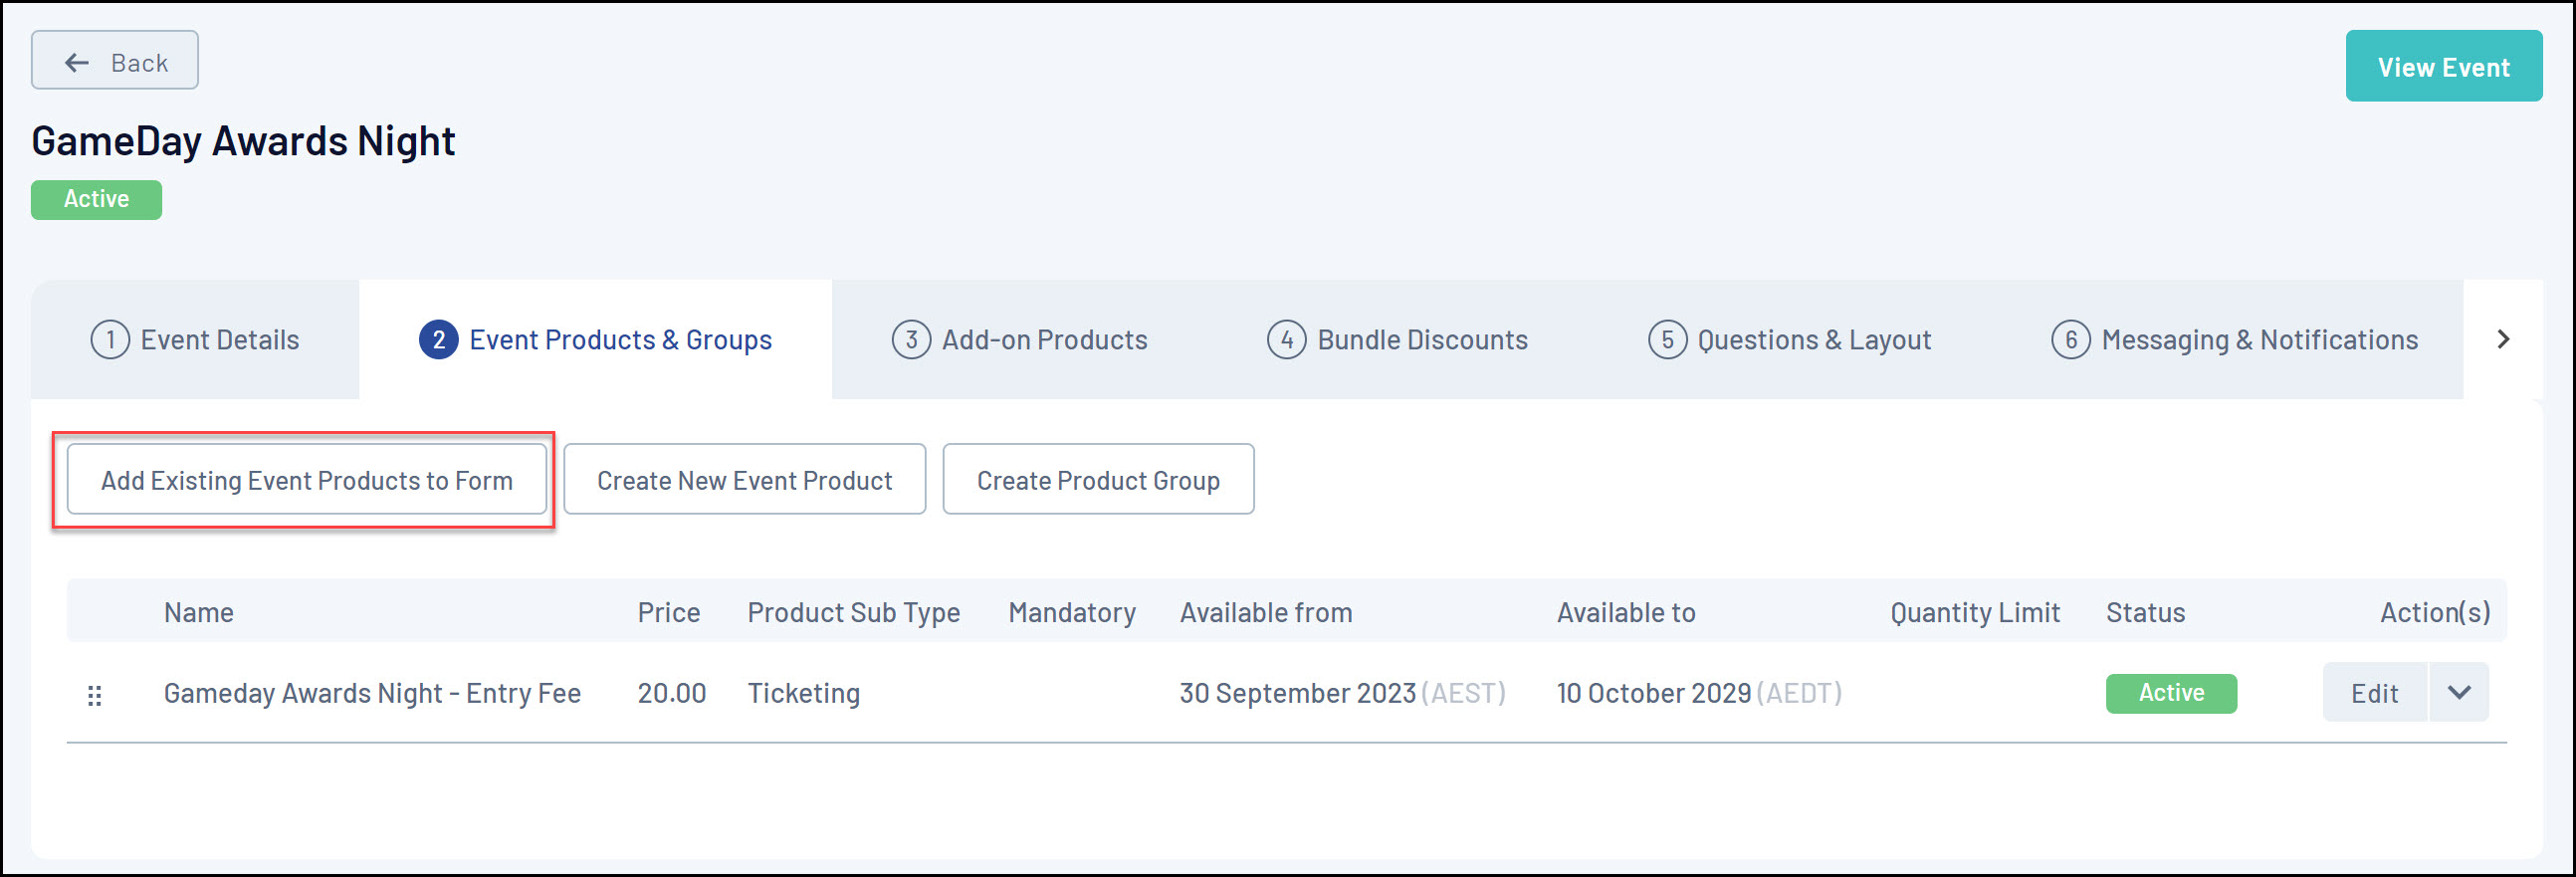
Event Products & Groups
In the Event Products & Groups tab, you have the ability to add products to your event form.
1. Click the EVENT PRODUCTS & GROUPS tab
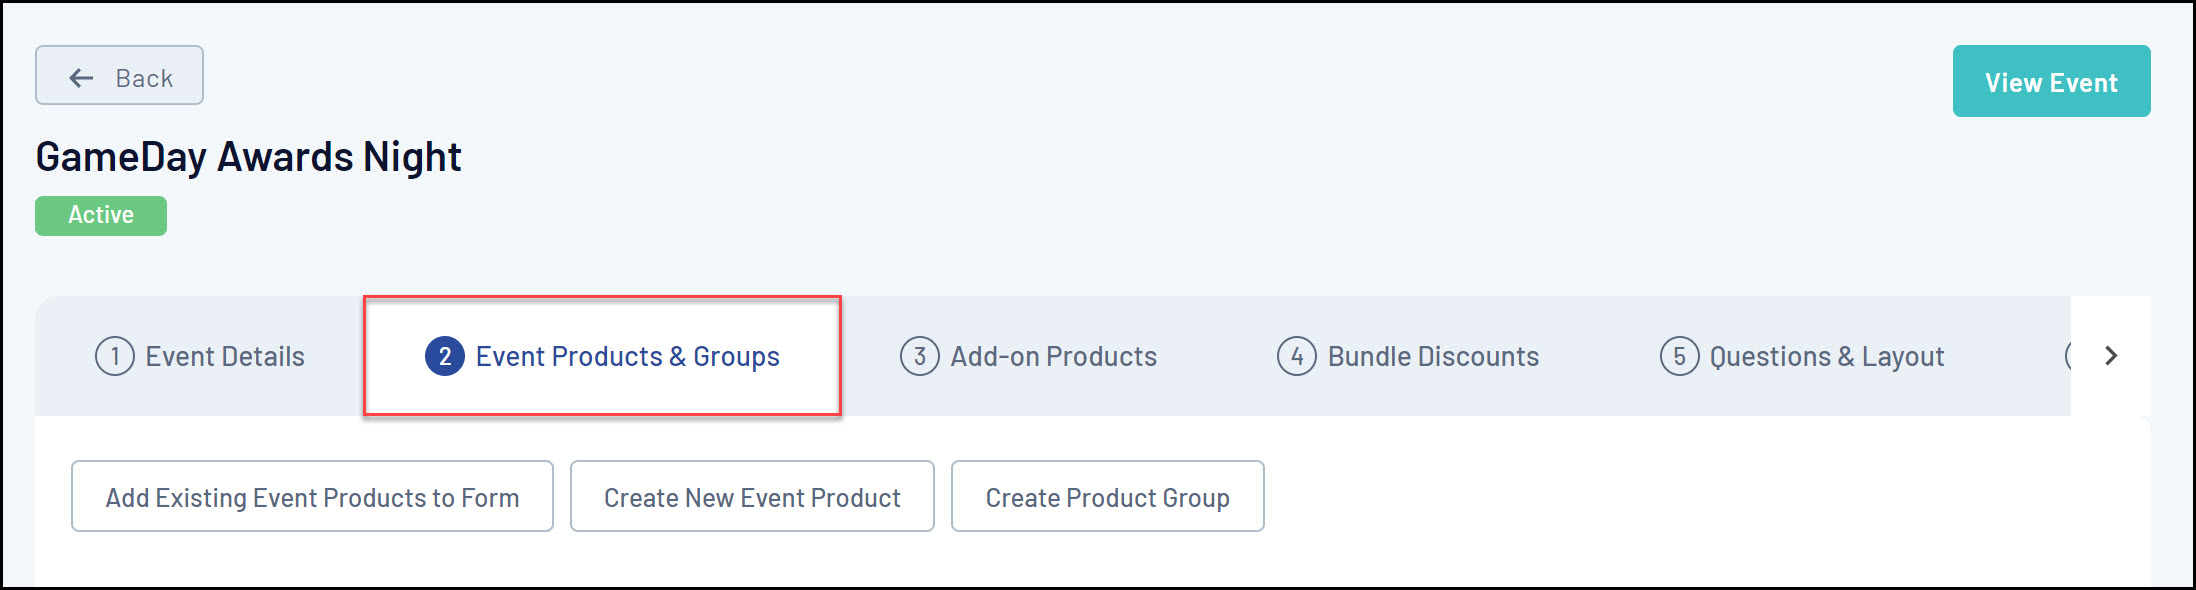
Here you can either add a new product from scratch, or add one of your existing products to the event.
Note: Only products with the Event Product Type will be available to add to an Event
2. Adding a new product to your event:
2a. Click on CREATE NEW EVENT PRODUCT
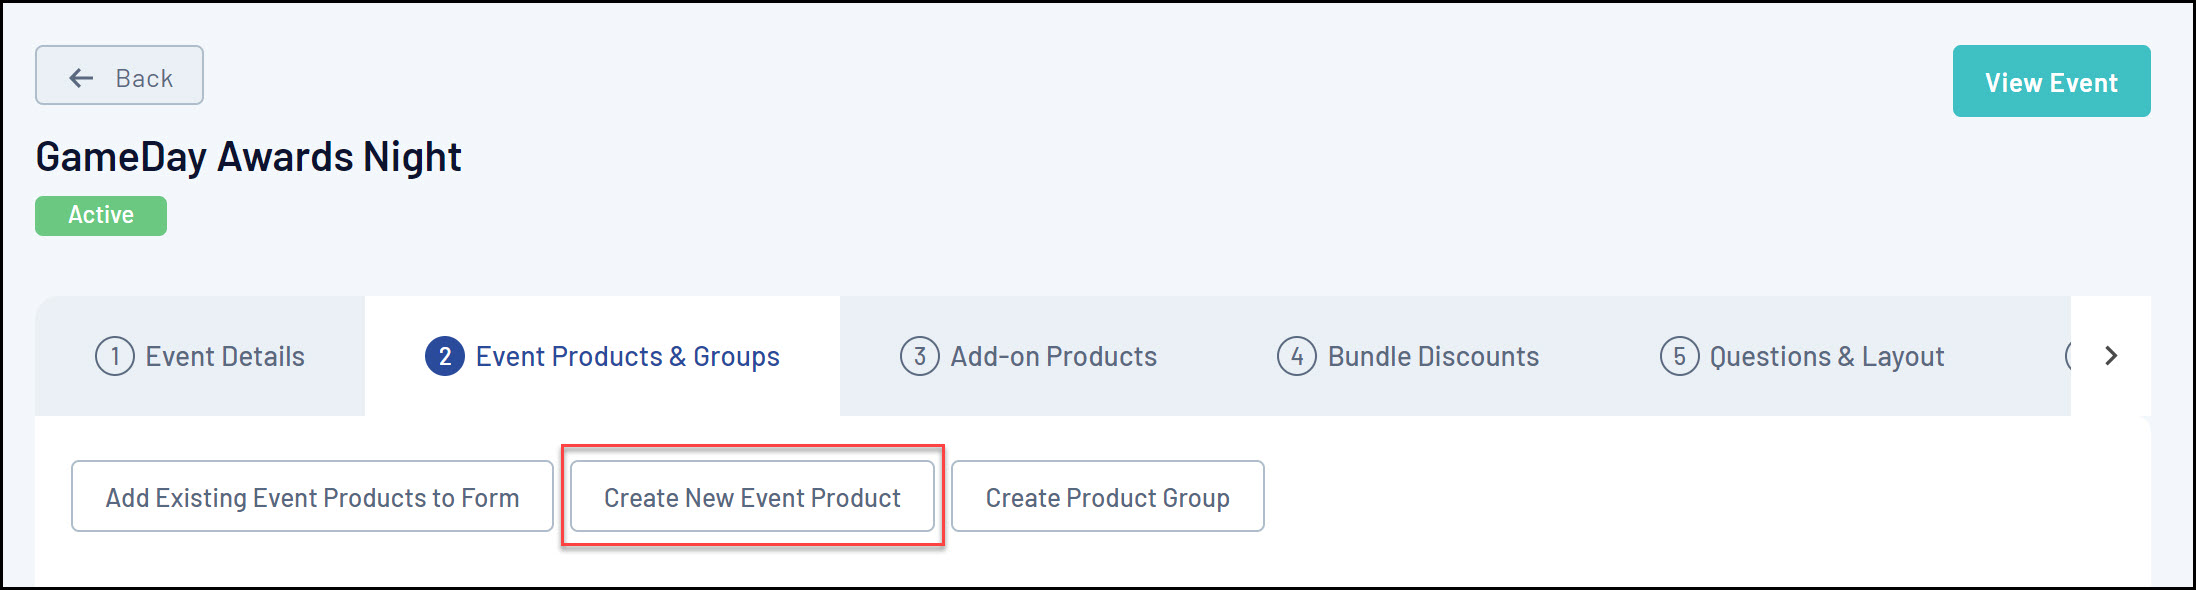
2b. On the Basic Settings page, you can apply the following settings and information:
- Product Sub Type: Choose the Ticketing option
- Product Name: The name of the product as displayed to the public on your event landing page and form
- Description: Provide an optional description of the Product to display on event forms
- Price
- Payment Option
- Payment Gateway Only: Ensures that the Product can only be purchased through the online payment gateway on GameDay registration forms
- Payment Gateway or Manually set Product as Paid: Allow the Product to be purchased through the online payment gateway or applied manually by an administrator directly through GameDay
- Available to Purchase Dates: Apply a date range in which you want the Product to appear on registration forms
- Grants Member Type: Select any Member Types that should be granted to members who purchase this Product
- Quantity Limit: Apply a maximum number of order that can be processed with this product. Tick the No Limit checkbox if you do not want to apply a purchase capacity limit
- Allow users to purchase a product multiple times: Allows registrants to purchase the product on multiple different occasions for the same member.
- Status: Set the Product to Active or Inactive
Once you've applied all mandatory fields, click CONTINUE
2c. Display Rules & Review
Display Rules allow you to configure your Product to only display on registration forms if a member meets a certain set of characteristics.
- Only show to Member Type(s): Select one or more Member Types here to ensure the Product only appears on registration if the registrant has selected a particular Member Type on the front page of the registration form
- Only show to Gender: Select a Gender option to ensure the Product only shows to a specific Gender selected by the registrant on the front page of the registration form

NOTE: Gender display rules are based on the Assigned Gender at Birth field, not the Gender Identity field
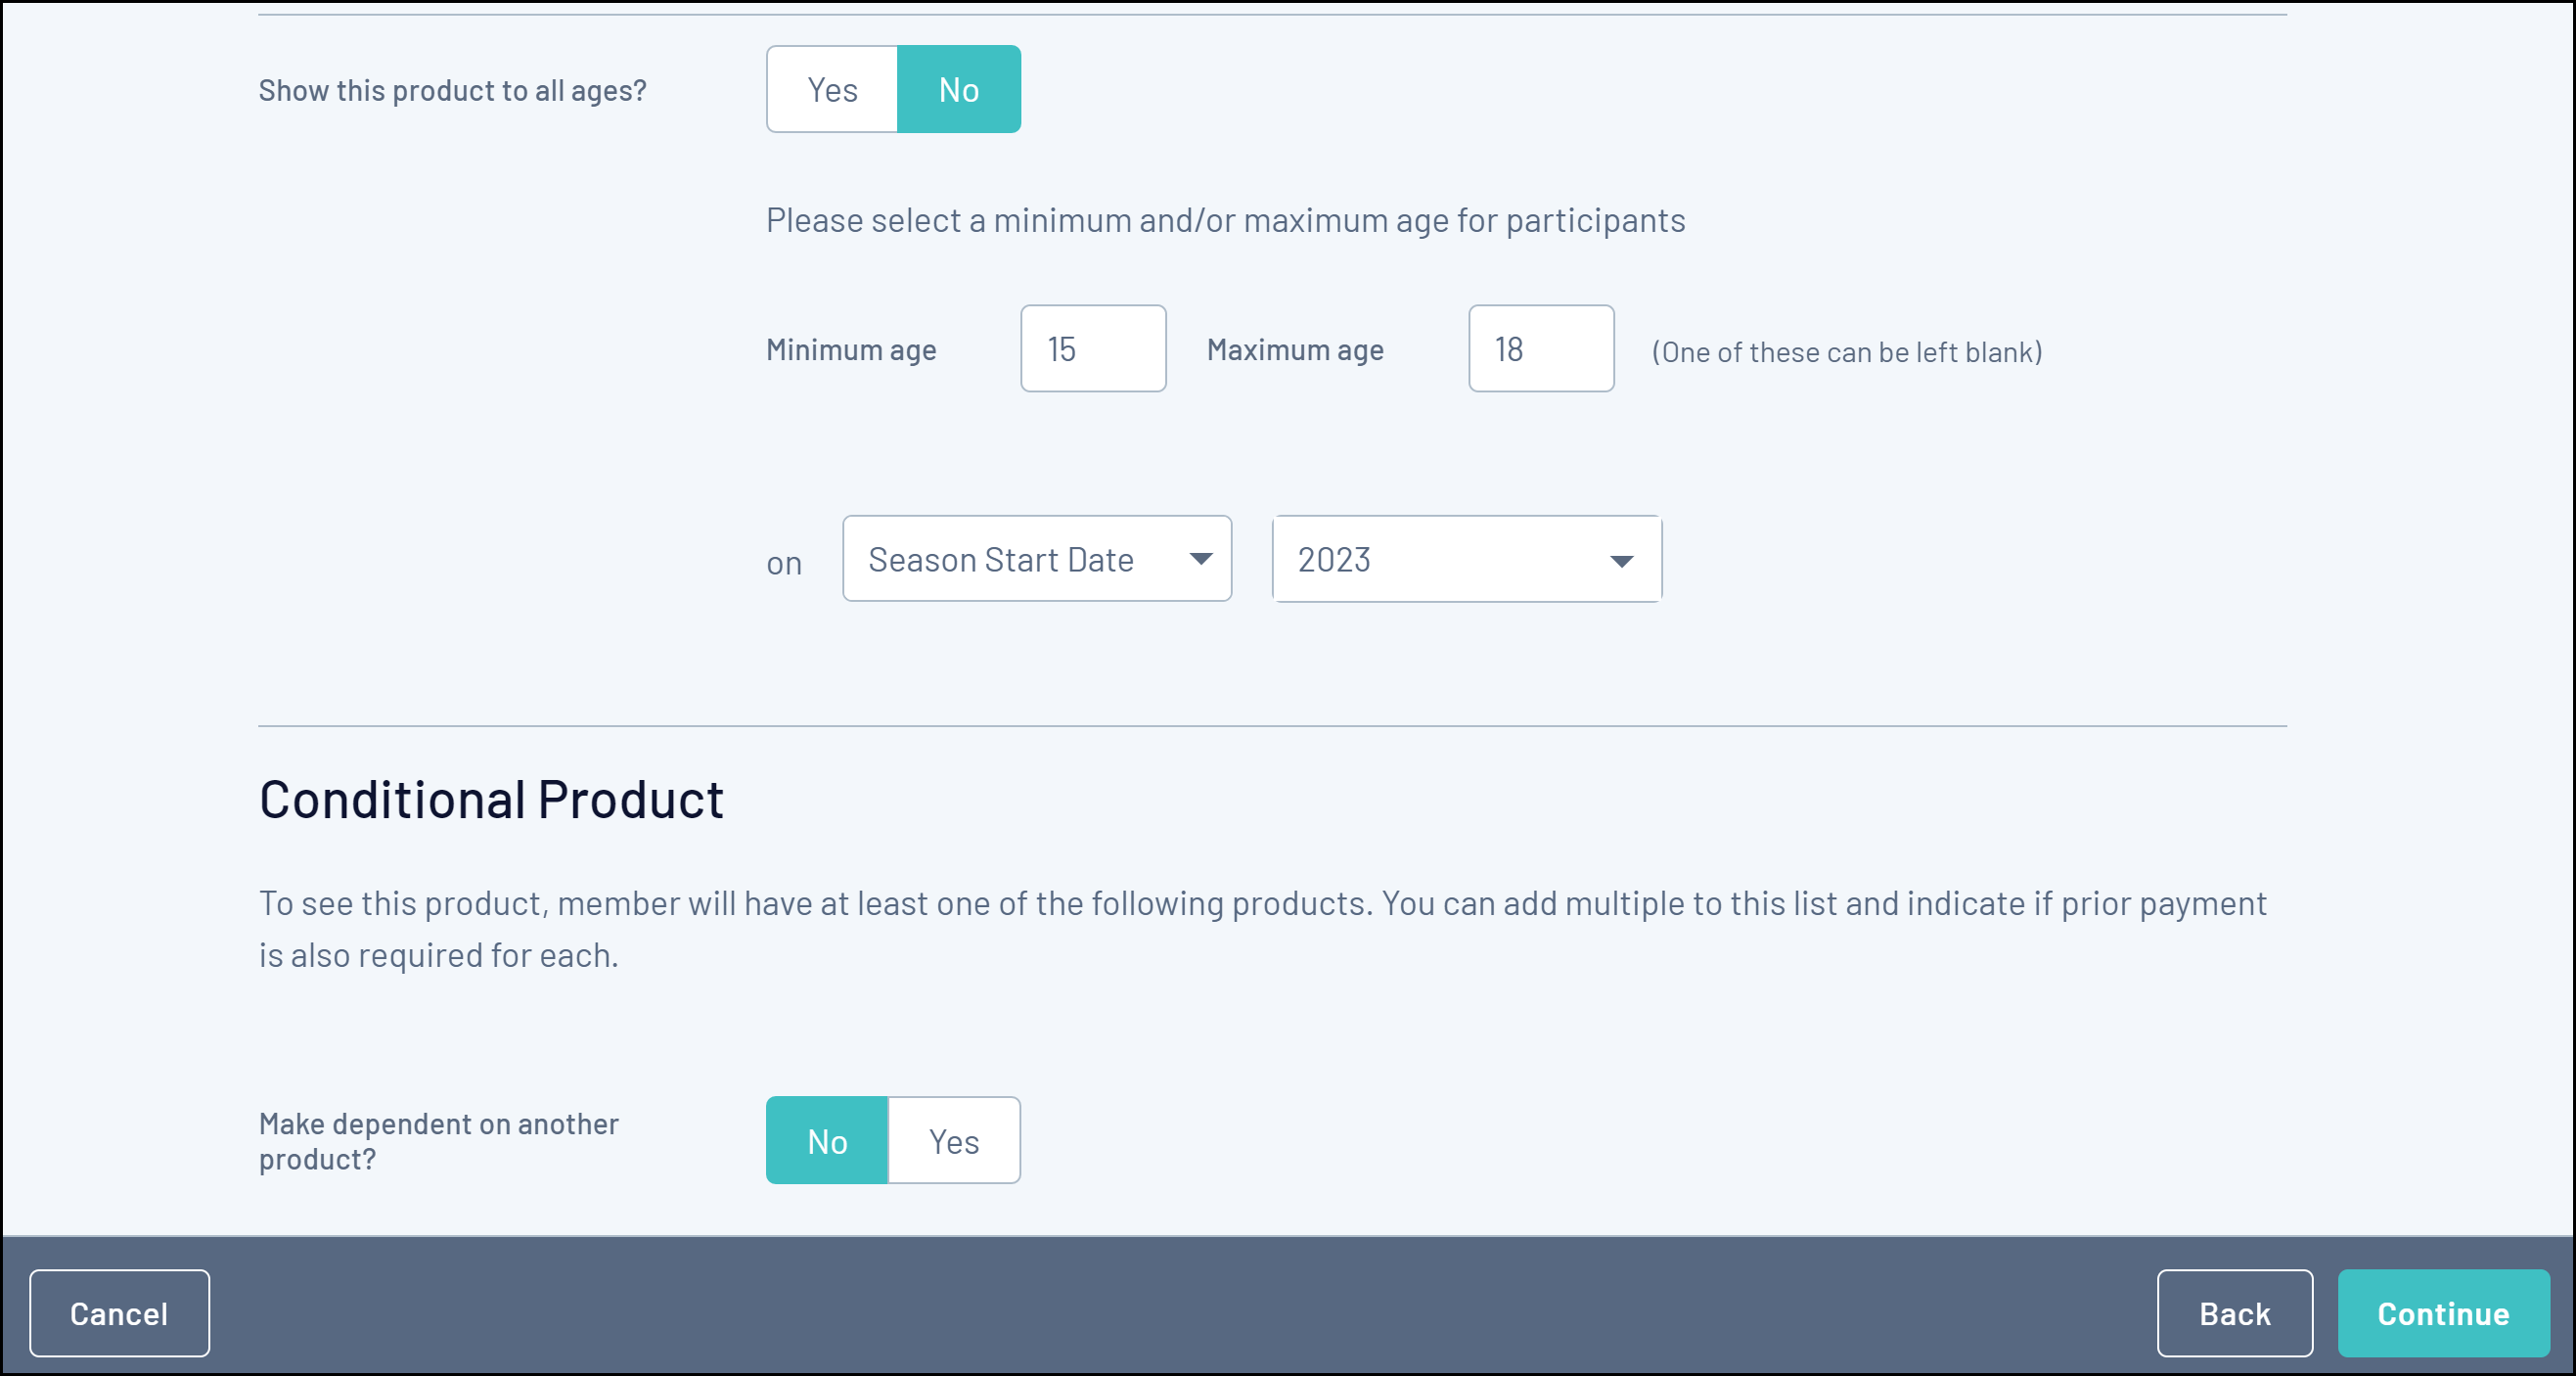
- Show this Product to all ages?: If No is selected here, you can apply an age range (as at a specific date) to ensure that the Product only displays to members of a certain age. This is automatically calculated based on the date of birth entered by each registrant on the front page of the registration form
- Make dependent on another Product?: If Yes is selected here, apply a Conditional Product to ensure that your new Product only displays if the member is purchasing - or has already purchased - the Conditional Product. Click here for more information on Conditional Products
Once you have applied your Display Rules, click CONTINUE.
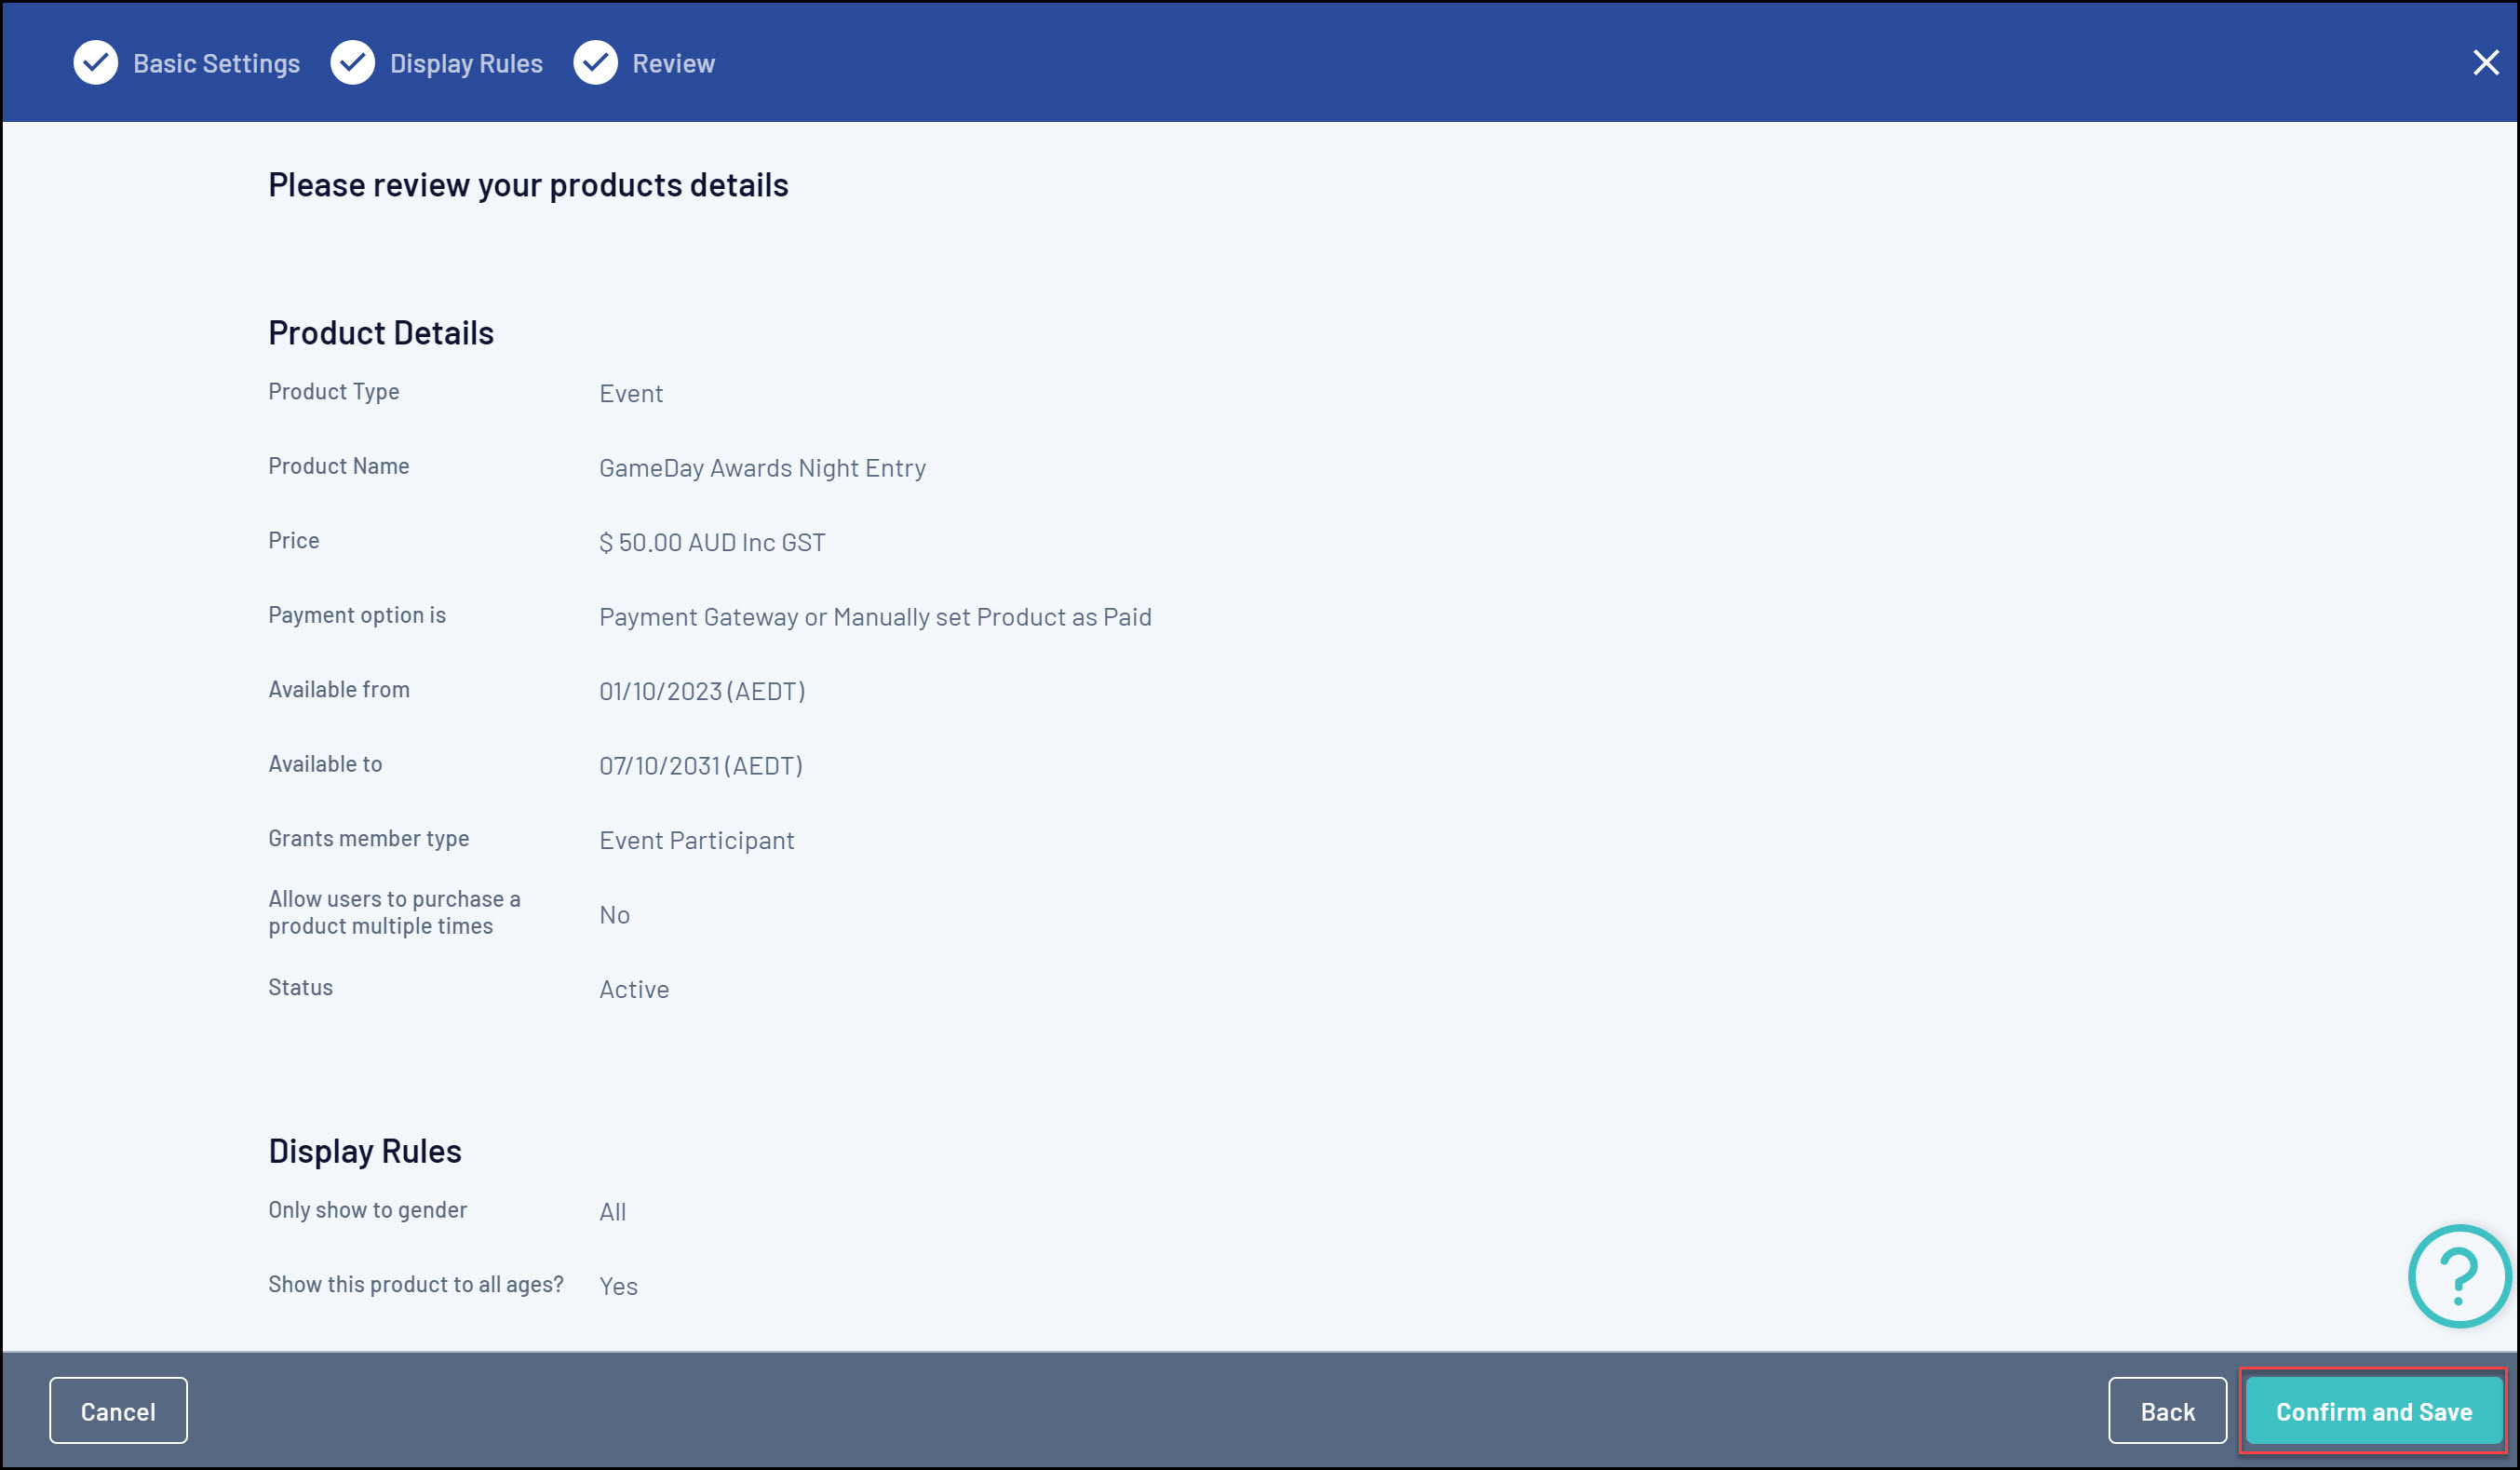
2d. On the following page, review the final details of your Product, then click CONFIRM AND SAVE. This product will then automatically be applied to your event form.
3. Adding an existing product to your event
If you select this option this will mean that you have already created your event product outside the form, or in a previous event.
3a. Click on ADD EXISTING EVENT PRODUCTS TO FORM
3b. Tick the checkboxes against the products you can to add to the form, then click ADD
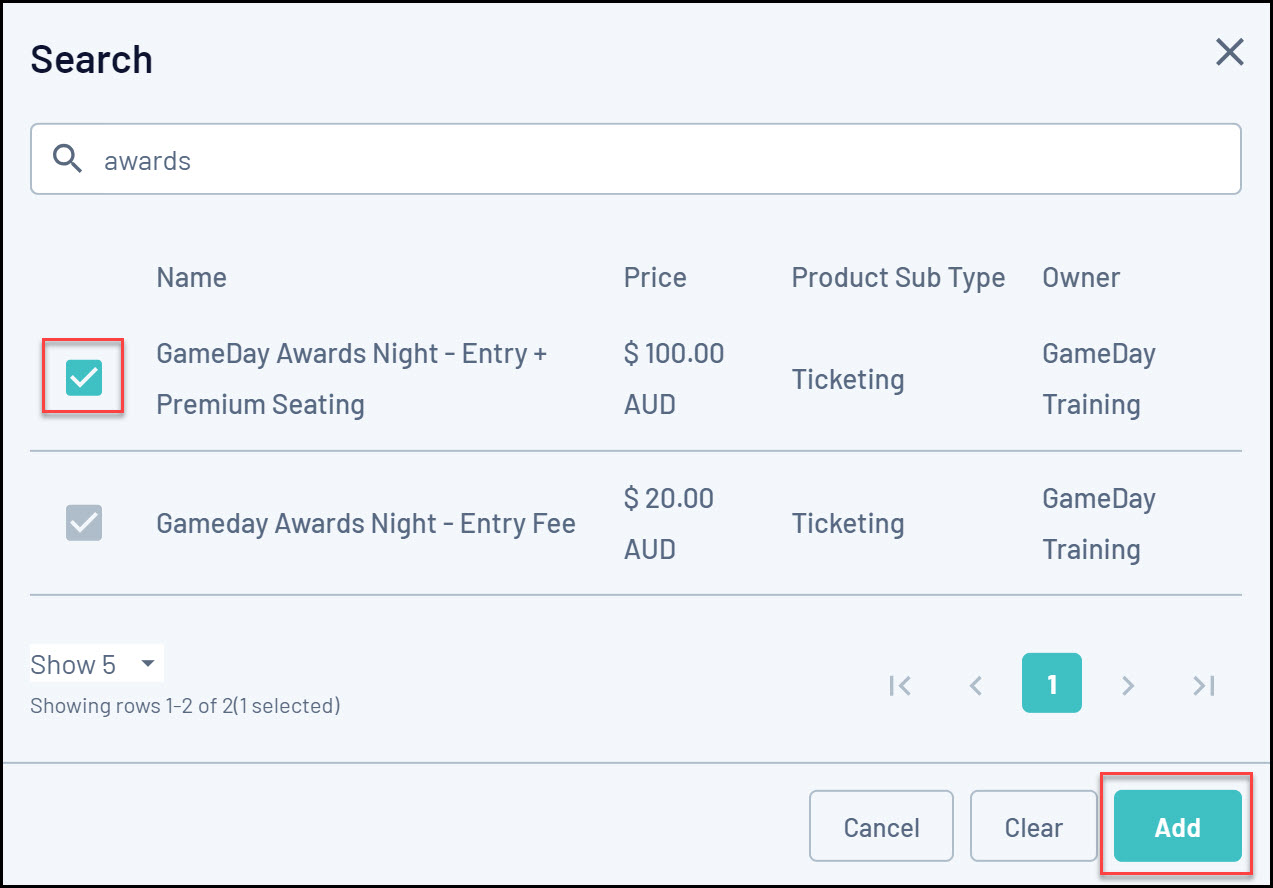
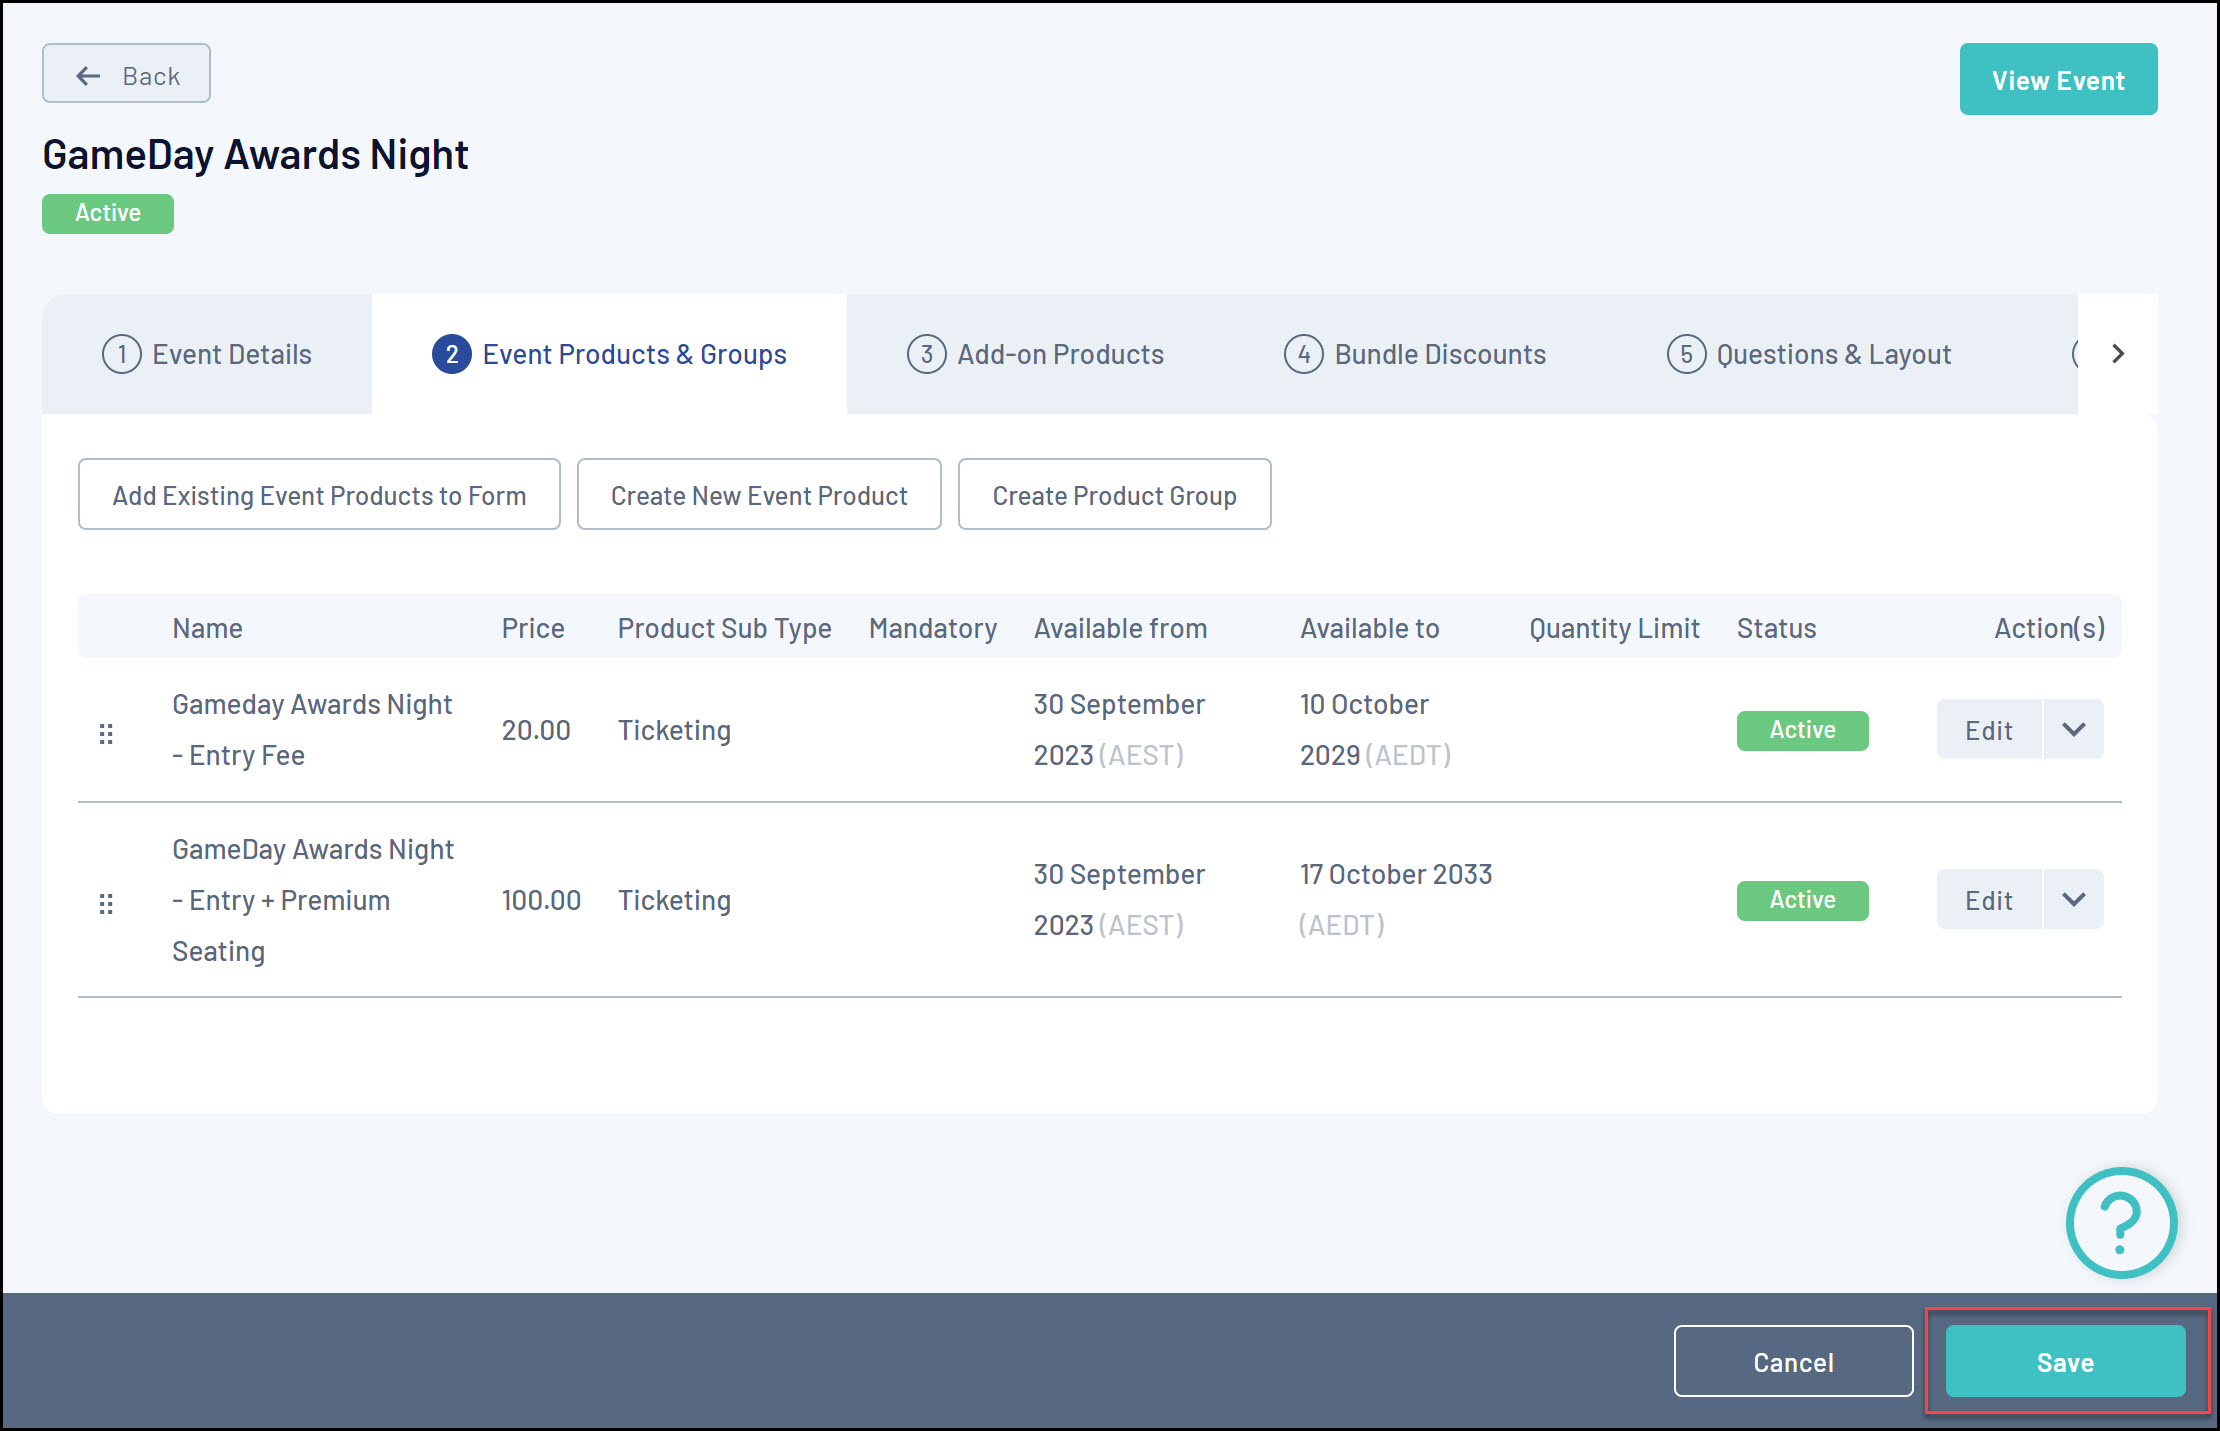
3c. Click SAVE
Questions & Layout
In the Questions & Layout tab, you have the ability to add new or existing custom questions to the event.

1. Adding an existing question to the form
1a. On the left-hand side, click the field you want to add from the Add Existing Question list
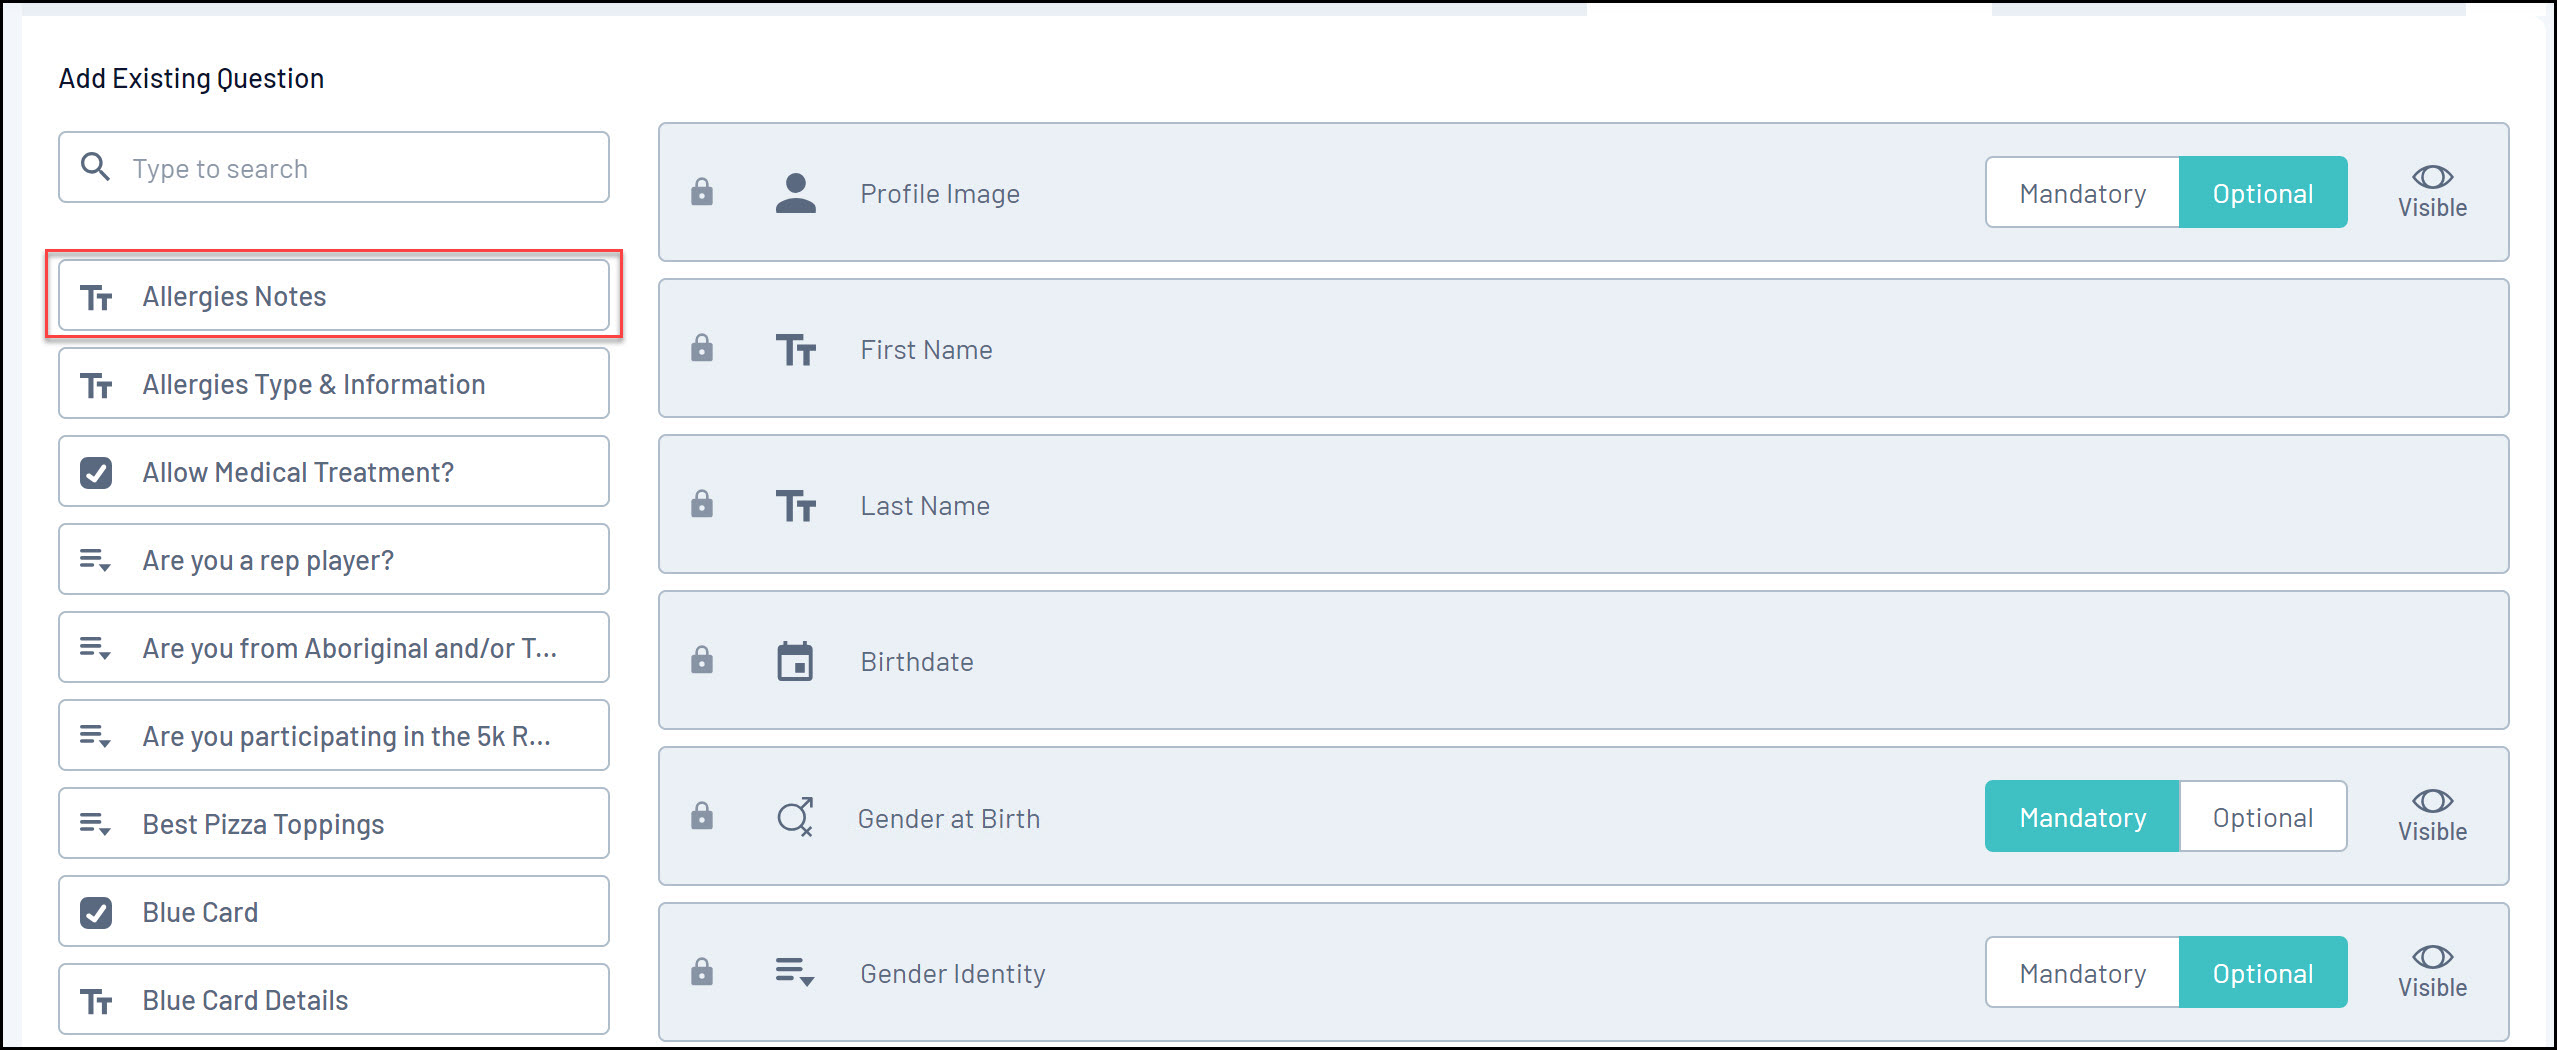
Once you've selected a question, it will appear and save automatically in the form's layout:
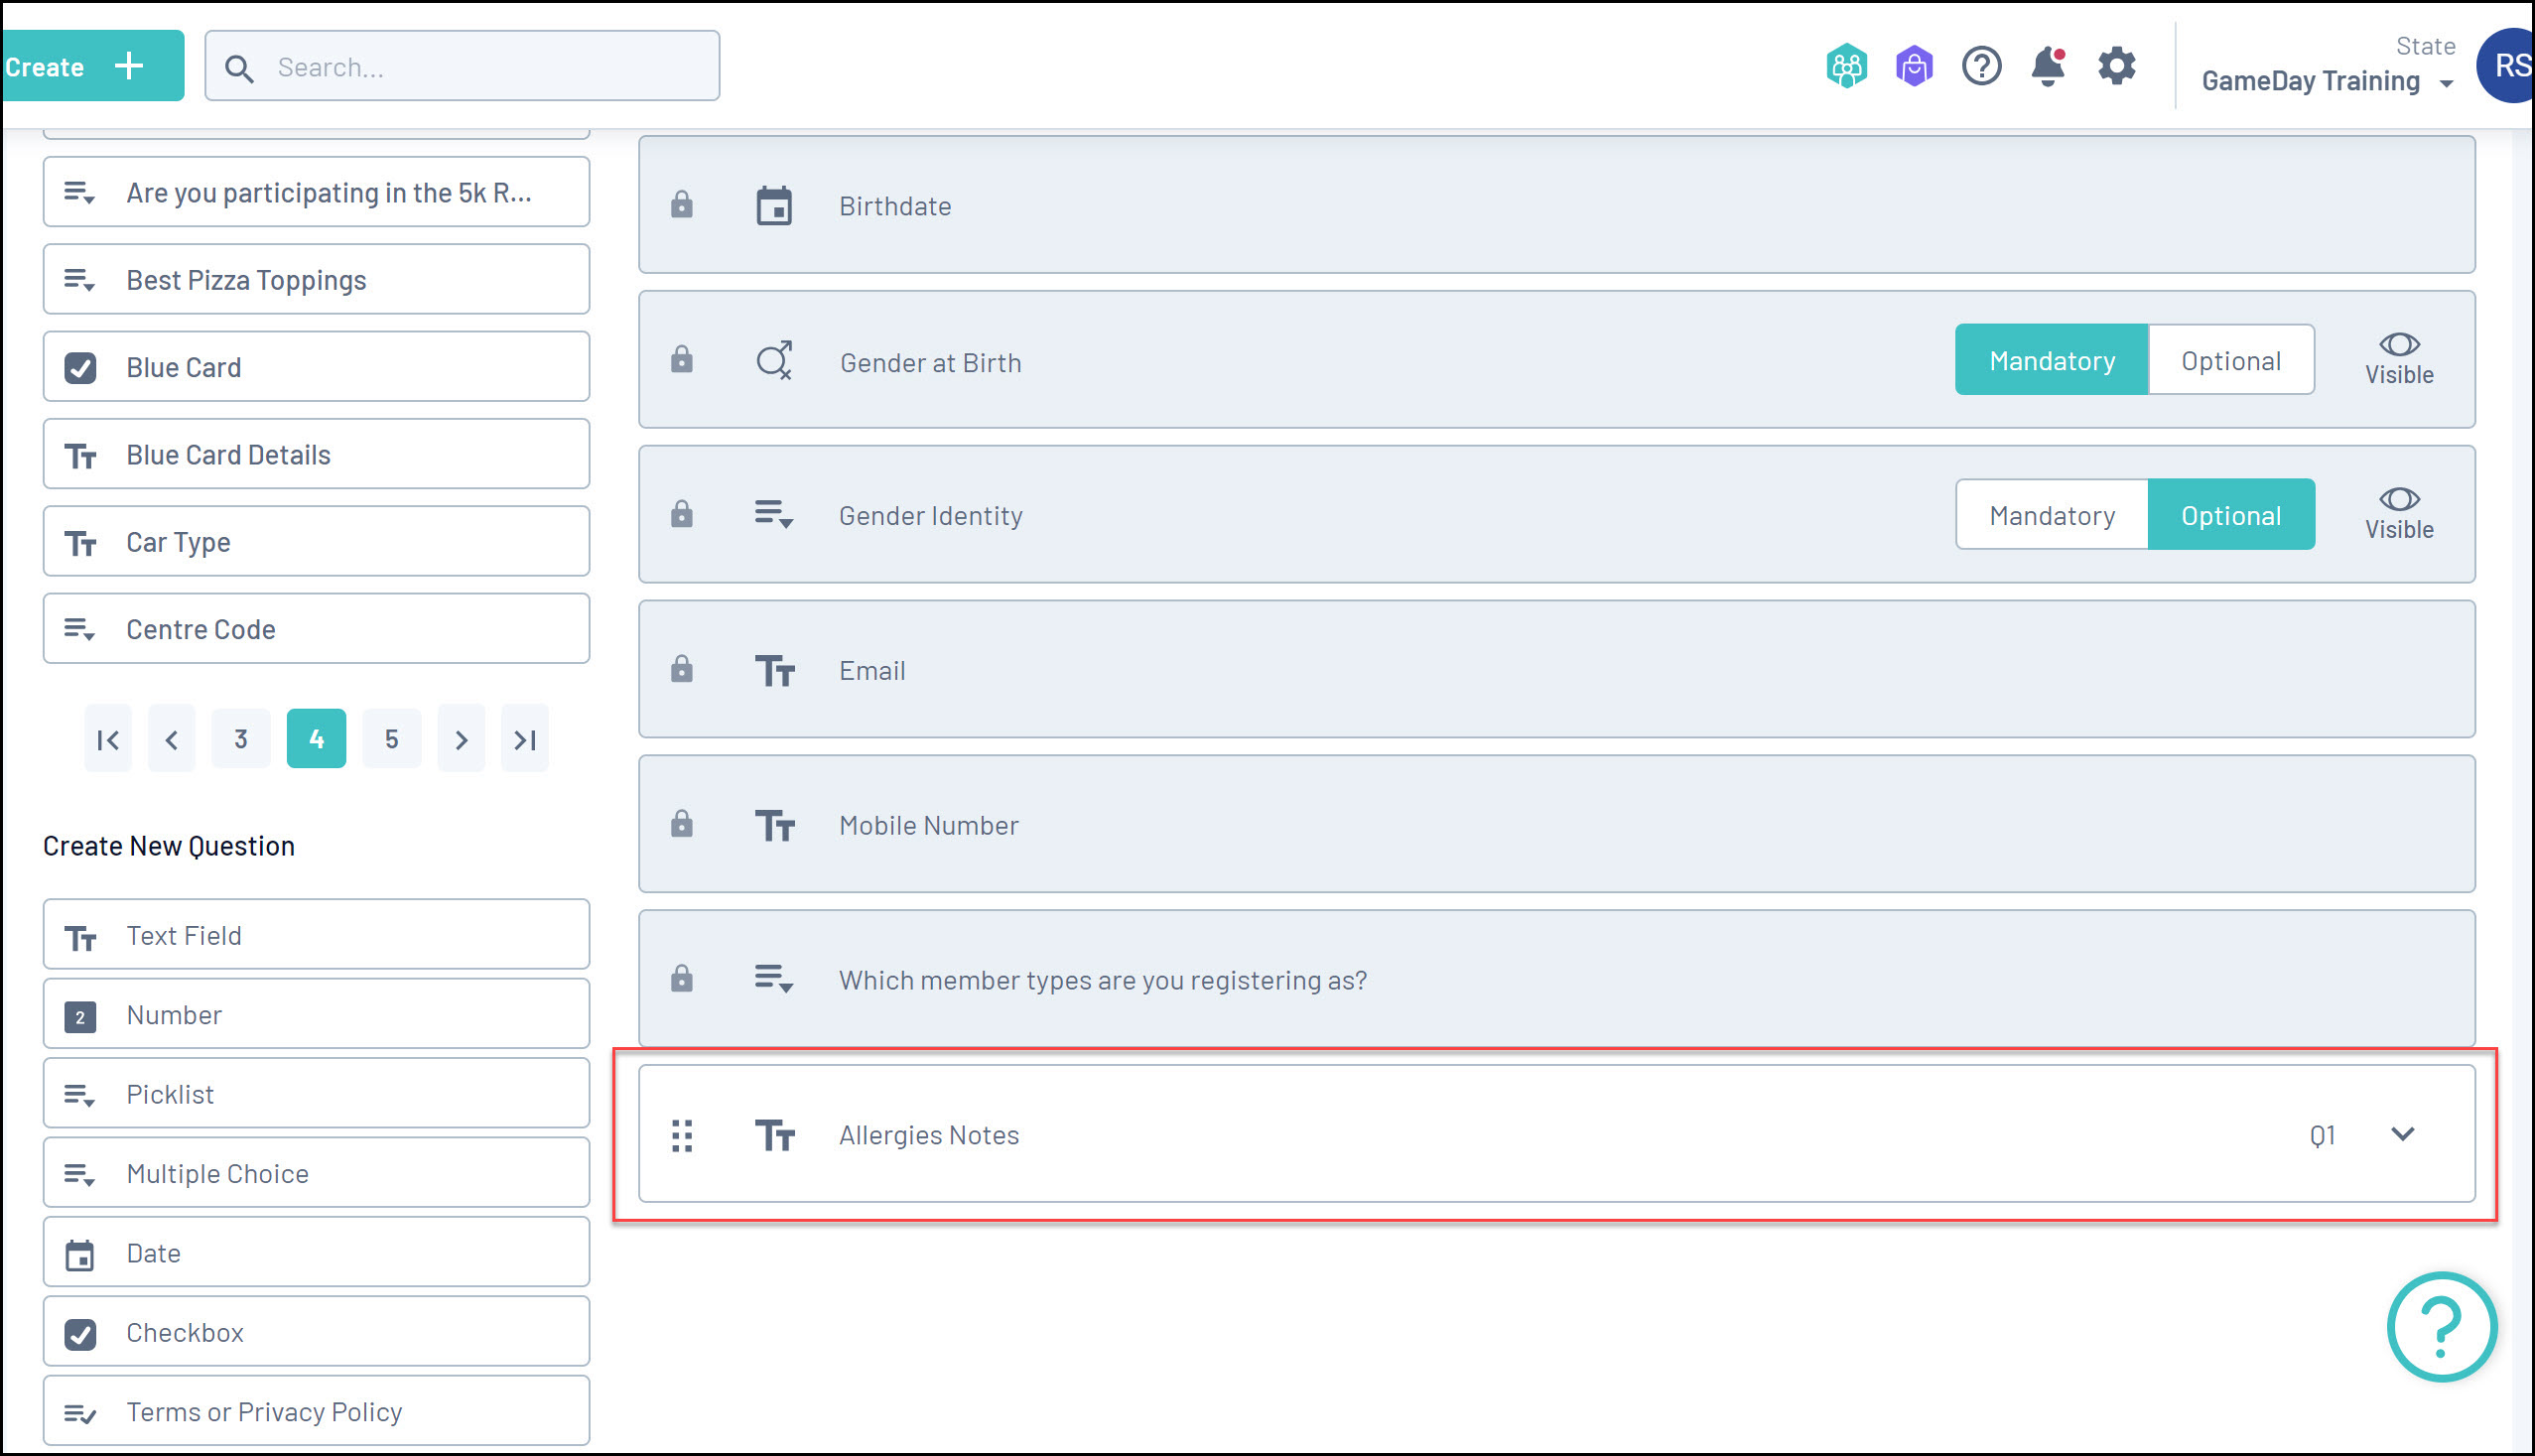
2. Adding a new question to the form
2a. On the left-hand side under the Create New Question list, select a Question Type:
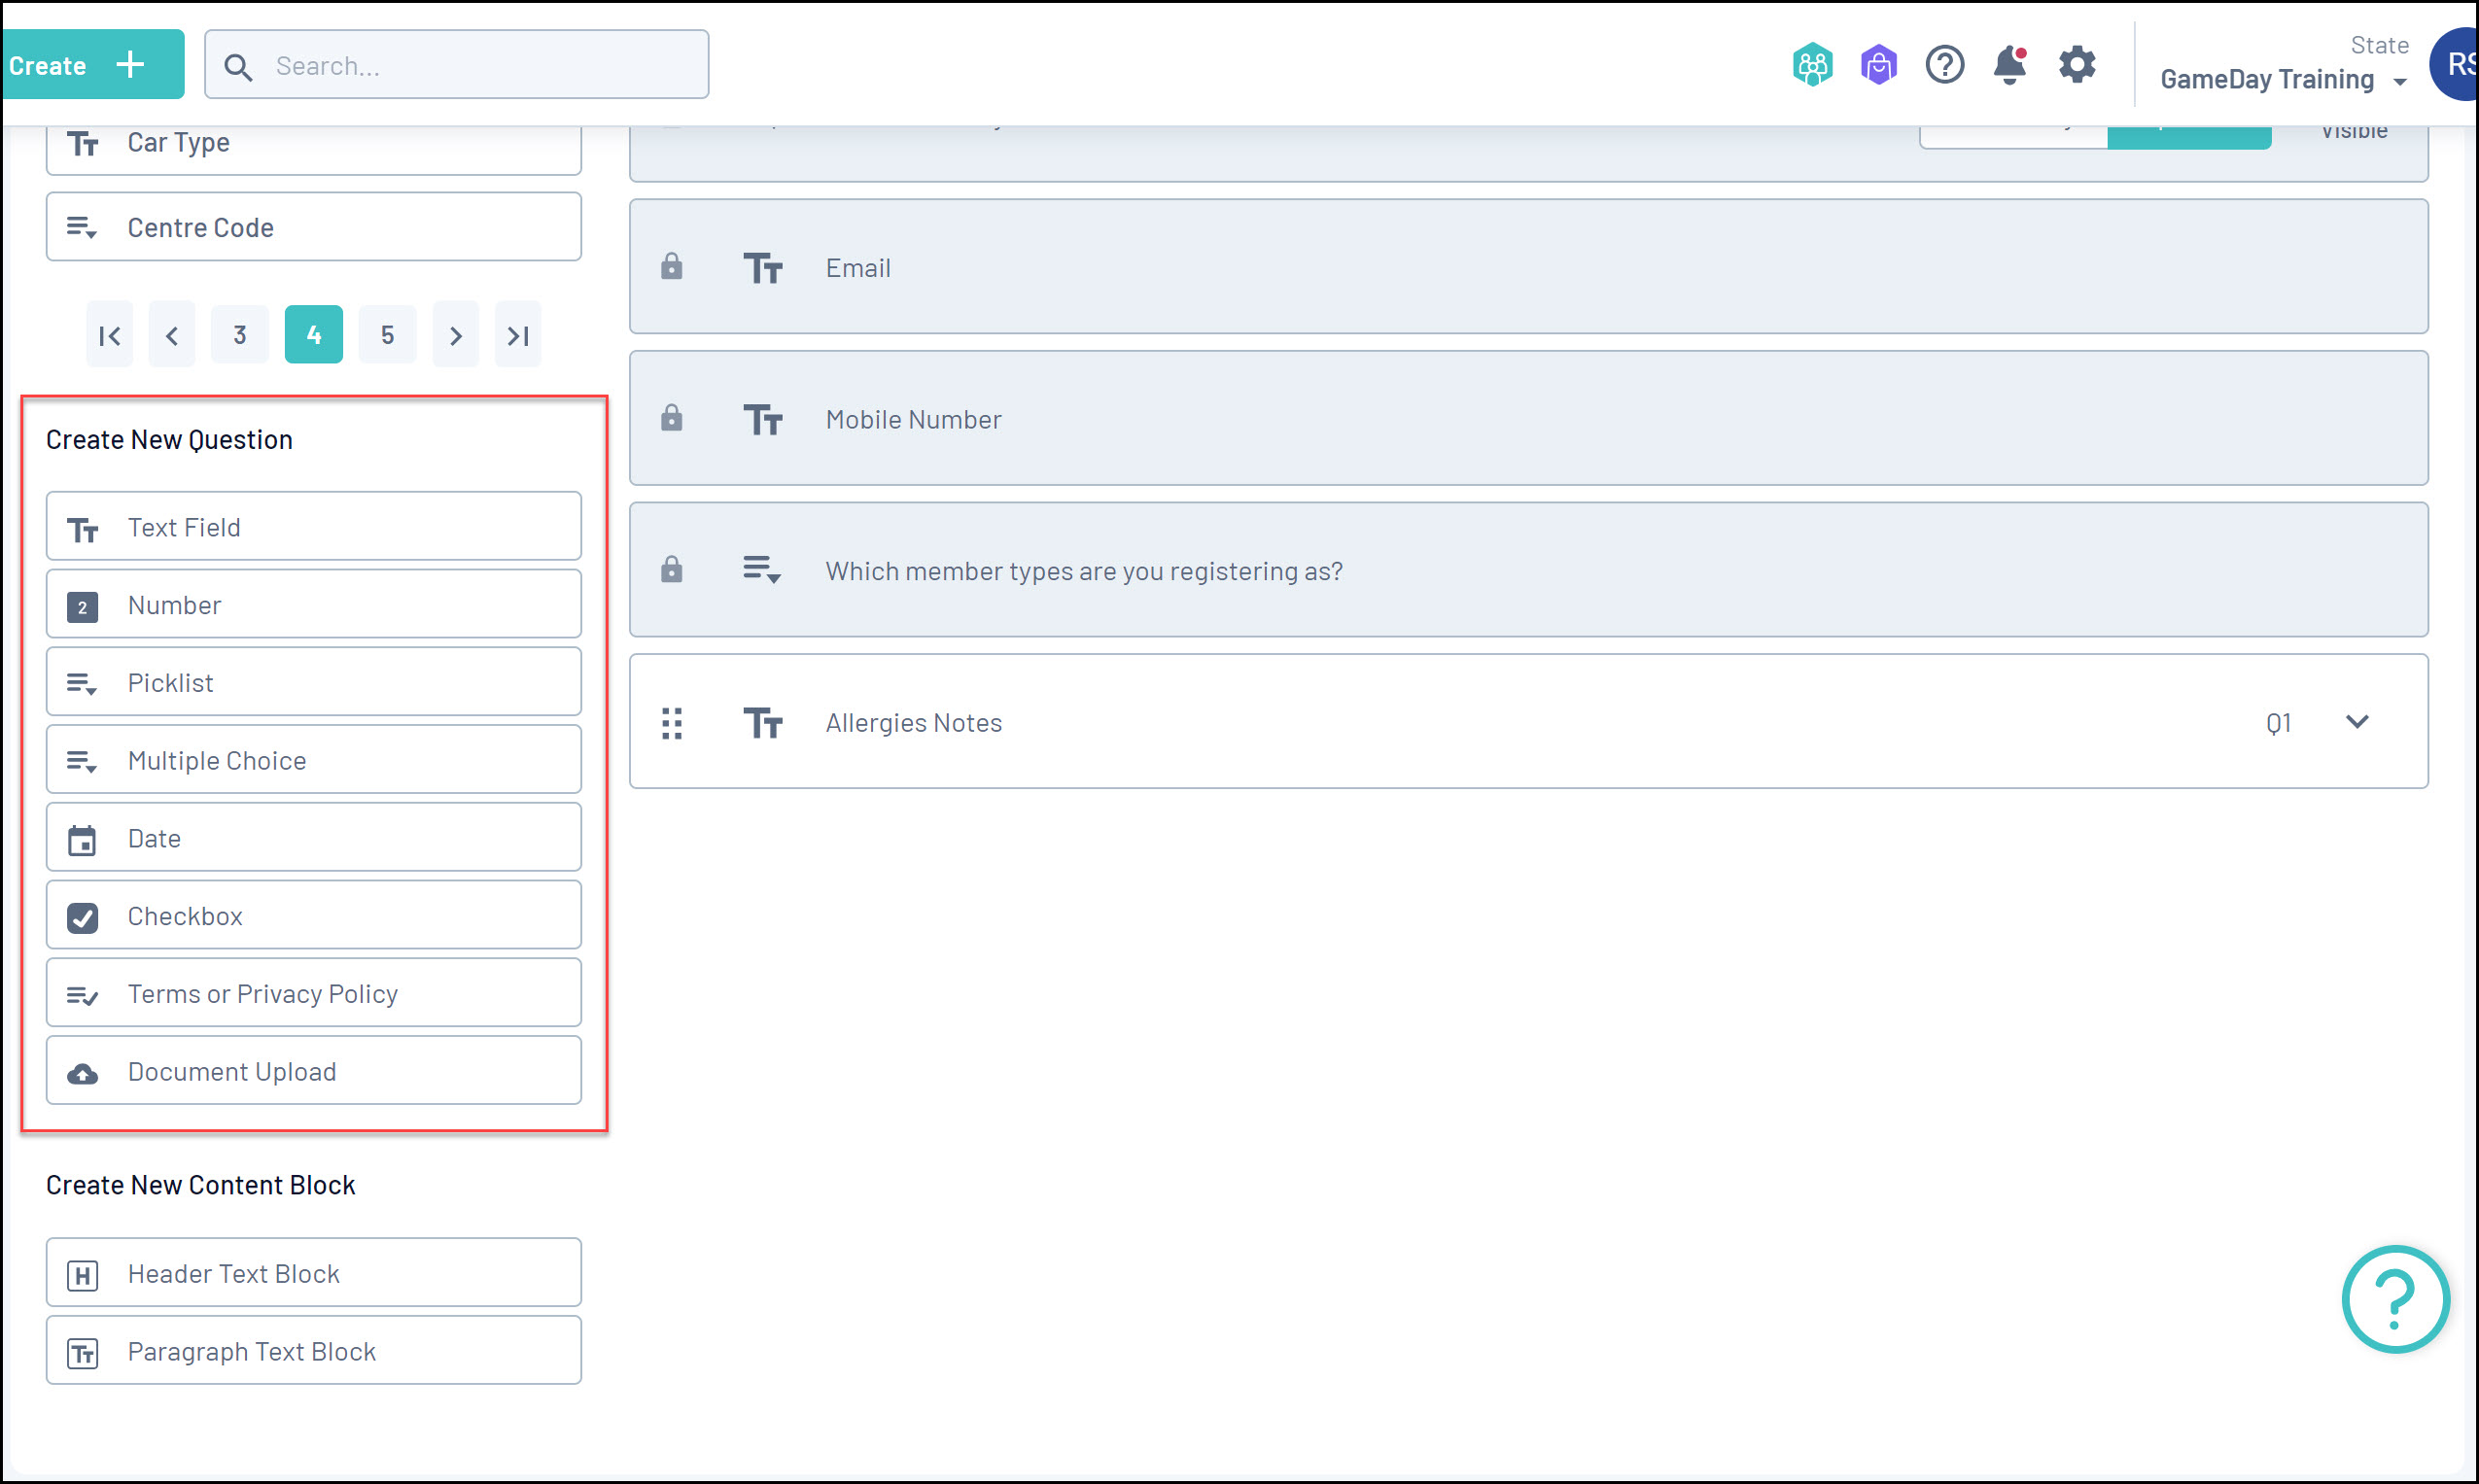
- Text field: Allows the entrant to enter their response in plain text
- Number: Allows the entrant to enter a numerical answer
- Picklist: Allows the entrant to choose one answer from a list of possible options that you can define. You can learn how to add responses to Picklist questions here
- Multiple Choice: Allows the user to pick one or more answers from the list of options you provide. You can learn how to add responses to Multiple Choice questions here
- Date: Allows entrants to select a specific date as their response
- Checkbox: Allow entrants to tick a box as their response.
- Terms or Privacy Policy: Allows you to set up any terms and conditions that entrants should read and agree to about your organisation. You can read more about setting up T&Cs here
- Document upload: Allows entrants to upload a document such as a passport, birth certificate or certification.
2b. Enter the relevant field information. For more information on the specific fields required for each Question Type, click here
Messaging & Notifications
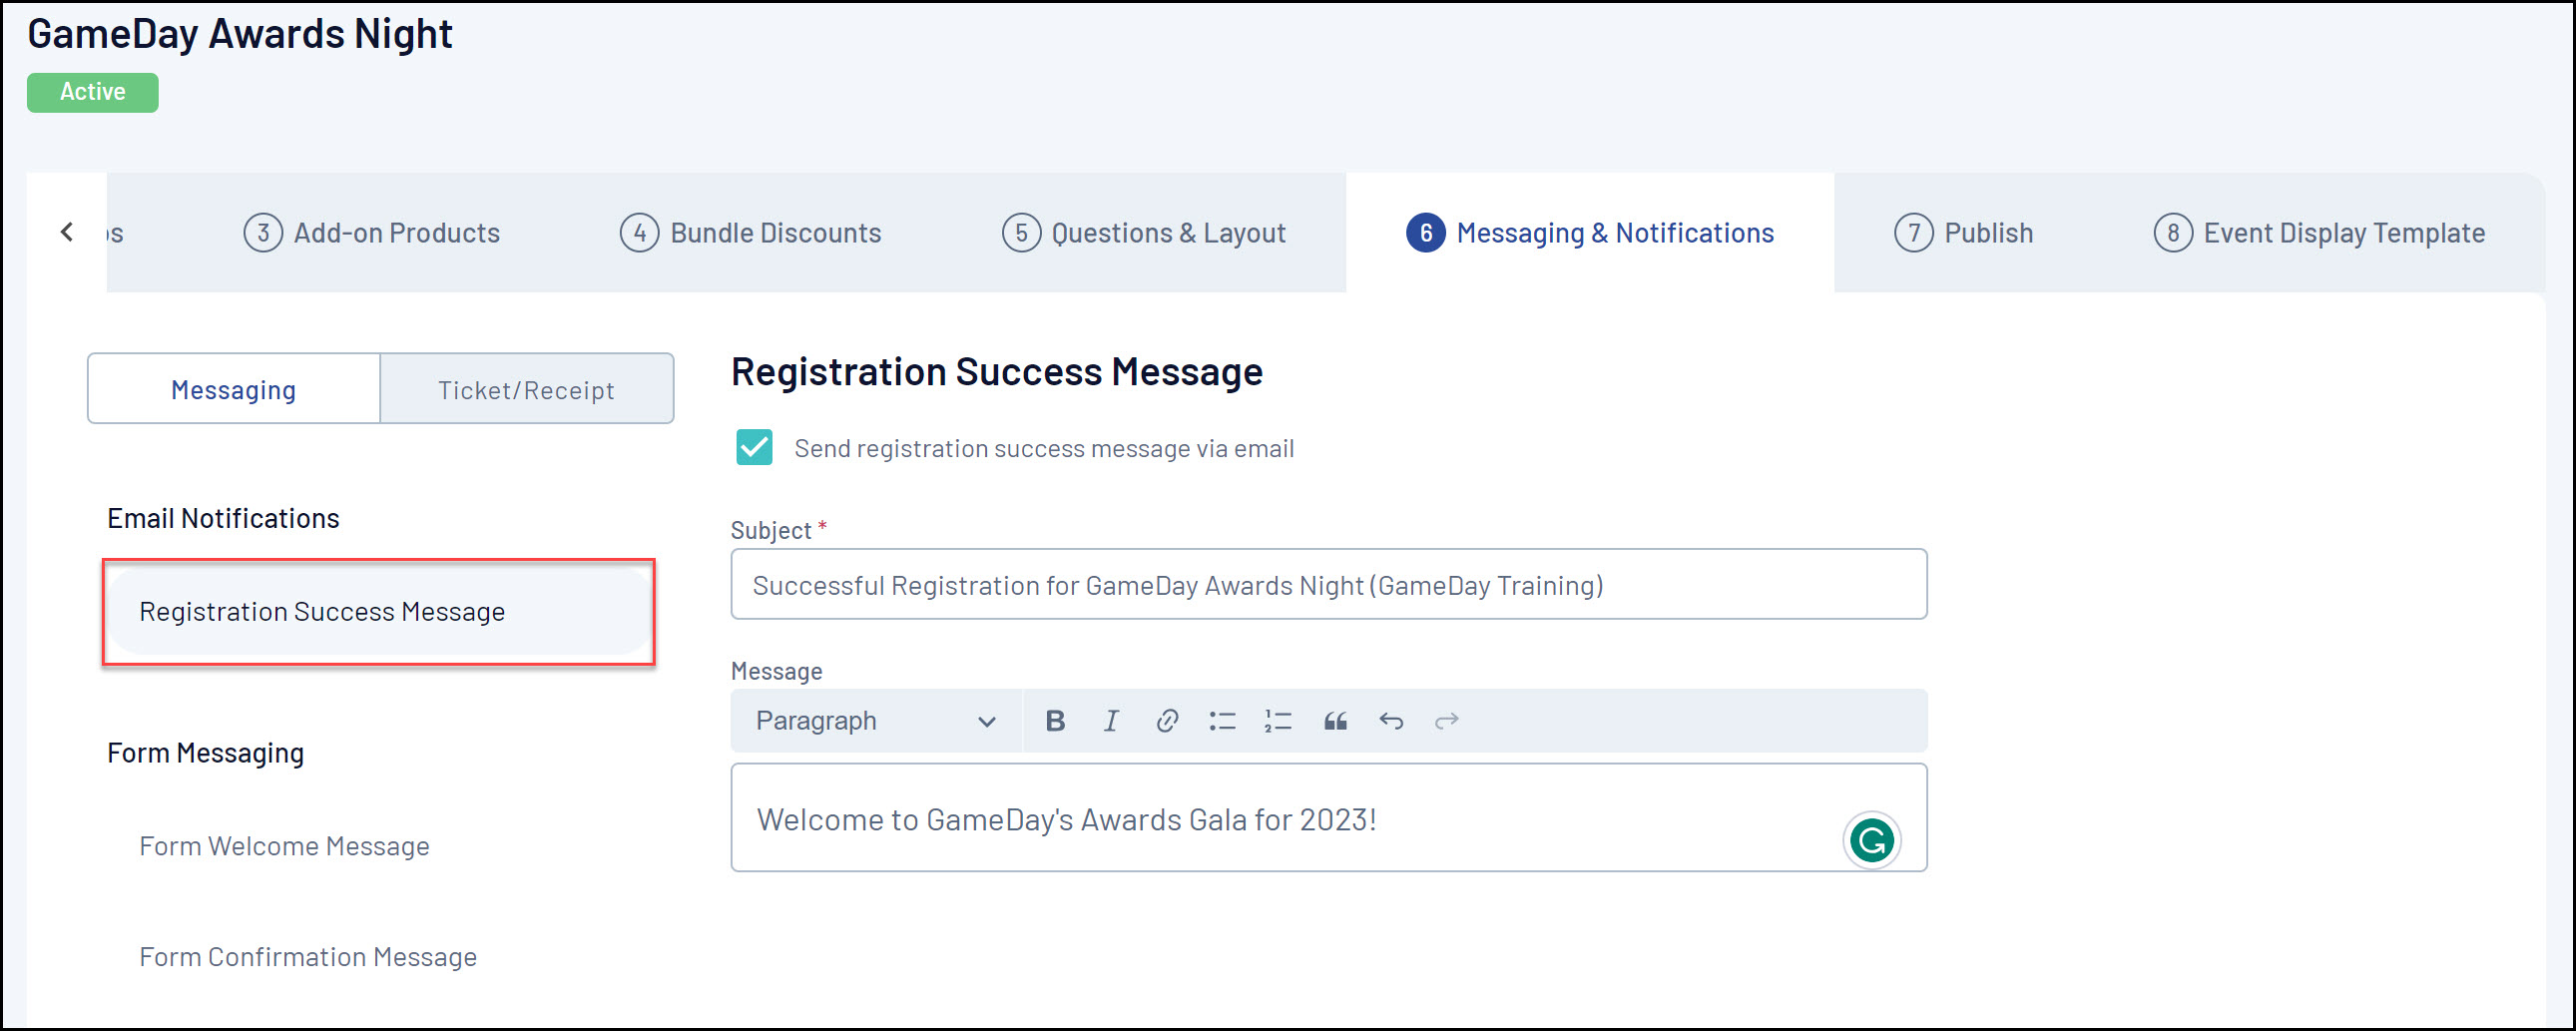
On the Messages and Notifications tab, you can enter any custom messages you would like members to receive once they have successfully completed their registration through the Messaging section, including.
- Registration Success Message allows you to create and customise an email that is sent to members after they register. For more information on composing a Registration Success Message, click here.
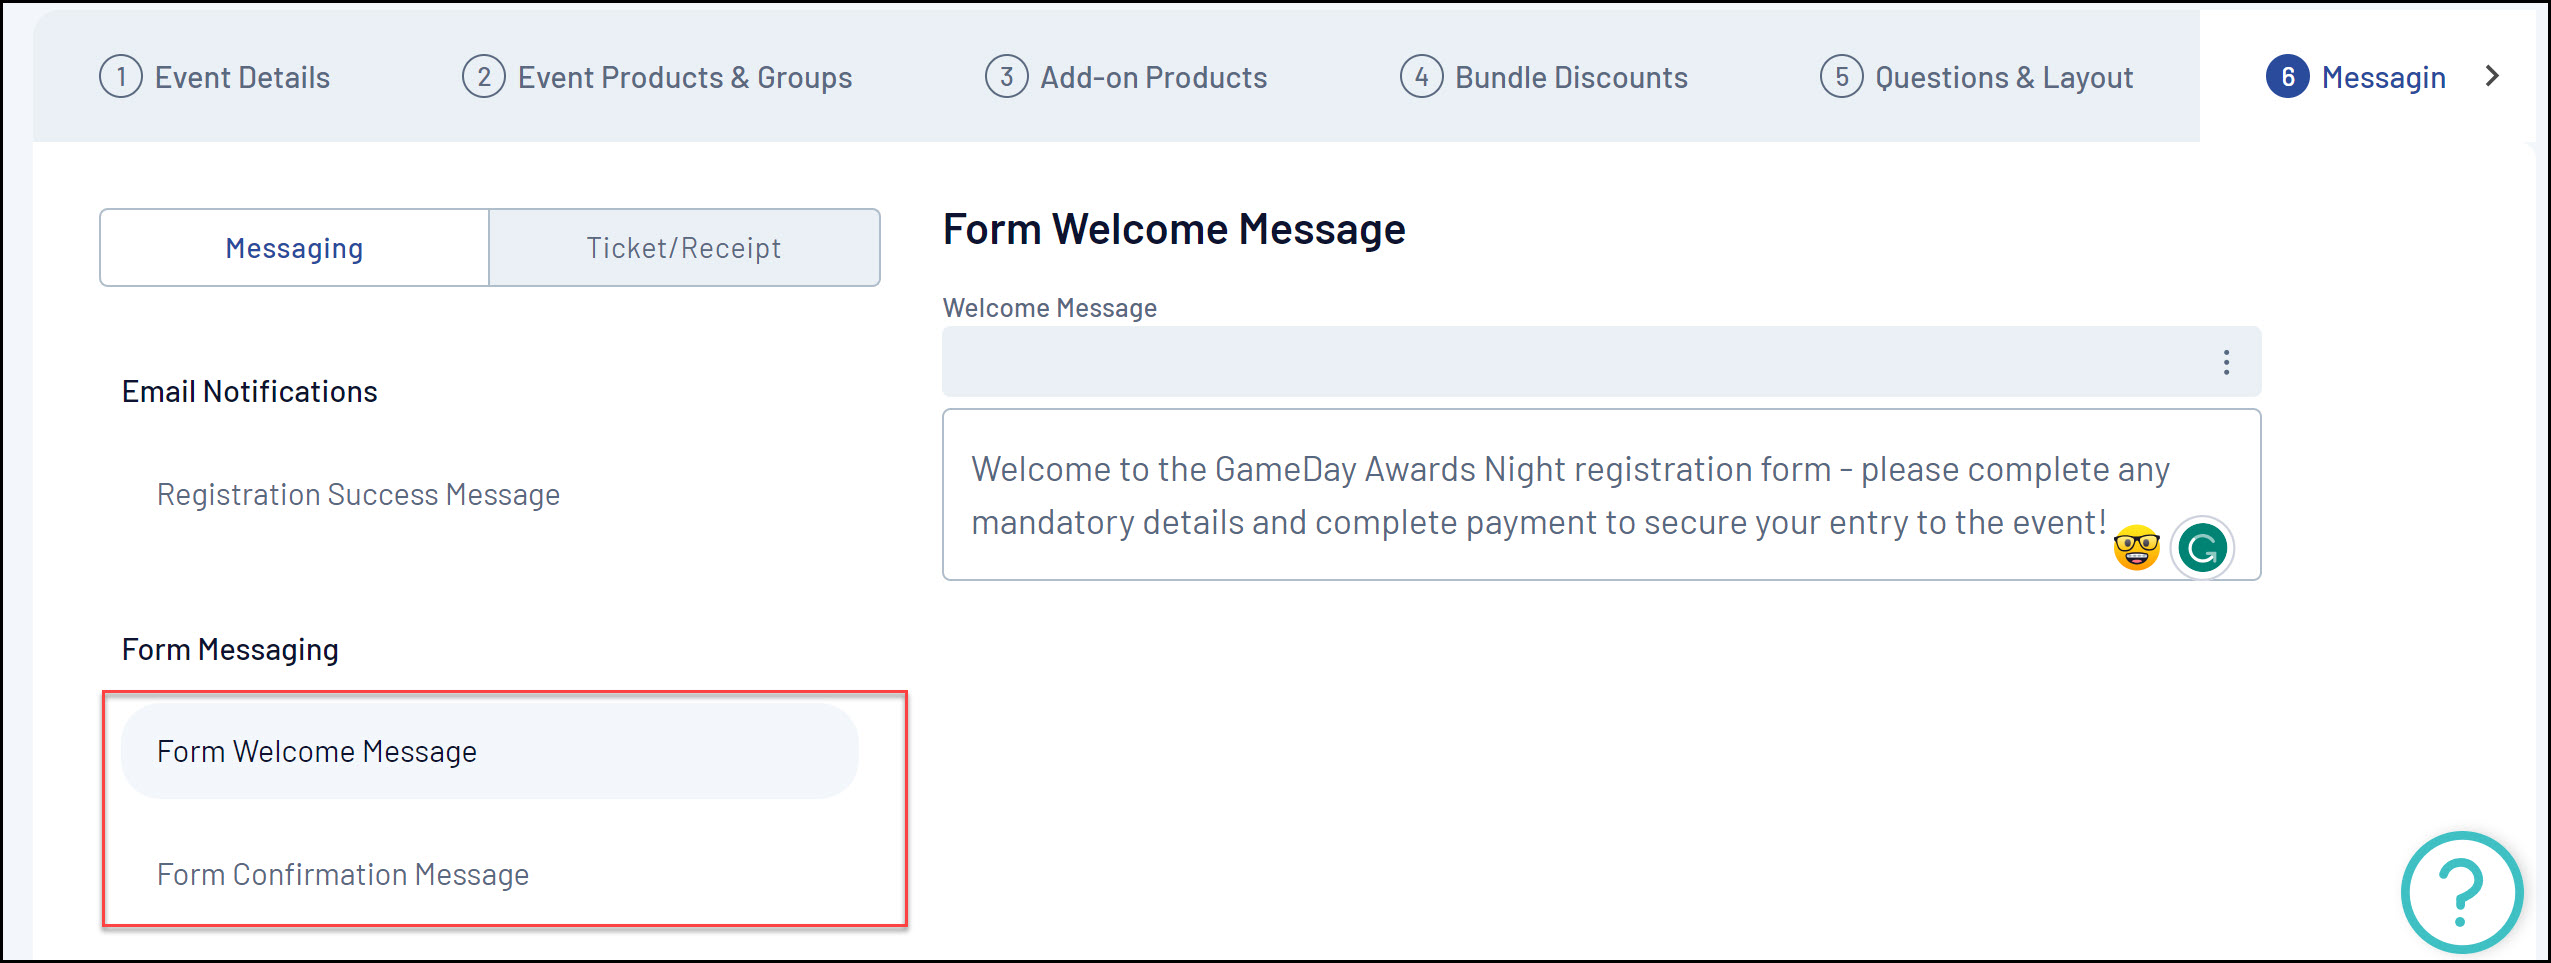
- Form Welcome/Confirmation Messages allow you to add custom messages at the beginning and end of the registration process on the form itself. Click here for more information on welcome and confirmation messages.
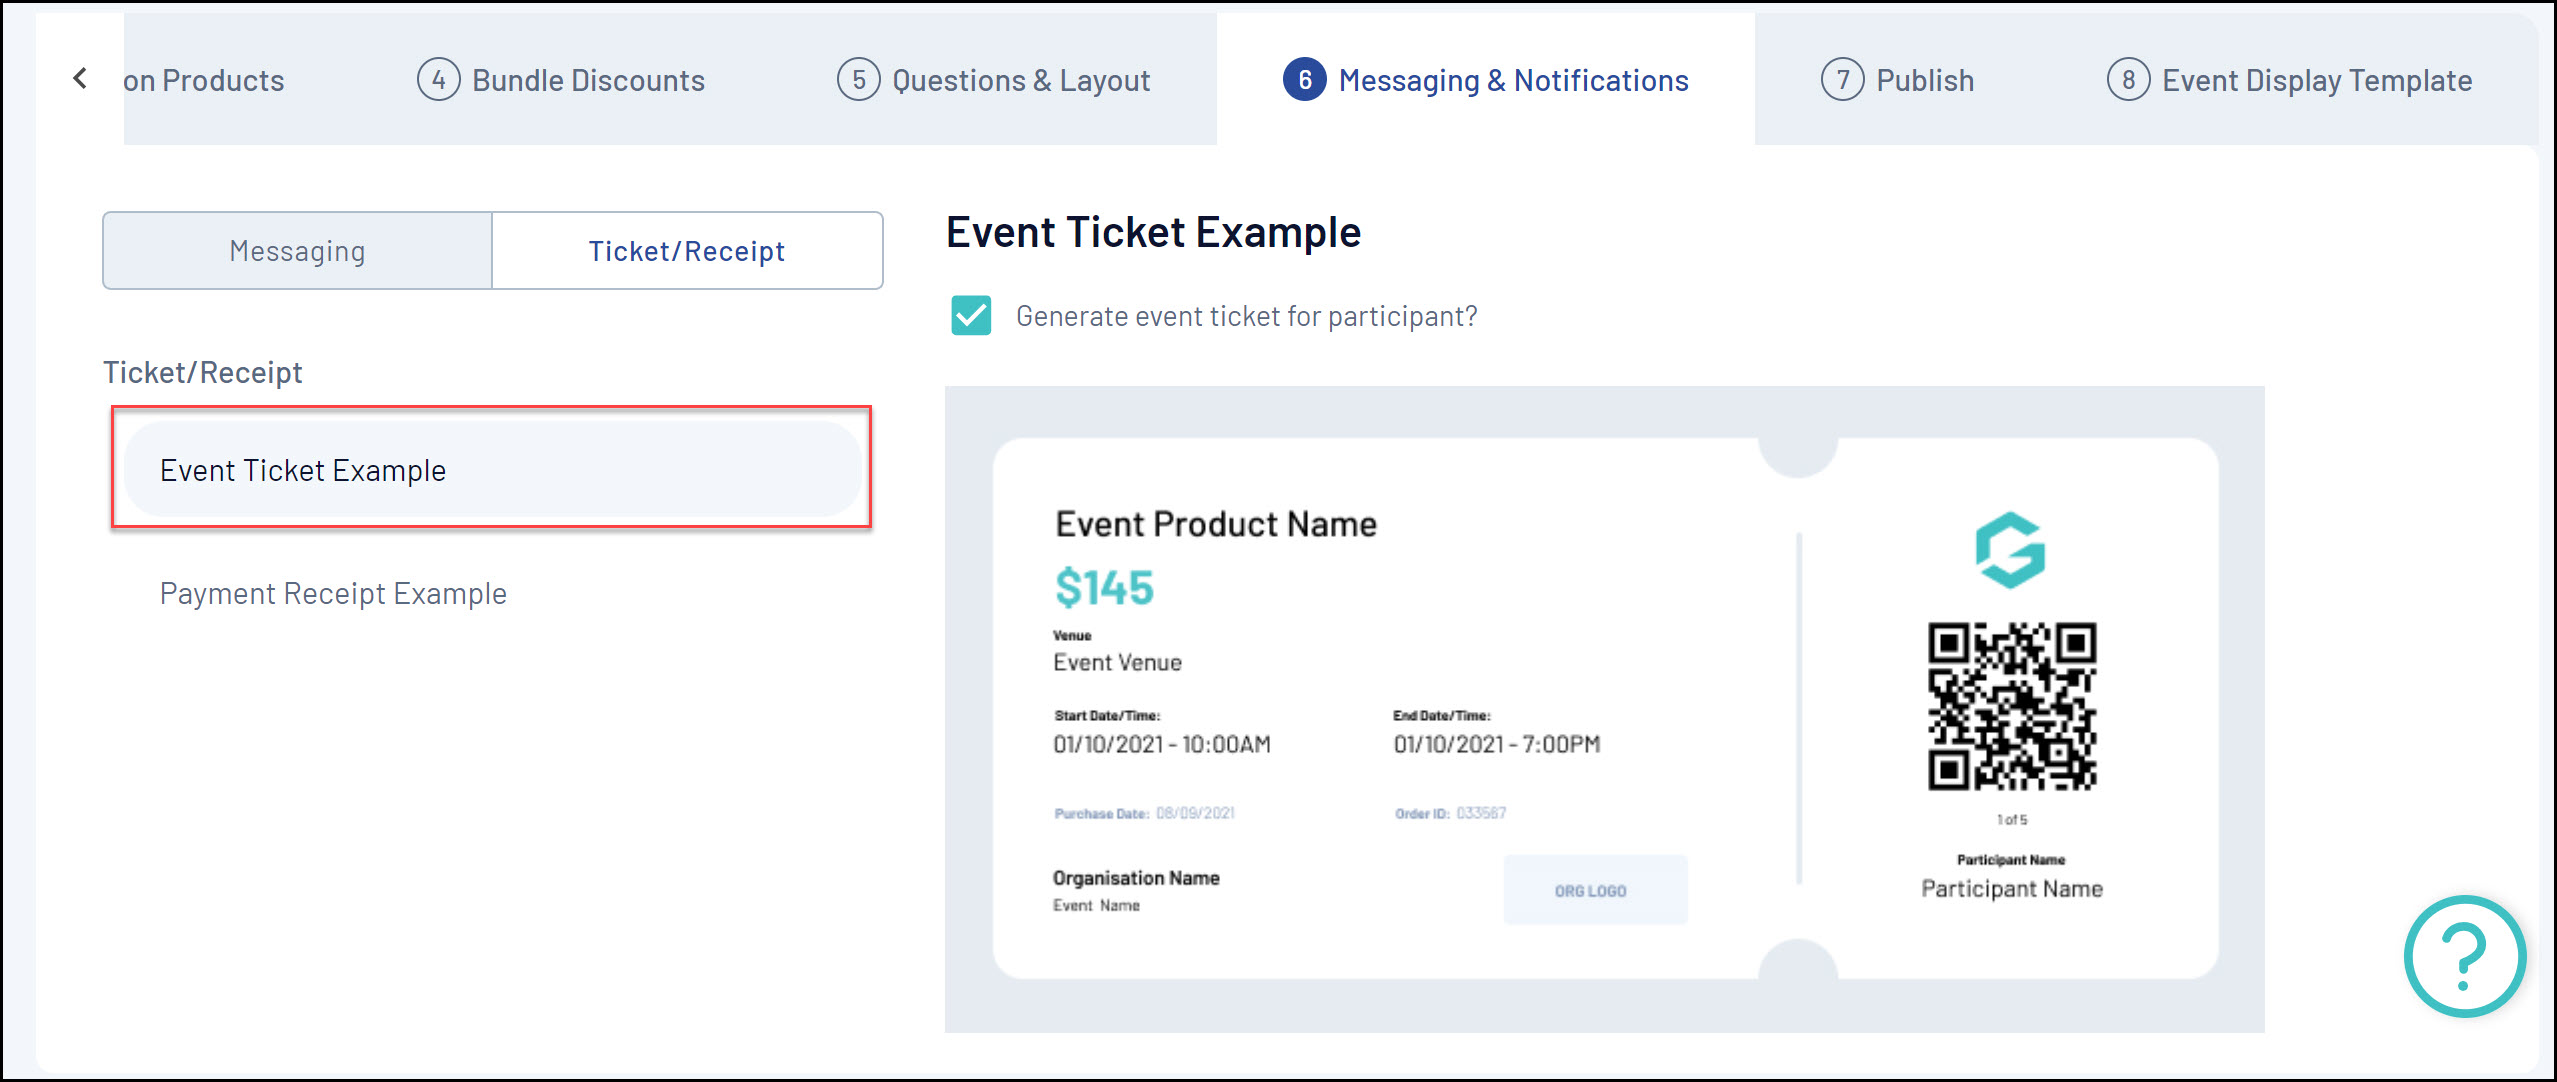
- Event Ticket Example shows you the design of the PDF ticket that is sent to entrants, including the event details that are automatically populated including Event Product Name, Price, Event Venue and Event Dates
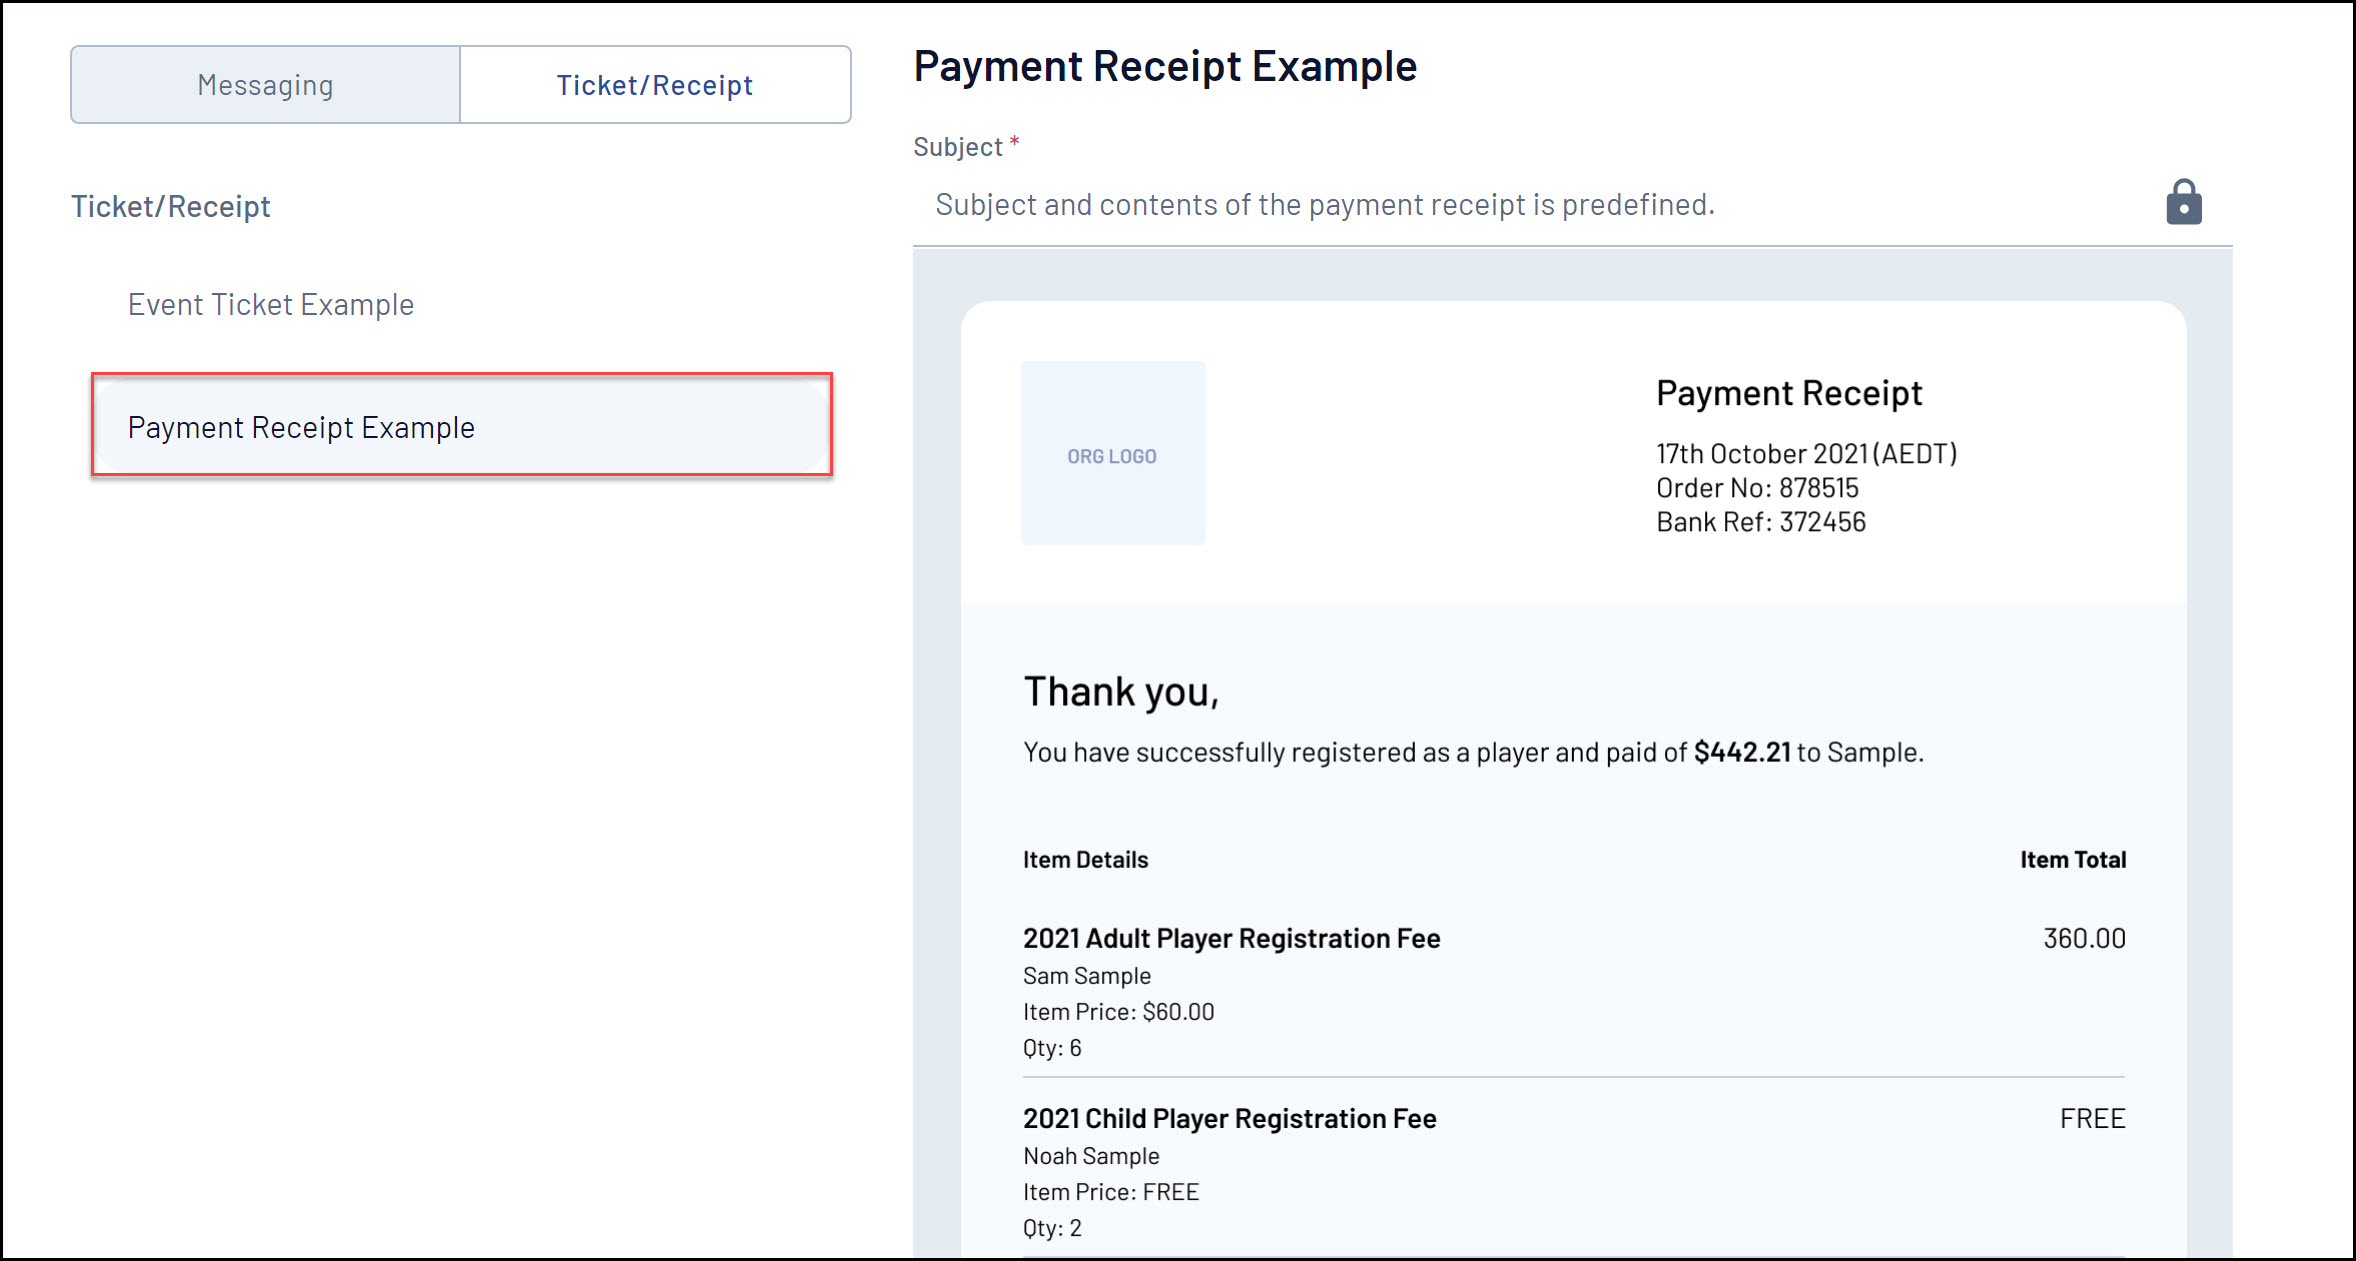
- Payment Receipt Example allows you to see the hard-coded payment receipt that is automatically sent to all members who make an online payment through your Membership Form. This is not customisable, however will automatically include your organisation logo, organisation name, and products purchased, discounts redeemed and more.
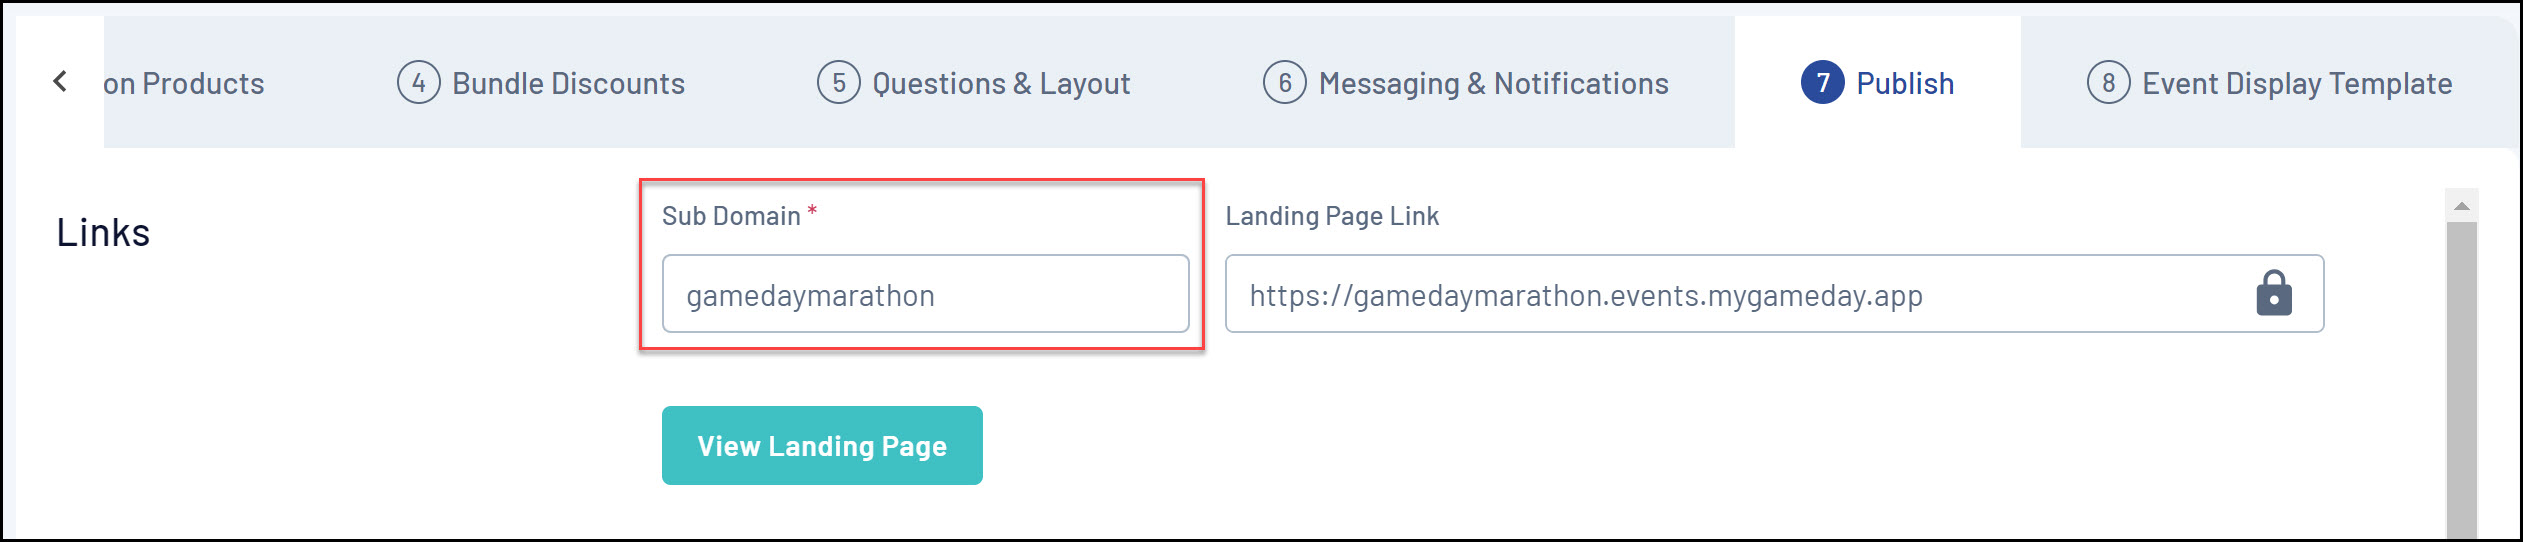
Publishing your Event
In the Publish tab, you can set your landing page and event form live:
1. Set your Landing Page live by adding a Sub Domain, which will generate a live URL for your event
2. In the Form Status section, you can set your event live by changing the status to ACTIVE and applying Form Activation and Expiry Dates
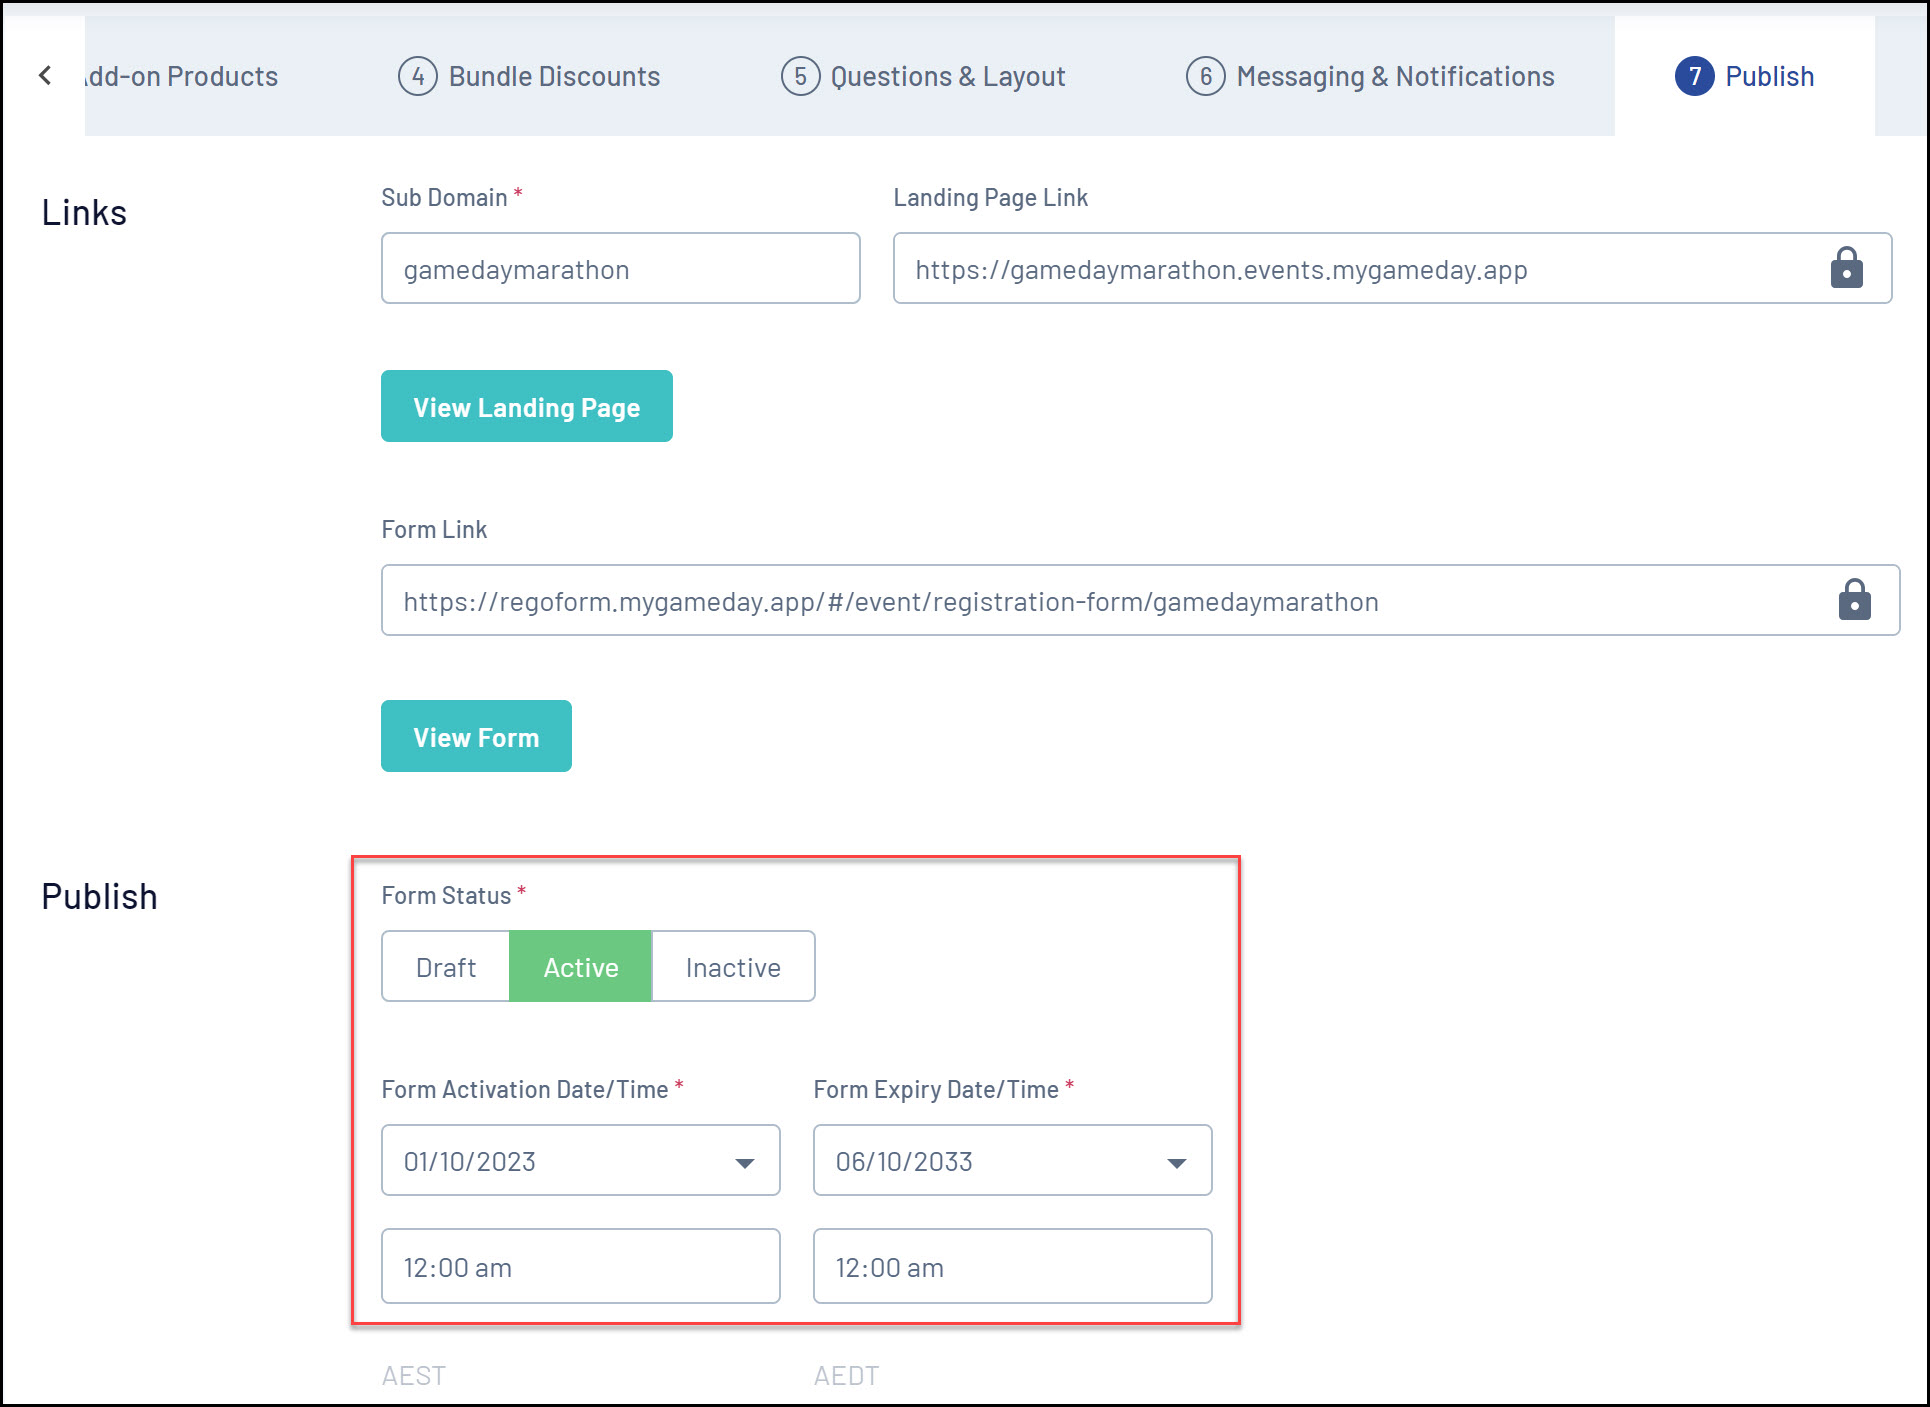
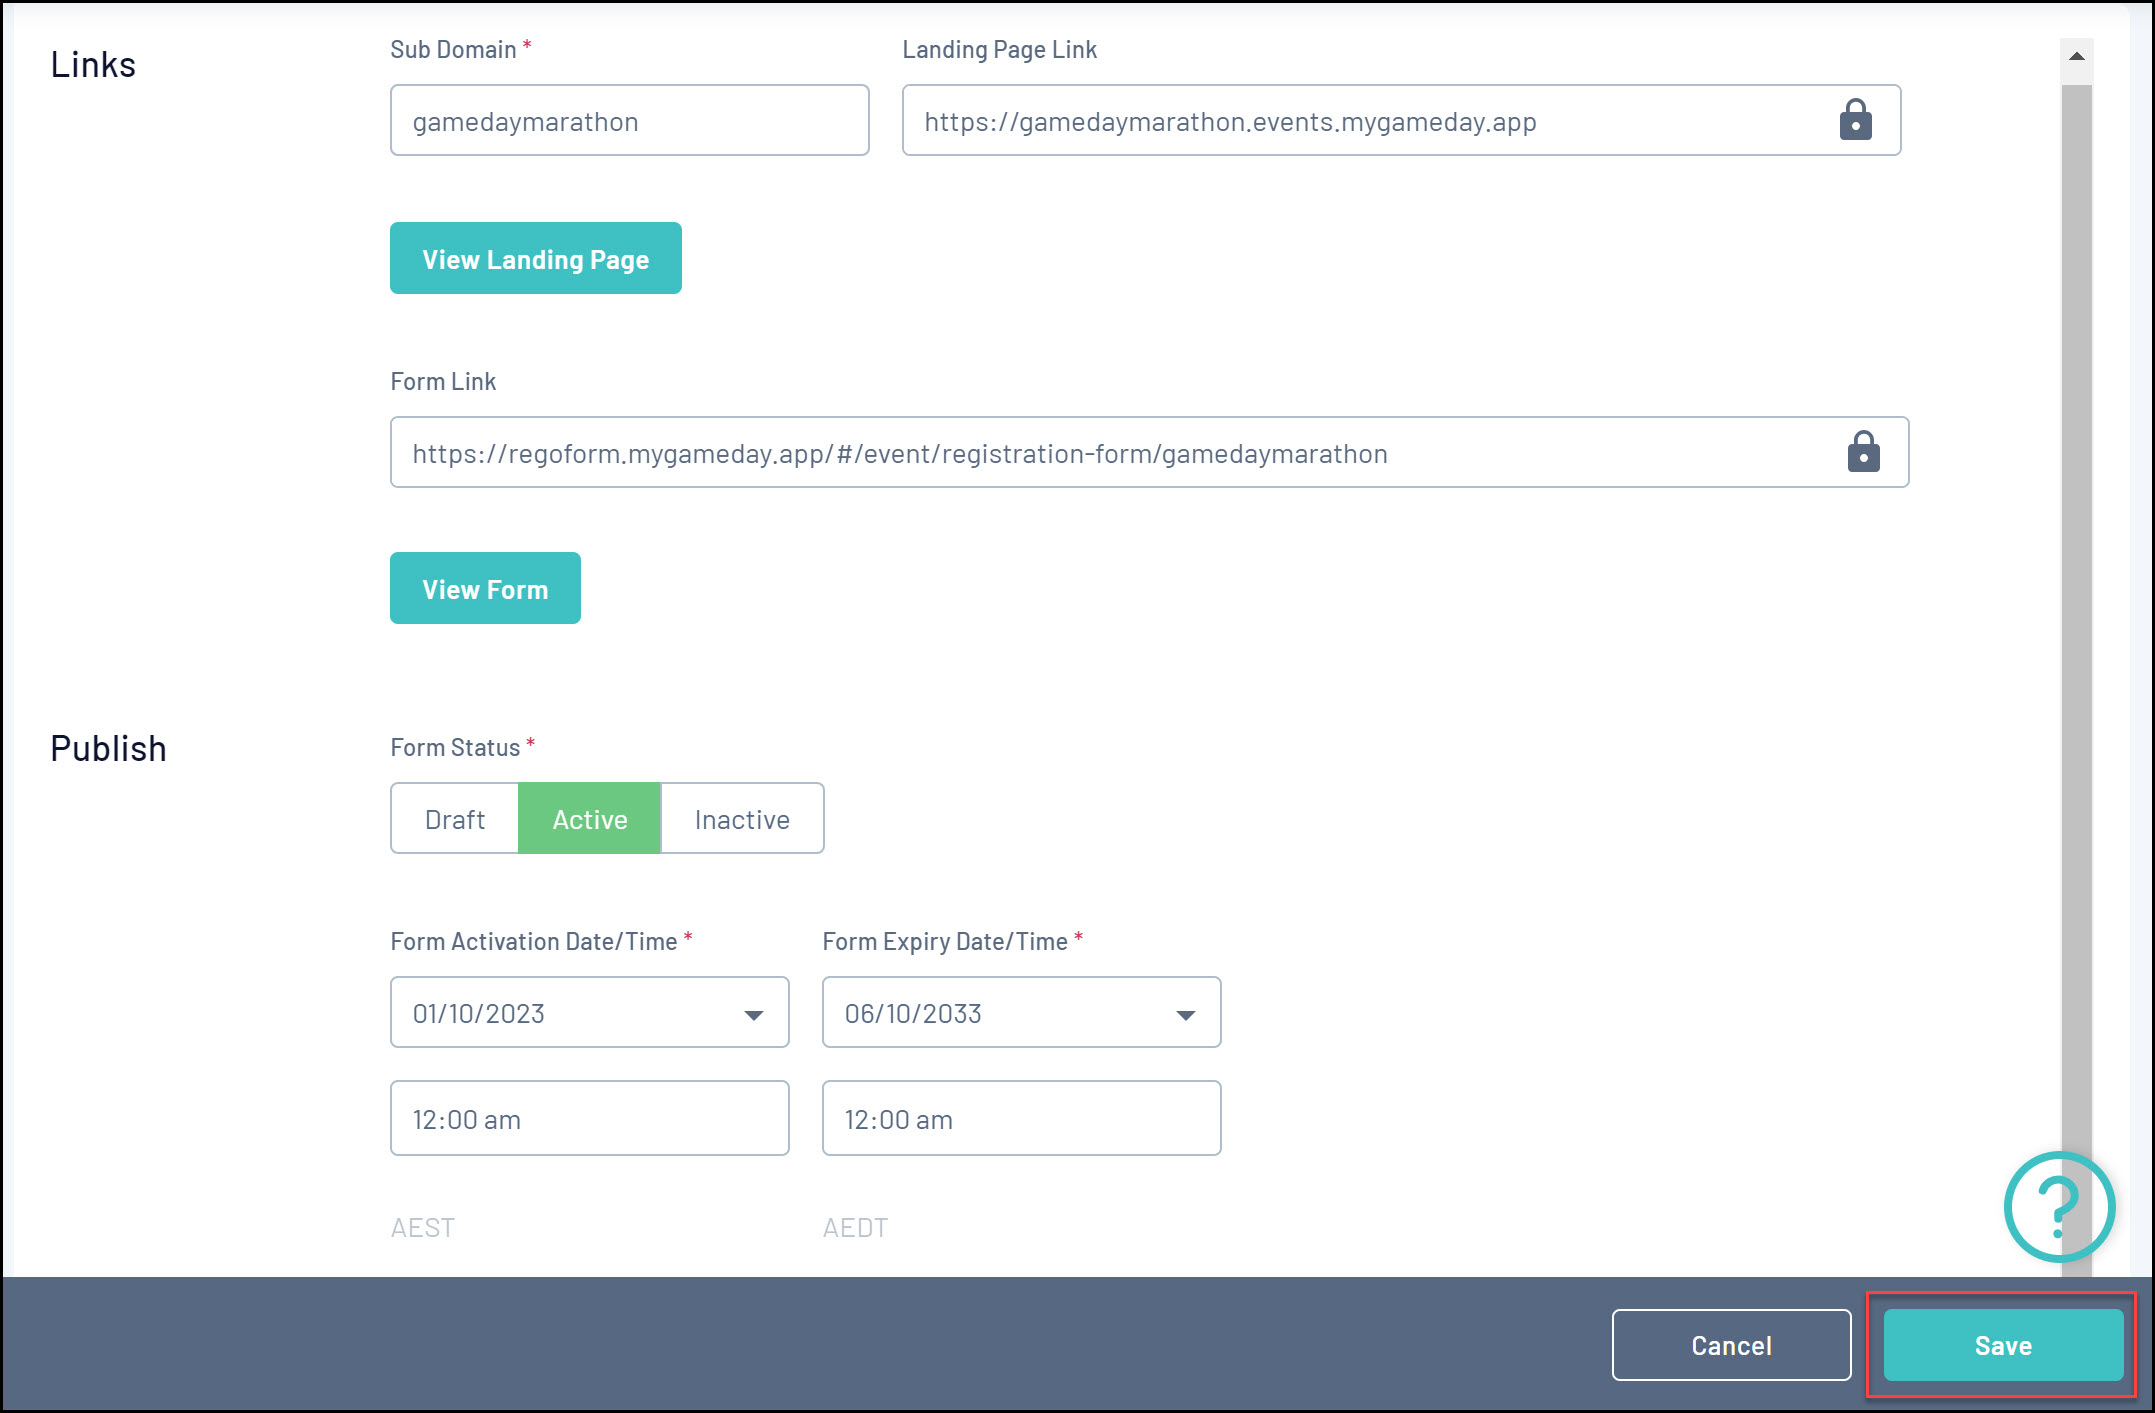
Click SAVE to finalise and generate your Event Landing Page and Registration Form
Event Display Template
The Event Display Template tab provides significant flexibility in the way you want to present the front-end version of your event pages, with features including:
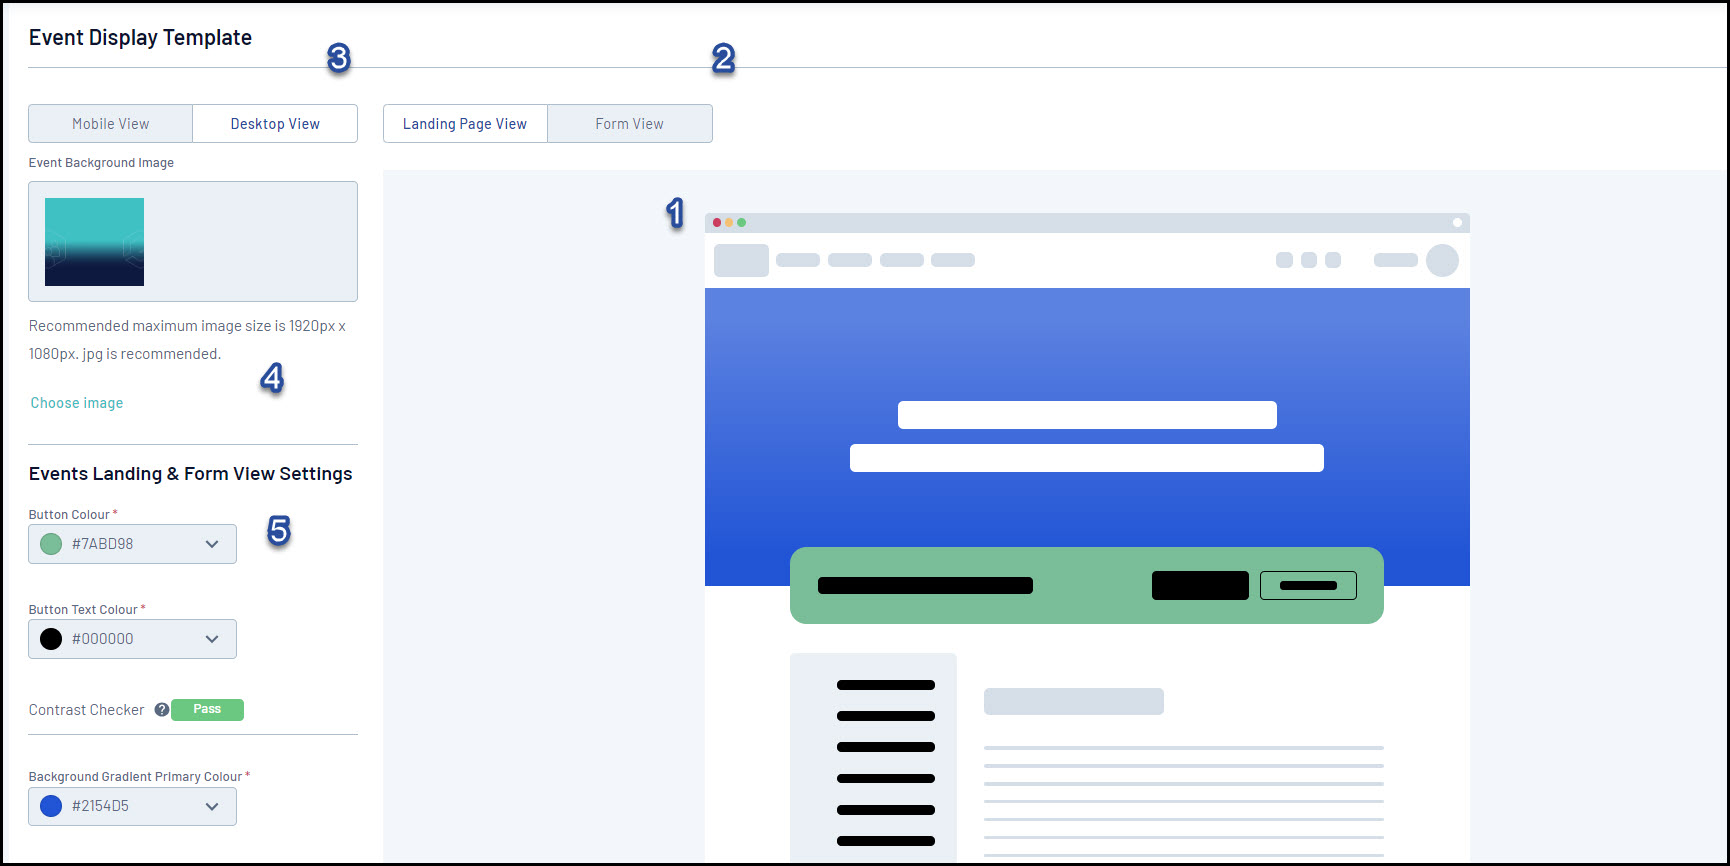
1. Preview Panel: Allows you to preview any colour changes you make on the template.
2. Event/Landing Page View: Allows you to toggle the Preview Panel to show the Landing Page design or Event Form design.
3. Desktop/Mobile View: Allows you to toggle the format of the Preview Panel to display either desktop view or mobile responsive view.
4. Background Image: Allows you to add a custom Background Image.
5. Button Colours: Allows you to customise the colour of buttons and button text.
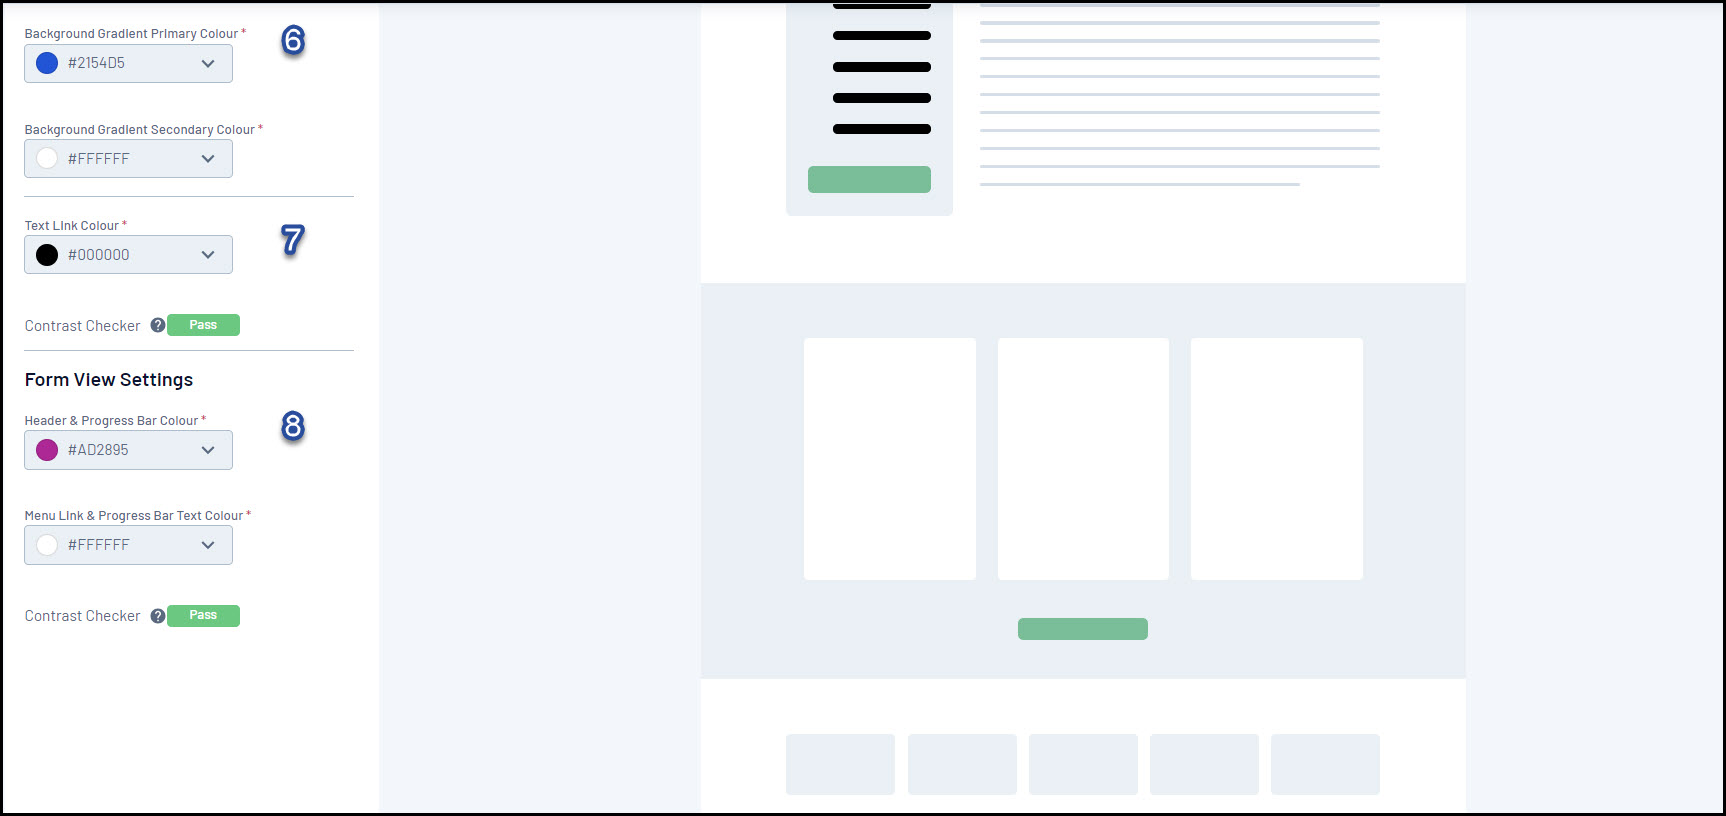
6. Background Gradients: Allows you to further customise your Background Image by applying gradient colours.
7. Text Link Colour: Allows you to customise the colour of text hyperlinks.
8. Form View Settings: Allows you to customise the colour of your Progress Bar and Progress Bar Text.
You will also notice that there is a Contrast Checker when applying your colour scheme. This assists you in setting colours that contrast enough so as to allow text to be seen clearly against their background containers.
Accessing your Event Landing Page
Once you're happy with your event setup, you can open your Event Landing page using the VIEW EVENT button at the top of the page.

