Overview
GameDay allows you to create Shop Products to add to your Shop, Membership or Event Forms. These allow you to collect payment for additional products outside of your primary membership or event fees such as uniforms, merchandise, services, or donations.
Step-by-Step
Step 1: Navigate to the Products & Questions list
In the left-hand menu, click PRODUCTS & QUESTIONS

Step 2: Create a new product
On the Products & Questions screen, click CREATE NEW PRODUCT

Step 3: Define the Product Type and Settings
In the Product Type field, select SHOP

Select an applicable Product Sub Type (Physical Goods, Non-Physical Goods or Donations)

Continue completing the product details, including:
Product Name
Product Image: Upload an image of the product that will be displayed on registration forms
Price
Payment Option: Choose whether the product can only be paid online through a payment gateway, or whether it can also be assigned to a member record manually by an administrator
Delivery Method: Assign a delivery method (Delivery or Pick Up) for the product. Please note, GameDay has no involvement in shipping and distribution of products
Availability Dates: Set a date range within which the product will be available for purchase. Outside of these dates, the product will be unavailable for purchase, even if it has been added to a form
Quantity Limit: Allows you to set a total stock limit for your product. Once this limit has been reached, it will automatically become unavailable for purchase
Allow users to purchase multiple times: Select Yes to allow users top purchase the product multiple times within the same registration. You can also place a minimum and maximum purchase quantity per member
Status (Active/Inactive)
Once you have completed the Basic Settings, click CONTINUE

Step 4: Assign Product Attributes (optional)
Shop products allow you to assign Product Attributes to give registrants additional selections - for example, you may want them to select a size or colour option for a merchandise item or uniform. Simply select an existing attribute, then add Attribute Options that registrants can select. You can also assign a stock limit to each option.

Step 5: Configure Display Rules
Apply Display Rules to configure when the product should appear on registration forms based on the registrant's initial information. You can set rules based on member characteristics like Age, Gender, or Member Type. Click CONTINUE
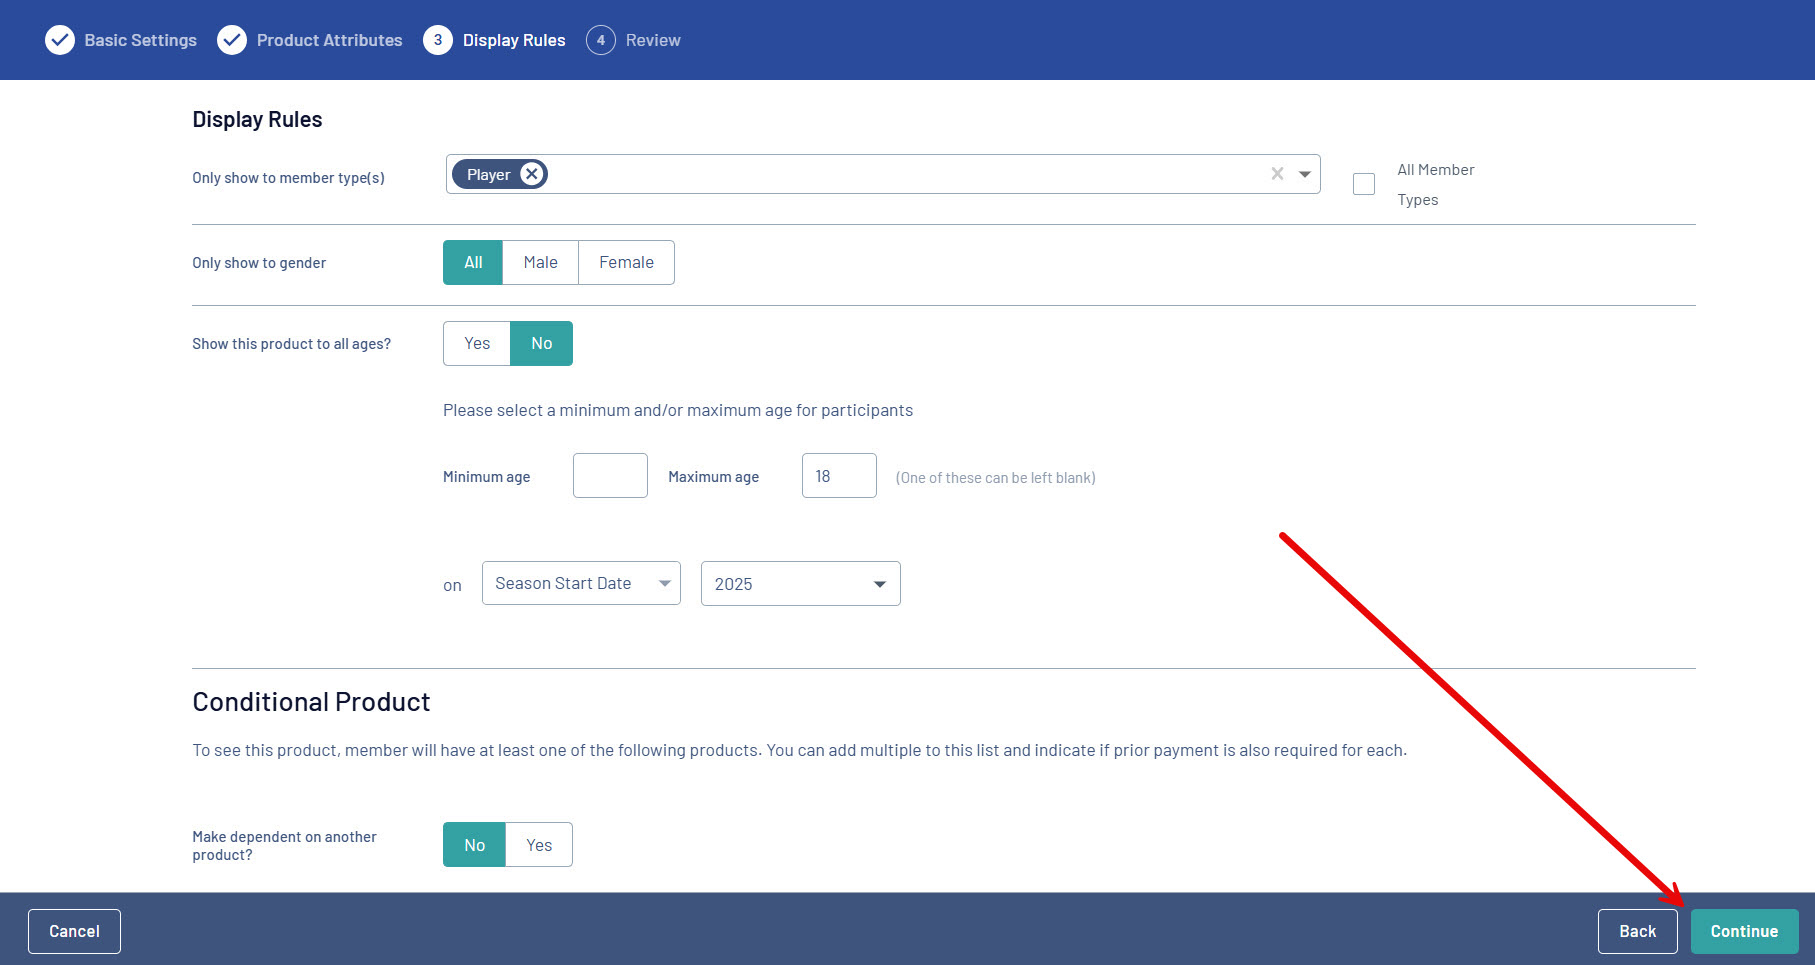 In this example, the product will only display if the registrants select the 'Player' Member Type at the beginning of the form, AND are18 years old or younger as of the beginning of the 2025 season.
Step 6: Review and save the product
On the final page, review all the details of your product. If everything is correct, click CONFIRM AND SAVE

Step 7: Add the product to a form
Once your product is created, you must add it to a form. When creating or editing a Shop, Membership or Event form, navigate to the Shop Products tab and select your newly created product

